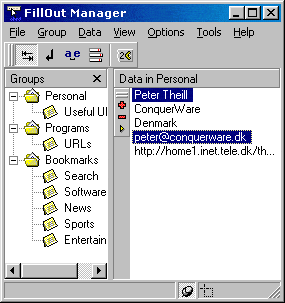
 You’re probably typed in a lot of redundant information in various forms. When you use FillOut Manager, you only have to type it once.
Unfortunately, there seems to be a serious problem with FillOut Manager and Windows 98 or Internet Explorer 5.0 installations. You are able to fix the above problem by hiding FOMs status bar. To do this, follow these steps:
- Select View menu
- Uncheck Status bar menuitem
### Help
A Windows Help file is included with the package. Open this help file inside FillOut Manager by selecting Contents from the Help-menu. Furthermore, I’ve created a small tutorial to get started quickly. The tutorial is available right here.
### Changelog
MARCH 7 ’98
- Added ‘Select All Data’ feature
- Now saves state and position of Toolbars
- Added ‘Contents’ menu item in Help menu
- Added Help file
- You can now drag a Group and when dropped, all items in Group are dropped
- Minor change in About-box
FEBRUARY 18 ’98
- Fixed bug when sending data to same window multiple times
FEBRUARY 11 ’98
- First release
### Reviews
FillOut Manager has been reviewed by ZD Net, but was judge hard – received only 3 of 5 stars. Obviously, the “reviewer” must have had a very bad day. Anyway, here’s what they say:
> "Fillout Manager is a freeware 32-bit program that's been designed to help you fill out Internet forms faster. Using its Explorer-liked two-paned hierarchical interface, just drag and drop information into your Web browser or another program. Fillout Manager can also be used to compile personal info, bookmark your favorite URL's (several are preloaded), or even used to jot down random thoughts."
### Downloads
Name | File | Size
---- | ---- | ----
FillOut Manager 1.02 zipped | [fillout.zip](/files/fillout.zip) | 264 kb
FillOut Manager – Beginners Tutorial (updated 08/24/99) | [fom-tutorial.txt](/files/fom-tutorial.txt) | 3 kb

---
### FillOut Manager Chrome Extension
[Visit](https://chromewebstore.google.com/detail/fillout-manager/bmphamlejjikoolijdbjpaldlolonbjl)
Intelligent form filling powered by AI - save time and eliminate repetitive data entry across the web.
You’re probably typed in a lot of redundant information in various forms. When you use FillOut Manager, you only have to type it once.
Unfortunately, there seems to be a serious problem with FillOut Manager and Windows 98 or Internet Explorer 5.0 installations. You are able to fix the above problem by hiding FOMs status bar. To do this, follow these steps:
- Select View menu
- Uncheck Status bar menuitem
### Help
A Windows Help file is included with the package. Open this help file inside FillOut Manager by selecting Contents from the Help-menu. Furthermore, I’ve created a small tutorial to get started quickly. The tutorial is available right here.
### Changelog
MARCH 7 ’98
- Added ‘Select All Data’ feature
- Now saves state and position of Toolbars
- Added ‘Contents’ menu item in Help menu
- Added Help file
- You can now drag a Group and when dropped, all items in Group are dropped
- Minor change in About-box
FEBRUARY 18 ’98
- Fixed bug when sending data to same window multiple times
FEBRUARY 11 ’98
- First release
### Reviews
FillOut Manager has been reviewed by ZD Net, but was judge hard – received only 3 of 5 stars. Obviously, the “reviewer” must have had a very bad day. Anyway, here’s what they say:
> "Fillout Manager is a freeware 32-bit program that's been designed to help you fill out Internet forms faster. Using its Explorer-liked two-paned hierarchical interface, just drag and drop information into your Web browser or another program. Fillout Manager can also be used to compile personal info, bookmark your favorite URL's (several are preloaded), or even used to jot down random thoughts."
### Downloads
Name | File | Size
---- | ---- | ----
FillOut Manager 1.02 zipped | [fillout.zip](/files/fillout.zip) | 264 kb
FillOut Manager – Beginners Tutorial (updated 08/24/99) | [fom-tutorial.txt](/files/fom-tutorial.txt) | 3 kb

---
### FillOut Manager Chrome Extension
[Visit](https://chromewebstore.google.com/detail/fillout-manager/bmphamlejjikoolijdbjpaldlolonbjl)
Intelligent form filling powered by AI - save time and eliminate repetitive data entry across the web.
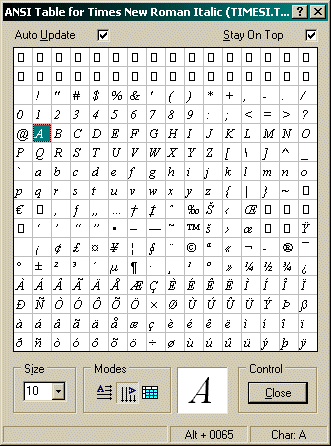
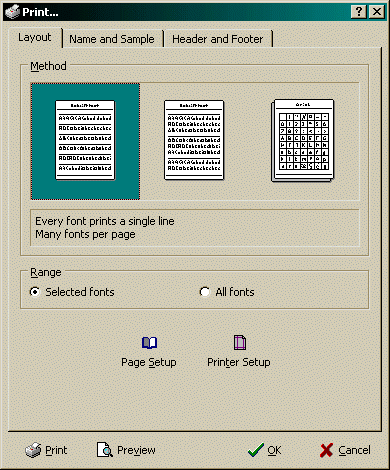
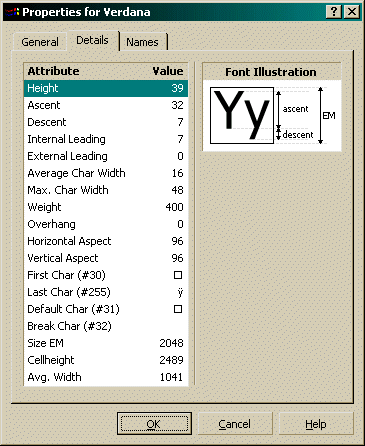
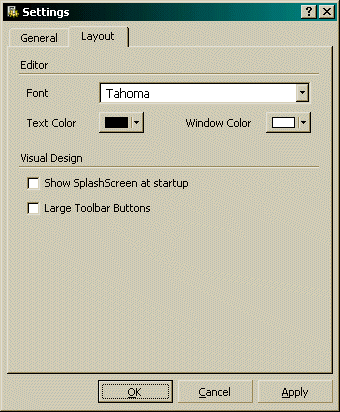
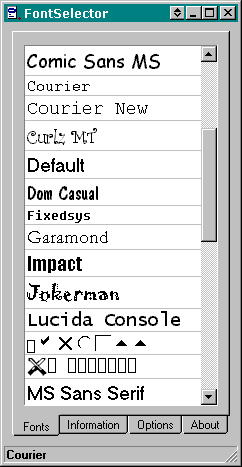 I’ve tried to make this program as simple as possible. Therefore I decided to split the program into four tabs – If you just want to browse your fonts, use the first tab. If you want a little information about a selected font, click the second tab. If you want to change some of the settings, click the third-tab and finally, if you want to know something about, where you can get the newest release, click the fourth tab.
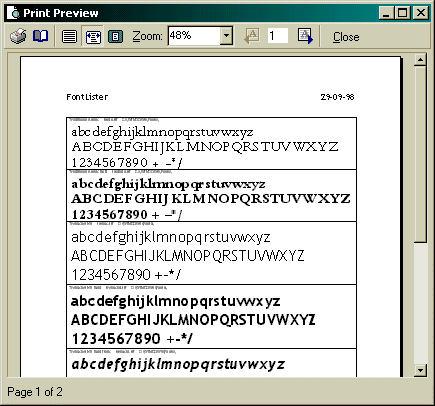
If you would like to install, delete or print fonts from a cd-rom or your hard drive, take a look at another of my products: FontLister. The latest version of FontLister is not freeware (costs $5), but you can still download the older version 2.0 for free – they both received maximum rating (5 stars) from ZDNet Interactive and a Get It from WinFilesjust to mention a few. If you would like to download a copy of it, check the FontLister-homepage.
### Help for FontSelector
I’ve made a Windows Helpfile for FontSelector which is included with your download.
### History
Version 1.3 (November 24, 1999)
- QuickView menu wasn’t showing all fonts correctly – fixed.
- Added a QuickView popup-menu showing all fonts when FontSelector is located in your traybar.
- Cursor will now change to a ‘handpoint’ when hovered above homepage and email links.
- When started minimized it would minimize main window – fixed.
- FontSelector now shows a font in its different types of scripts (charsets) instead of just showing a list of them.
- All settings were apparently not stored – fixed.
- It wasn’t possible to open fonts (using FontView) under Windows NT and 2000 systems – fixed.
- Added small images to popup menus.
Version 1.27 (November 20, 1999)
- Saves window position correctly.
- Updated URL to FontSelector web site.
Version 1.26 (September 6, 1998)
- Would fail to View/Print fonts if they were entered with full path in the Registry – fixed.
- Rollup button updated to handle Win98’s gradient captions.
Version 1.25 (July 9, 1998)
- If you Exit FontSelector from tray, it’ll start minimized next time.
- Added fontsize combobox for Selector.
- Added ‘Open Help File’ button.
- Shows name of font in Statusbar.
- Uses Custom View as default view.
Version 1.2 (January 25, 1998)
- View and Print using Win95/NT4 build-in viewer added.
- Minimize to tray function added.
- Vertical scrollbar if window gets too small to contain all information.
- Minor bug when retrieving fontnames corrected.
Version 1.0 (December 14, 1997)
- First release.
- Check my homepage for more freeware.
### Downloads
[](/files/fs.zip)
Download FontSelector 1.3 (right click on filename and select ‘Save Target As…’)
### Logo


---
### Forward
[Visit](https://forwardapphq.com)
Forward was an online community where you gathered donations for your favorite charity by giving stuff away.
### Don't throw out that old sofa
You replaced your old sofa, gave up on playing the guitar a long time ago, and your kids have grown out of their toys. These things now gather dust on the attic or in the basement.
Once in a while, you do a big cleanup, and you consider putting the items up for sale, but you end up throwing everything out.
However, there is a better way.
### Introducing Forward
You don't need to throw away your good, old items anymore. With Forward, you can easily give them away. The people receiving them will donate a small amount of money to a charity of your choice.
To get started, all you have to do is take a picture of the item you would like to give away, put a price on it, and pick a charity from the list.You can get rid of your stuff, people get things in good condition that are almost free, and charity organizations get extra help.
Everybody wins!
### TV appearance

---
### Gratitude
[Visit](https://knipsmig.com/gratitude)
Create personalized wedding thank you cards in minutes with our AI-powered tool. Perfect for couples who want to express gratitude to their guests with custom messages.
Gratitude offers a unique solution for creating personalized wedding thank you cards with ease. Utilizing AI-powered message generation, this tool allows users to design, customize, and export stunning cards as PDFs in just minutes. With a focus on simplicity and creativity, Gratitude provides an intuitive interface for users to craft heartfelt messages effortlessly. Key features include a variety of design templates, customization options, and seamless PDF export functionality. Whether you're looking to express gratitude to your wedding guests or simply want to create a memorable keepsake, Gratitude ensures that your thank you cards are both beautiful and personal. Embrace the power of AI to enhance your card creation process and leave a lasting impression on your loved ones.
### How It Works
**Design**: Choose your card style, colors, fonts, and layout to match your wedding theme.
**Add Guests**: Enter your guests and their gifts. AI generates a heartfelt, unique message for each.
**Export**: Preview every card and download a print-ready PDF — two cards per page.

---
### HTML Font Colorizer
HFC is available for Windows 95, 98, ME, 2000 & XP. Enjoy 🙂
This piece of Windows freeware was created by Peter Theill. It makes it possible to generate font fades like the example below within seconds. Make sure to read the tutorial if you need help.
First of all, you type the text your want to colorize into Input text window. It’s possible to write multiple lines too, e.g. if you want to colorize your postal address. Line breaks will automatically be inserted in the generated HTML code.
The Color list shows all colors used in a colorize. If you want to add or remove some colors, click on ‘+‘ or ‘–‘ to the right of the list. It’s possible to hold down the mouse cursor to add/remove multiple colors at once. To change colors, click the appropriate one and select a new color from the popup-menu -or- click ‘Others’ to view the standard Windows color dialog. If all colors can’t fit in the Color list window, a horizontal scrollbar will appear. Move this scrollbar left or right to get access to all colors in the list.
To colorize your text, press F2 on your keyboard or click on the RGB colored A-button. The HTML code will be generated and shown in the HTML Code window. The Fade preview window shows you how the colorize will present itself when inserted into a standard HTML document.
An example of output
I’ve tried to make this program as simple as possible. Therefore I decided to split the program into four tabs – If you just want to browse your fonts, use the first tab. If you want a little information about a selected font, click the second tab. If you want to change some of the settings, click the third-tab and finally, if you want to know something about, where you can get the newest release, click the fourth tab.
If you would like to install, delete or print fonts from a cd-rom or your hard drive, take a look at another of my products: FontLister. The latest version of FontLister is not freeware (costs $5), but you can still download the older version 2.0 for free – they both received maximum rating (5 stars) from ZDNet Interactive and a Get It from WinFilesjust to mention a few. If you would like to download a copy of it, check the FontLister-homepage.
### Help for FontSelector
I’ve made a Windows Helpfile for FontSelector which is included with your download.
### History
Version 1.3 (November 24, 1999)
- QuickView menu wasn’t showing all fonts correctly – fixed.
- Added a QuickView popup-menu showing all fonts when FontSelector is located in your traybar.
- Cursor will now change to a ‘handpoint’ when hovered above homepage and email links.
- When started minimized it would minimize main window – fixed.
- FontSelector now shows a font in its different types of scripts (charsets) instead of just showing a list of them.
- All settings were apparently not stored – fixed.
- It wasn’t possible to open fonts (using FontView) under Windows NT and 2000 systems – fixed.
- Added small images to popup menus.
Version 1.27 (November 20, 1999)
- Saves window position correctly.
- Updated URL to FontSelector web site.
Version 1.26 (September 6, 1998)
- Would fail to View/Print fonts if they were entered with full path in the Registry – fixed.
- Rollup button updated to handle Win98’s gradient captions.
Version 1.25 (July 9, 1998)
- If you Exit FontSelector from tray, it’ll start minimized next time.
- Added fontsize combobox for Selector.
- Added ‘Open Help File’ button.
- Shows name of font in Statusbar.
- Uses Custom View as default view.
Version 1.2 (January 25, 1998)
- View and Print using Win95/NT4 build-in viewer added.
- Minimize to tray function added.
- Vertical scrollbar if window gets too small to contain all information.
- Minor bug when retrieving fontnames corrected.
Version 1.0 (December 14, 1997)
- First release.
- Check my homepage for more freeware.
### Downloads
[](/files/fs.zip)
Download FontSelector 1.3 (right click on filename and select ‘Save Target As…’)
### Logo


---
### Forward
[Visit](https://forwardapphq.com)
Forward was an online community where you gathered donations for your favorite charity by giving stuff away.
### Don't throw out that old sofa
You replaced your old sofa, gave up on playing the guitar a long time ago, and your kids have grown out of their toys. These things now gather dust on the attic or in the basement.
Once in a while, you do a big cleanup, and you consider putting the items up for sale, but you end up throwing everything out.
However, there is a better way.
### Introducing Forward
You don't need to throw away your good, old items anymore. With Forward, you can easily give them away. The people receiving them will donate a small amount of money to a charity of your choice.
To get started, all you have to do is take a picture of the item you would like to give away, put a price on it, and pick a charity from the list.You can get rid of your stuff, people get things in good condition that are almost free, and charity organizations get extra help.
Everybody wins!
### TV appearance

---
### Gratitude
[Visit](https://knipsmig.com/gratitude)
Create personalized wedding thank you cards in minutes with our AI-powered tool. Perfect for couples who want to express gratitude to their guests with custom messages.
Gratitude offers a unique solution for creating personalized wedding thank you cards with ease. Utilizing AI-powered message generation, this tool allows users to design, customize, and export stunning cards as PDFs in just minutes. With a focus on simplicity and creativity, Gratitude provides an intuitive interface for users to craft heartfelt messages effortlessly. Key features include a variety of design templates, customization options, and seamless PDF export functionality. Whether you're looking to express gratitude to your wedding guests or simply want to create a memorable keepsake, Gratitude ensures that your thank you cards are both beautiful and personal. Embrace the power of AI to enhance your card creation process and leave a lasting impression on your loved ones.
### How It Works
**Design**: Choose your card style, colors, fonts, and layout to match your wedding theme.
**Add Guests**: Enter your guests and their gifts. AI generates a heartfelt, unique message for each.
**Export**: Preview every card and download a print-ready PDF — two cards per page.

---
### HTML Font Colorizer
HFC is available for Windows 95, 98, ME, 2000 & XP. Enjoy 🙂
This piece of Windows freeware was created by Peter Theill. It makes it possible to generate font fades like the example below within seconds. Make sure to read the tutorial if you need help.
First of all, you type the text your want to colorize into Input text window. It’s possible to write multiple lines too, e.g. if you want to colorize your postal address. Line breaks will automatically be inserted in the generated HTML code.
The Color list shows all colors used in a colorize. If you want to add or remove some colors, click on ‘+‘ or ‘–‘ to the right of the list. It’s possible to hold down the mouse cursor to add/remove multiple colors at once. To change colors, click the appropriate one and select a new color from the popup-menu -or- click ‘Others’ to view the standard Windows color dialog. If all colors can’t fit in the Color list window, a horizontal scrollbar will appear. Move this scrollbar left or right to get access to all colors in the list.
To colorize your text, press F2 on your keyboard or click on the RGB colored A-button. The HTML code will be generated and shown in the HTML Code window. The Fade preview window shows you how the colorize will present itself when inserted into a standard HTML document.
An example of output
! Generated wrong <SIZE> tag when using quotation-marks around colors
- - Concatenates FACE and SIZE tag if both is in use
- + Close Font Popup if you double-click a font
- - Doesn't hide Popups automatically if they're undocked
### Version 2.03 (May 24, 1998)
- ! Fontname is now saved
- - Fontsize in Preview window is now saved
### Version 2.02 (May 24, 1998)
- ! Fontnames are now in quotation-marks if they consist of multiple words
### Version 2.01 (May 19, 1998)
- - Updated help
- + HTML Code Drop added. It's now possible to drag your HTML Code directly from HTML Font Colorizer into your documents
- ! Known inputtext limitation has been lifted. It's now possible to fade a inputstring of 'unlimited' length
### Version 2.0 (May 13, 1998)
- + Help-file added
- + <BR>-tag added when new line is found in text
- - UI optimized for quicker navigation
- + DblClick Colorlist to colorize text
- + RightClick Colorlist for popupmenu with common items
- i Known limitations: Inputtext has to below 1800 characters
- + Colorize multiple text lines :)
- + Shows number of characters in HTML Code
- - Fade Generator optimized
- + The Quotationmark-option is now expanded to include size and name too
- + Fade between unlimited number of colors
- + Stay on Top option added
- ! Wasn't able to create strings with more than 256 characters
- - Updated email and homepage addresses
- - Close aboutbox with ESC
- ! Arrows on colorbuttons sometimes failed to show correctly
- + Variable size of preview window
### Version 1.52 (December 10, 1997)
- + Quotation-marks around ColorCode (e.g. #911911) is now an option
### Version 1.51 (December 5, 1997)
- + Inclusion of <FONT NAME=""> is now an option
- + Inclusion of <FONT SIZE=""> is now an option
- - Autoupdates HTML-code when changing colors/fonts
- - Hiding the FadePreview when Colorizing
- - Faster colorize
### Version 1.5 (August 16, 1996)
- + FontName added
- + FontSize added
- - Nicer layout
- + Aboutbox added
### Version 1.0 - August 10, 1996
- + Initial release
## What do they say?
I've collected some reviews from various sources. You're able to read their opinion here…
This is what the large software archive [ZDNet](http://www.zdnet.com/) says:
> "Do you like fancy multicolored headlines on Web pages? Here's the fast way to get them. The HTML Font Colorizer is a product for Web authors that does only one thing and does it quite well. It calculates the color codes (like #18E700) for creating a line of text that gradually shifts from one color to another. It then creates the proper FONT parameter tags for you to include on your Web pages. You work from the standard Windows palette and can see the results almost as fast as you can type. Once you have the desired design, the Colorizer copies it to the Clipboard, ready for insertion into your total page design. You can also choose the font itself, from a drop-down selection list."
 |
 |
| 5 Stars by ZDNet | Tuesday, December 30, 1997 |
 
---
### Hurtig Moms
[Visit](https://github.com/theill/hurtigmoms)
A simple online accounting system which allows bank statement imports and match-up based on your emailed PDF invoices.
### Idea
The idea behind this project was to create a simple online accounting system for small businesses. The system should be able to import bank statements and match-up the transactions with the invoices that are emailed to the system. The system should be simple and easy to use, and should not require the user to install anything or learn accounting.
### Features
- Bank statement imports
- Match-up based on emailed PDF invoices
- Simple and easy to use
- No need to install anything
- No need to learn accounting
### Technologies
- Ruby on Rails
- PostgreSQL
- Heroku
### Open Source
The project is open source and can be found on [GitHub](https://github.com/theill/hurtigmoms). The project is written in Ruby on Rails and uses PostgreSQL as the database.

---
### Iquomi
[Visit](https://github.com/theill/iquomi)
Iquomi is an acronym for **I**ntelligent **Qu**erying **O**n **M**anaged **I**nfrastructure and its basic idea is to provide a set of components for building services.
These components are:
1. Data distribution
1. Licensing
1. Authentication, Authorization & Encryption
1. Notifications
1. Scripting / Object Libraries
1. Reporting
Refer to design overview for more details.
### Available Services
1. IqAlerts
1. IqApplicationSettings
1. IqCalendar
1. IqCategories
1. IqContacts
1. IqFavorites
1. IqLists
1. IqLocations
1. IqPresence
1. IqProfile
1. IqServices
1. IqSharewareProduct
1. IqSms
1. IqWallet
### Open Source
The project is open source and can be found on [GitHub](https://github.com/theill/iquomi). The project is written in C# and uses SQL Server as the database.
### Technologies
- C#
- SQL Server
- .NET
### License
The project is licensed under the MIT license.

---
### KirkeApp
[Visit](https://github.com/theill/kirkeapp)
An iOS app for your church. This project was build to provide easy access to the "samlebogen" which is a book with all the songs used in the church. The app is build with Objective-C and uses Podio as backend.

---
### Knipsmig
[Visit](https://knipsmig.com)
[Buy](https://knipsmig.com/pricing)

Knipsmig provides a seamless solution for sharing event photos, making the process effortless and hassle-free.
The core philosophy of Knipsmig is "more sharing, less searching." When it's time to share, simply create an event and generate a unique QR code for your guests. This QR code gives access to a custom sharing hub where all event photos are collected in one place, eliminating awkward photo swapping.
At the end of the event, you can easily view and download all shared images, ensuring a smooth and efficient process.
Knipsmig enhances your event experience by simplifying photo sharing, allowing you and your guests to focus on enjoying the moment instead of worrying about exchanging photos.
.png)
---
### Made in Europe
[Visit](https://madeineurope.club)
Made in Europe is a community and directory where European indie makers can submit and discover digital products, SaaS tools, and apps built across Europe. Browse products by country, upvote your favorites, and connect with fellow European builders.


---
### Molly: Memory Game ($4.99)
[Visit](https://apps.apple.com/app/molly-memory-game/id6503224315)
Are you ready to put your memory to the ultimate test? Dive into the world of this memory game, where your cognitive skills will be challenged like never before. Inspired by the timeless classic, Simon, Molly offers a captivating game experience for players of all ages.

---
### Hurtig Moms
[Visit](https://github.com/theill/hurtigmoms)
A simple online accounting system which allows bank statement imports and match-up based on your emailed PDF invoices.
### Idea
The idea behind this project was to create a simple online accounting system for small businesses. The system should be able to import bank statements and match-up the transactions with the invoices that are emailed to the system. The system should be simple and easy to use, and should not require the user to install anything or learn accounting.
### Features
- Bank statement imports
- Match-up based on emailed PDF invoices
- Simple and easy to use
- No need to install anything
- No need to learn accounting
### Technologies
- Ruby on Rails
- PostgreSQL
- Heroku
### Open Source
The project is open source and can be found on [GitHub](https://github.com/theill/hurtigmoms). The project is written in Ruby on Rails and uses PostgreSQL as the database.

---
### Iquomi
[Visit](https://github.com/theill/iquomi)
Iquomi is an acronym for **I**ntelligent **Qu**erying **O**n **M**anaged **I**nfrastructure and its basic idea is to provide a set of components for building services.
These components are:
1. Data distribution
1. Licensing
1. Authentication, Authorization & Encryption
1. Notifications
1. Scripting / Object Libraries
1. Reporting
Refer to design overview for more details.
### Available Services
1. IqAlerts
1. IqApplicationSettings
1. IqCalendar
1. IqCategories
1. IqContacts
1. IqFavorites
1. IqLists
1. IqLocations
1. IqPresence
1. IqProfile
1. IqServices
1. IqSharewareProduct
1. IqSms
1. IqWallet
### Open Source
The project is open source and can be found on [GitHub](https://github.com/theill/iquomi). The project is written in C# and uses SQL Server as the database.
### Technologies
- C#
- SQL Server
- .NET
### License
The project is licensed under the MIT license.

---
### KirkeApp
[Visit](https://github.com/theill/kirkeapp)
An iOS app for your church. This project was build to provide easy access to the "samlebogen" which is a book with all the songs used in the church. The app is build with Objective-C and uses Podio as backend.

---
### Knipsmig
[Visit](https://knipsmig.com)
[Buy](https://knipsmig.com/pricing)

Knipsmig provides a seamless solution for sharing event photos, making the process effortless and hassle-free.
The core philosophy of Knipsmig is "more sharing, less searching." When it's time to share, simply create an event and generate a unique QR code for your guests. This QR code gives access to a custom sharing hub where all event photos are collected in one place, eliminating awkward photo swapping.
At the end of the event, you can easily view and download all shared images, ensuring a smooth and efficient process.
Knipsmig enhances your event experience by simplifying photo sharing, allowing you and your guests to focus on enjoying the moment instead of worrying about exchanging photos.
.png)
---
### Made in Europe
[Visit](https://madeineurope.club)
Made in Europe is a community and directory where European indie makers can submit and discover digital products, SaaS tools, and apps built across Europe. Browse products by country, upvote your favorites, and connect with fellow European builders.


---
### Molly: Memory Game ($4.99)
[Visit](https://apps.apple.com/app/molly-memory-game/id6503224315)
Are you ready to put your memory to the ultimate test? Dive into the world of this memory game, where your cognitive skills will be challenged like never before. Inspired by the timeless classic, Simon, Molly offers a captivating game experience for players of all ages.
 ### How to play
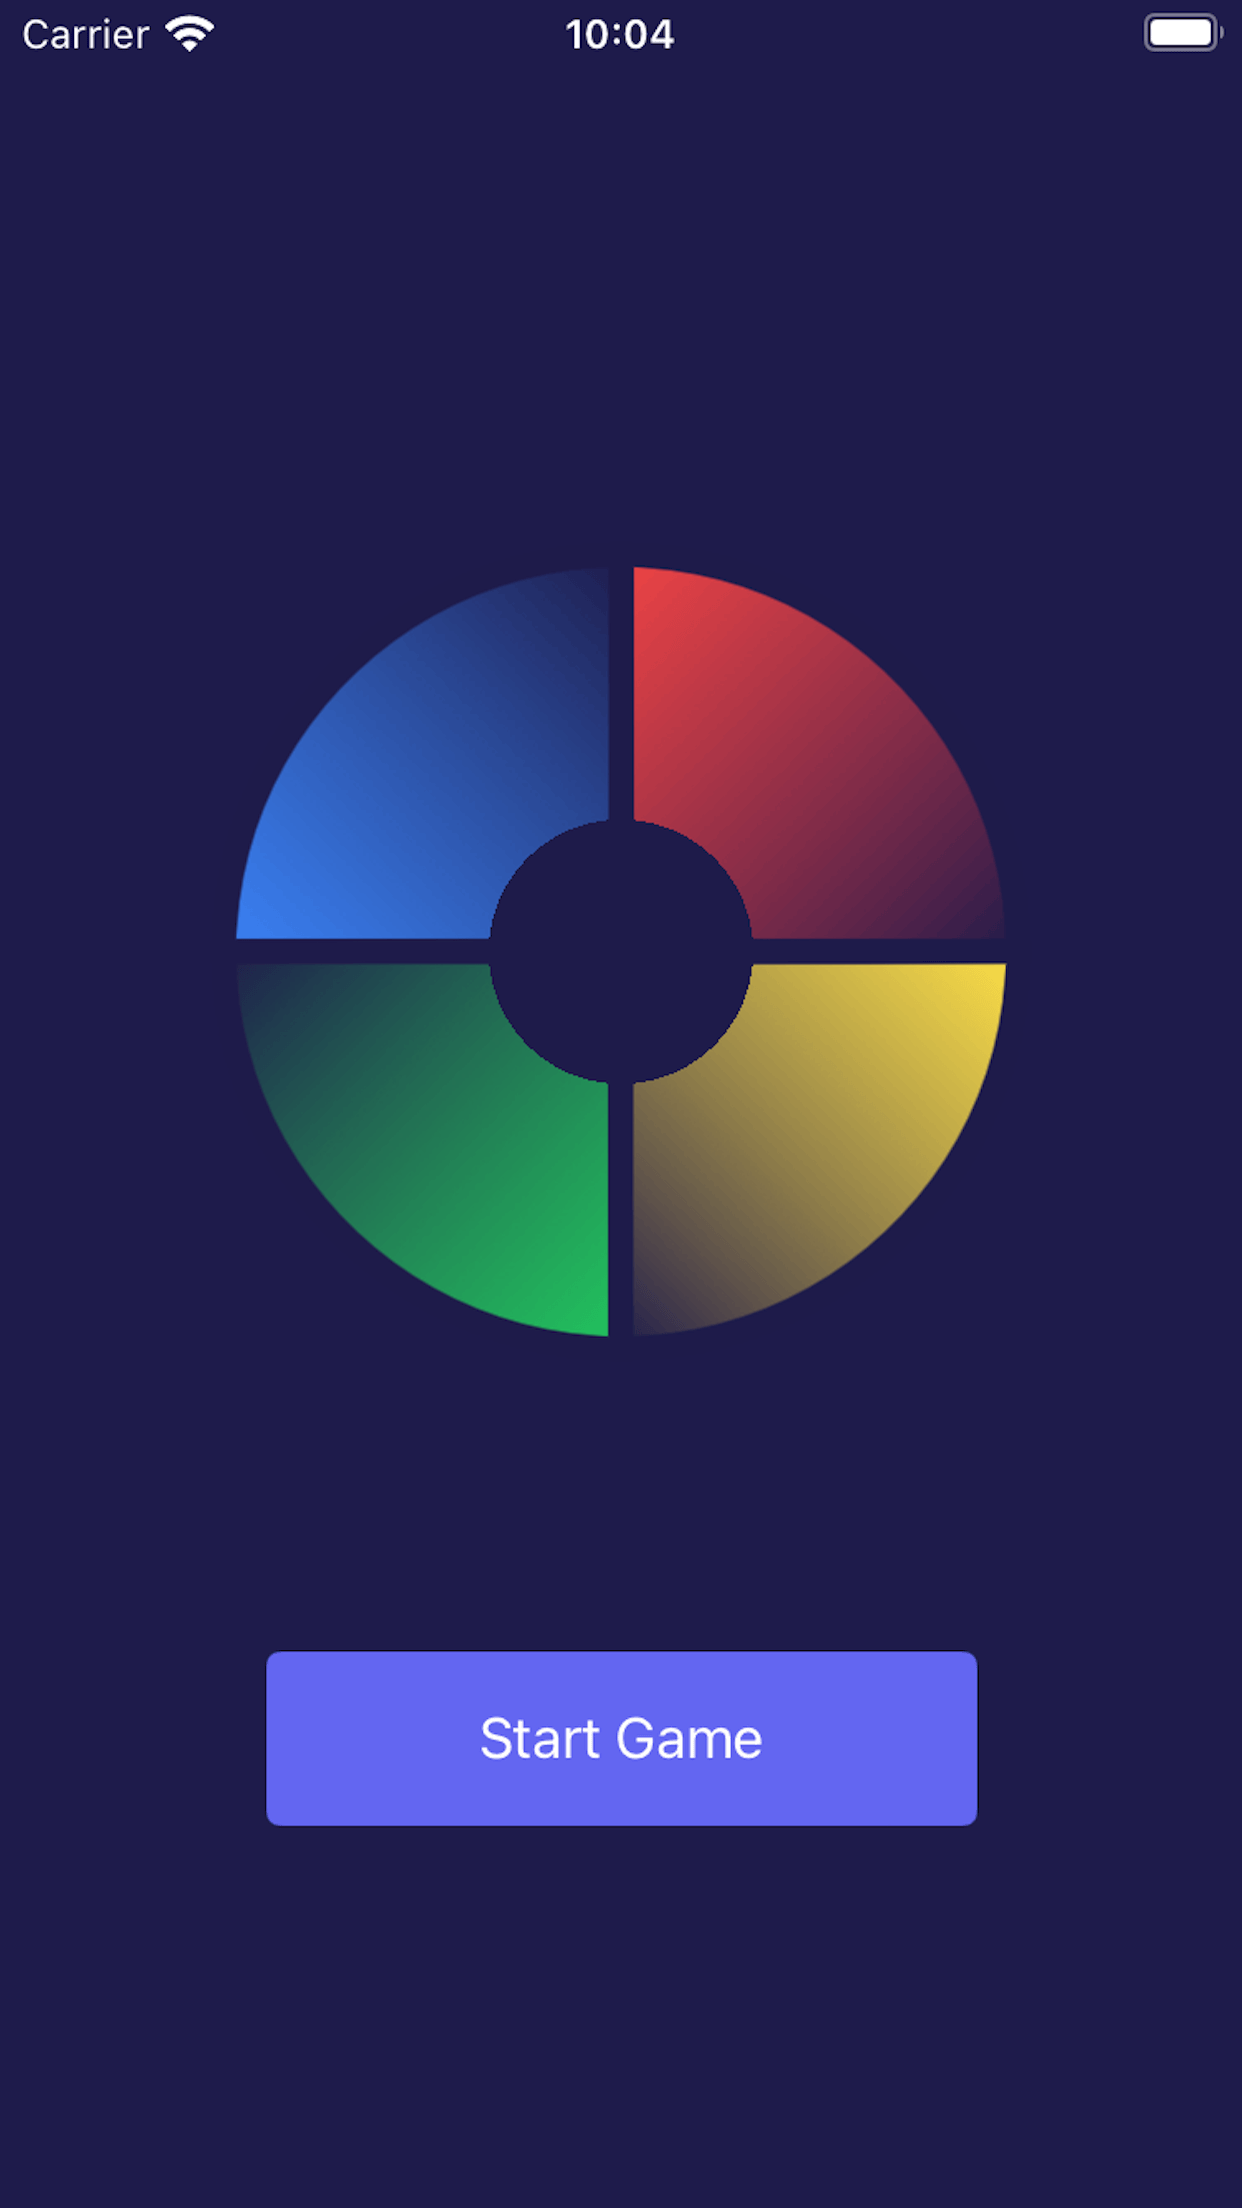
Molly is simple yet addictive. Watch carefully as a sequence of colors and sounds is displayed. Your task is to memorize the sequence and play it back in the correct order. As you progress, the sequences become longer and more complex, pushing your memory to its limits.
### Features
* Classic Simon gameplay: Enjoy the familiar and beloved gameplay of Simon with a fresh twist.
* Increasing difficulty: Start with easy sequences and gradually face more challenging ones.
* Beautiful design: Stunning and colorful graphics make the game visually appealing.
* Catchy sounds: Each color is paired with a unique sound, enhancing your memory challenge.
* No ads & no in-app purchases: Enjoy a completely uninterrupted gaming experience without any ads or the need for additional purchases.
* User-friendly interface: Simple and intuitive design ensures a smooth gaming experience.
### Benefits
* Improve memory: Boost your memory and cognitive skills through fun and engaging gameplay.
* Perfect for all ages: Suitable for kids, adults, and seniors alike.
* Fun and relaxing: Enjoy a game that is both entertaining and relaxing, perfect for unwinding or sharpening your mind.
Whether you’re looking to train your brain, enjoy a trip down memory lane, or simply have fun, Molly the Memory Game is the perfect choice for you.

---
### Nstatxt
[Visit](https://nstatxt.com)
Nstatxt is a real-time collaborative platform that enables instant document sharing and collaboration without requiring user accounts. The platform focuses on simplicity and accessibility, allowing users to create live documents, upload files, and collaborate seamlessly.

### Key features
- Create live documents with real-time updates
- Share content *instantly* with anyone
- No account required for collaboration
- Upload and share files effortlessly
- Auto-delete documents
The platform emphasizes frictionless collaboration by removing traditional barriers like user accounts and complex setups, making it an ideal solution for quick and efficient document sharing and teamwork.

---
### OhDiary ($89.0)
[Visit](https://www.ohdiary.com)
[Buy](https://buy.stripe.com/5kA9AD8Qeedt9VKcMQ)
OhDiary is an online platform designed to encourage daily journaling by nudging users to write entries regularly. The service offers an easy-to-use interface, making it simple for users to start and maintain their digital diaries.
### Key Features
- **User-Friendly Interface**: OhDiary provides a straightforward and intuitive interface, making it accessible for both beginners and seasoned diarists.
- **Privacy and Transparency**: The platform emphasizes the protection of users' information and ensures that data is used responsibly.
- **Journaling Tools and Tips**: OhDiary offers various tools and tips to help users get started with online journaling, promoting consistent writing habits.
### Benefits
By promoting regular journaling, OhDiary aims to help users reflect on their daily lives and document their personal journeys effectively. The platform is designed to support users in developing a meaningful and reflective journaling practice.
For more information, visit [OhDiary](https://www.ohdiary.com/).

---
### Oplæs ($4.99)
[Visit](https://apps.apple.com/app/opl%C3%A6s-read-aloud/id6815136679)
Oplæs reads your text aloud in natural voices and highlights each word as you follow along. No account, no ads, no subscription – and all reading happens on your iPhone.
### Listen to anything
- PDFs, reports and course packs – scanned pages too
- Articles from the web: tap Share in Safari and choose Oplæs
- ePub books, text you paste and paper you photograph
- Headers, page numbers, footnote numbers and web addresses are skipped
### Follow along word by word
- Each word lights up yellow, in time with the voice
- Tap a sentence to read from there
- Skip a sentence forward or back, or jump to a chapter
- Large, calm type that’s easy to read – made for dyslexia, good for everyone
### Voices that sound human
- Natural English and Danish voices
- Mic and Nic: natural Danish voices from the CoRal project, recorded by Nota
- Numbers, dates and abbreviations are read correctly
- Oplæs listens to its own reading to make sure every word is said
### Wherever you are
- 0.5× to 3× speed
- Listen with the screen locked, on AirPods or in the car
- Sleep timer and Lock Screen controls
- Oplæs remembers where you left off
### Your text is yours
The voices are downloaded once and then run on your iPhone. No account, no server reading along, no tracking.
### A small price, made to last.
Free apps come and go. Oplæs costs $4.99, once – a small price that keeps it going: every future update, and support straight from the person who made it. No subscription, no ads, and your texts stay on your iPhone.
### Get it
- [Download Oplæs on the App Store](https://apps.apple.com/app/opl%C3%A6s-read-aloud/id6815136679) – one-time purchase, no subscription
- Website: [oplaes.theill.com](https://oplaes.theill.com)

---
### Page Screen Capture Chrome Extension
[Visit](https://chromewebstore.google.com/detail/page-screen-capture/abepmooejniahckapkgaekncbnkeopbg)
Capture screenshots of the current page with a cool frame and background
Transform your screenshots into eye-catching visuals with just one click.
This is a simple Chrome extension that lets you capture screenshots of any webpage and instantly enhance them with beautiful frames and backgrounds. Perfect for creators, professionals, and anyone who wants to share web content with style.

---
### Pling
[Visit](https://pling.theill.com)
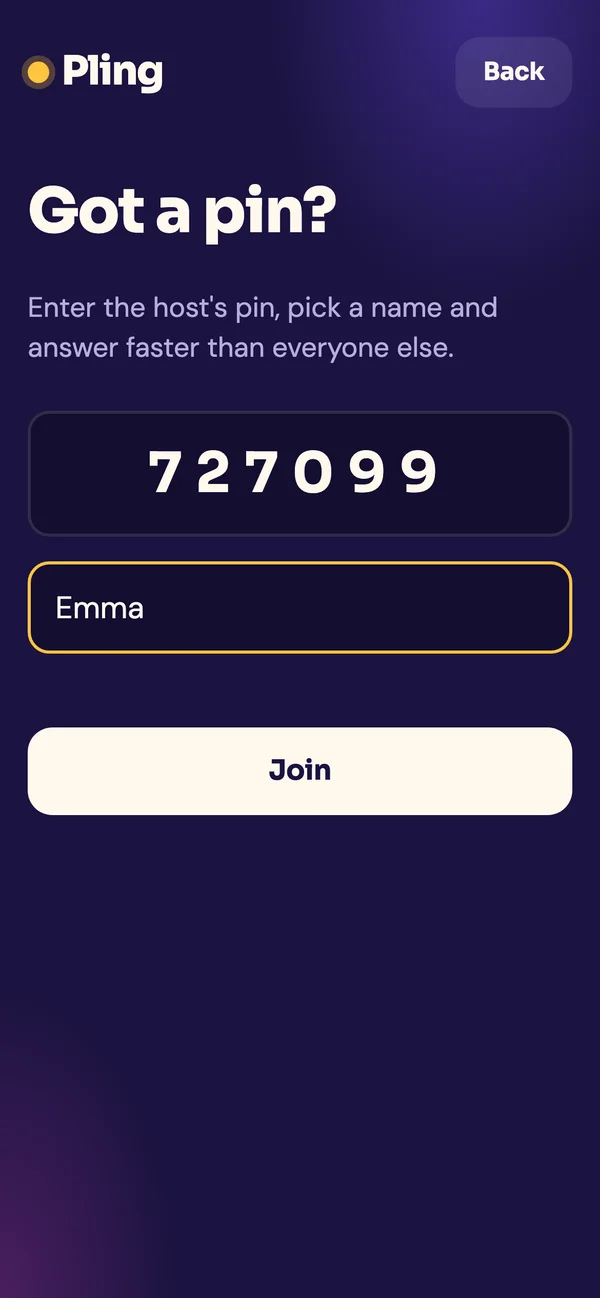
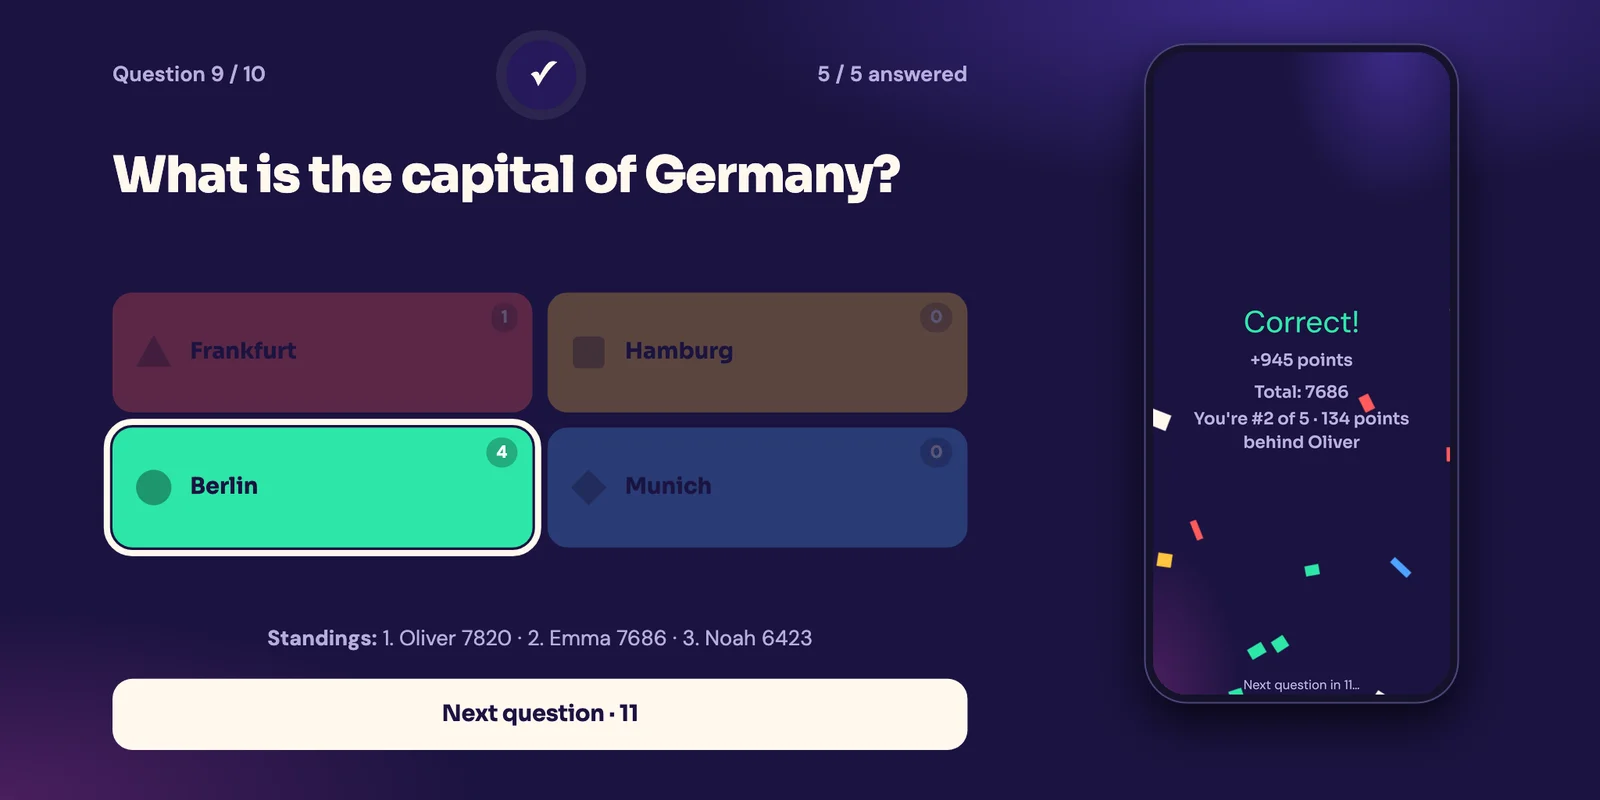
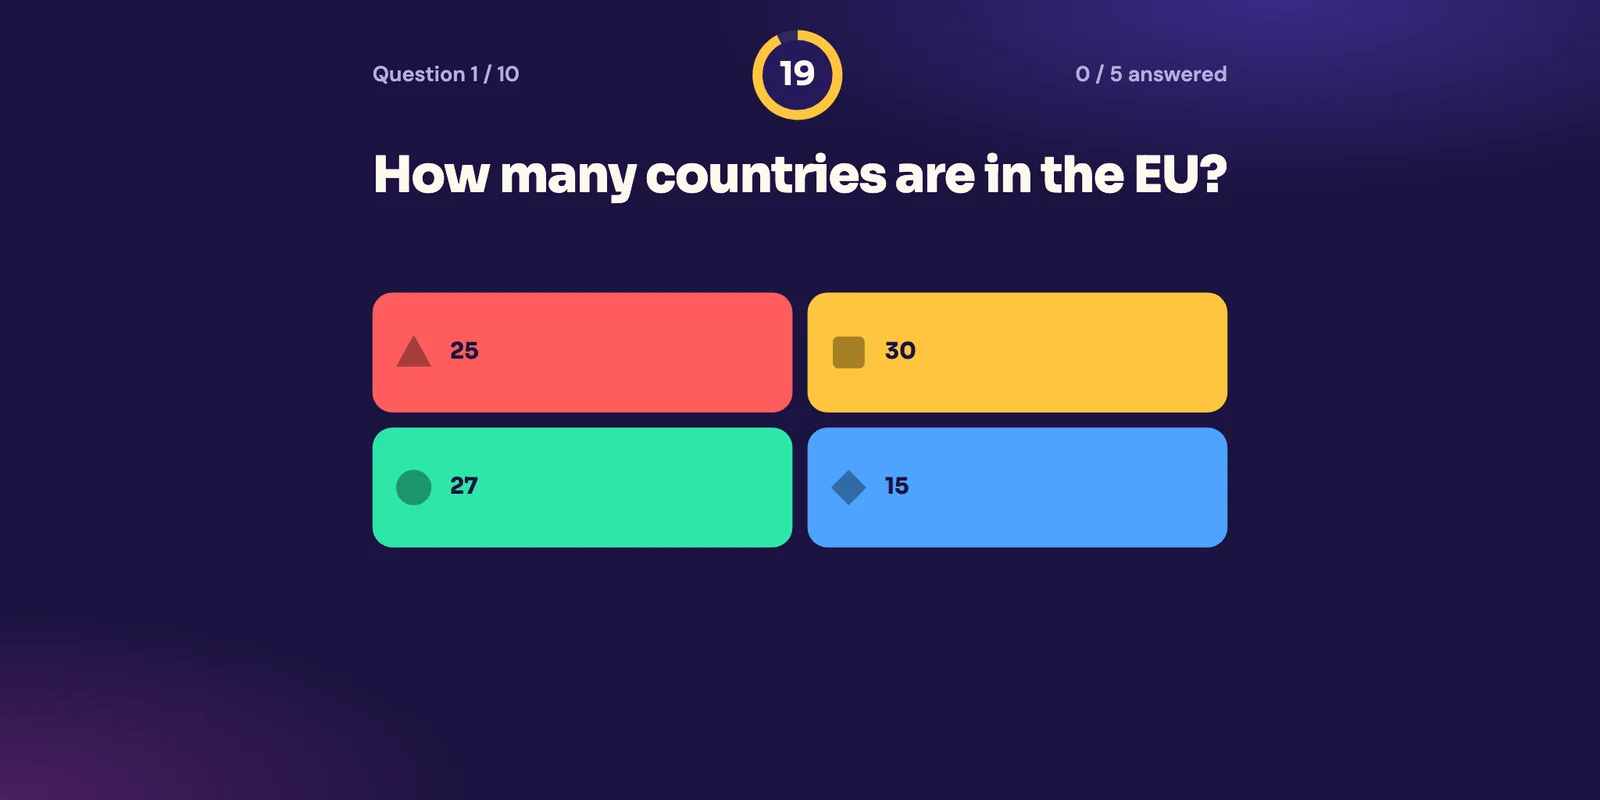
Pling is a tiny live quiz game for a room full of people – friends, family, colleagues or a classroom. One person hosts and gets a six-digit pin, everyone else enters it on their phone, and ten questions later there is a winner. No login, no app, no accounts. Just a pin.
**How it works**
1. The host presses start and gets a 6-digit pin
2. Everyone enters the pin on [pling.theill.com](https://pling.theill.com)
3. Ten questions – the fastest correct answer wins
### How to play
Molly is simple yet addictive. Watch carefully as a sequence of colors and sounds is displayed. Your task is to memorize the sequence and play it back in the correct order. As you progress, the sequences become longer and more complex, pushing your memory to its limits.
### Features
* Classic Simon gameplay: Enjoy the familiar and beloved gameplay of Simon with a fresh twist.
* Increasing difficulty: Start with easy sequences and gradually face more challenging ones.
* Beautiful design: Stunning and colorful graphics make the game visually appealing.
* Catchy sounds: Each color is paired with a unique sound, enhancing your memory challenge.
* No ads & no in-app purchases: Enjoy a completely uninterrupted gaming experience without any ads or the need for additional purchases.
* User-friendly interface: Simple and intuitive design ensures a smooth gaming experience.
### Benefits
* Improve memory: Boost your memory and cognitive skills through fun and engaging gameplay.
* Perfect for all ages: Suitable for kids, adults, and seniors alike.
* Fun and relaxing: Enjoy a game that is both entertaining and relaxing, perfect for unwinding or sharpening your mind.
Whether you’re looking to train your brain, enjoy a trip down memory lane, or simply have fun, Molly the Memory Game is the perfect choice for you.

---
### Nstatxt
[Visit](https://nstatxt.com)
Nstatxt is a real-time collaborative platform that enables instant document sharing and collaboration without requiring user accounts. The platform focuses on simplicity and accessibility, allowing users to create live documents, upload files, and collaborate seamlessly.

### Key features
- Create live documents with real-time updates
- Share content *instantly* with anyone
- No account required for collaboration
- Upload and share files effortlessly
- Auto-delete documents
The platform emphasizes frictionless collaboration by removing traditional barriers like user accounts and complex setups, making it an ideal solution for quick and efficient document sharing and teamwork.

---
### OhDiary ($89.0)
[Visit](https://www.ohdiary.com)
[Buy](https://buy.stripe.com/5kA9AD8Qeedt9VKcMQ)
OhDiary is an online platform designed to encourage daily journaling by nudging users to write entries regularly. The service offers an easy-to-use interface, making it simple for users to start and maintain their digital diaries.
### Key Features
- **User-Friendly Interface**: OhDiary provides a straightforward and intuitive interface, making it accessible for both beginners and seasoned diarists.
- **Privacy and Transparency**: The platform emphasizes the protection of users' information and ensures that data is used responsibly.
- **Journaling Tools and Tips**: OhDiary offers various tools and tips to help users get started with online journaling, promoting consistent writing habits.
### Benefits
By promoting regular journaling, OhDiary aims to help users reflect on their daily lives and document their personal journeys effectively. The platform is designed to support users in developing a meaningful and reflective journaling practice.
For more information, visit [OhDiary](https://www.ohdiary.com/).

---
### Oplæs ($4.99)
[Visit](https://apps.apple.com/app/opl%C3%A6s-read-aloud/id6815136679)
Oplæs reads your text aloud in natural voices and highlights each word as you follow along. No account, no ads, no subscription – and all reading happens on your iPhone.
### Listen to anything
- PDFs, reports and course packs – scanned pages too
- Articles from the web: tap Share in Safari and choose Oplæs
- ePub books, text you paste and paper you photograph
- Headers, page numbers, footnote numbers and web addresses are skipped
### Follow along word by word
- Each word lights up yellow, in time with the voice
- Tap a sentence to read from there
- Skip a sentence forward or back, or jump to a chapter
- Large, calm type that’s easy to read – made for dyslexia, good for everyone
### Voices that sound human
- Natural English and Danish voices
- Mic and Nic: natural Danish voices from the CoRal project, recorded by Nota
- Numbers, dates and abbreviations are read correctly
- Oplæs listens to its own reading to make sure every word is said
### Wherever you are
- 0.5× to 3× speed
- Listen with the screen locked, on AirPods or in the car
- Sleep timer and Lock Screen controls
- Oplæs remembers where you left off
### Your text is yours
The voices are downloaded once and then run on your iPhone. No account, no server reading along, no tracking.
### A small price, made to last.
Free apps come and go. Oplæs costs $4.99, once – a small price that keeps it going: every future update, and support straight from the person who made it. No subscription, no ads, and your texts stay on your iPhone.
### Get it
- [Download Oplæs on the App Store](https://apps.apple.com/app/opl%C3%A6s-read-aloud/id6815136679) – one-time purchase, no subscription
- Website: [oplaes.theill.com](https://oplaes.theill.com)

---
### Page Screen Capture Chrome Extension
[Visit](https://chromewebstore.google.com/detail/page-screen-capture/abepmooejniahckapkgaekncbnkeopbg)
Capture screenshots of the current page with a cool frame and background
Transform your screenshots into eye-catching visuals with just one click.
This is a simple Chrome extension that lets you capture screenshots of any webpage and instantly enhance them with beautiful frames and backgrounds. Perfect for creators, professionals, and anyone who wants to share web content with style.

---
### Pling
[Visit](https://pling.theill.com)
Pling is a tiny live quiz game for a room full of people – friends, family, colleagues or a classroom. One person hosts and gets a six-digit pin, everyone else enters it on their phone, and ten questions later there is a winner. No login, no app, no accounts. Just a pin.
**How it works**
1. The host presses start and gets a 6-digit pin
2. Everyone enters the pin on [pling.theill.com](https://pling.theill.com)
3. Ten questions – the fastest correct answer wins






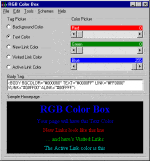 Here follows a online guide to get started with RGB Color Box (even though Quick Help! has been added in version 1.2)
To the right you see the main screen where all the action takes place. In the Tag Picker-window, you choose what tag you want to modify – options are : background, text, new link, visited link or active link. When you have chosen the tag, you can slide the bars in the Color Picker-window to hit the color you want. After you have made your mind you can click on the Generate Body Tag-button in the Body Tag-window. If you want to select a color from your windows default colors, you first choose which tag you want to give the color, and then you press Ctrl-P or select Tools, Windows Color Picker. If you want to have a background in you BODY-tag, then select the menu Tools, and then select Show Backgrounds?. Then you once again select the menu Tools and this time select the menuitem Load Background (or press Ctrl-L). A dialog box appears where you can choose a bmp-file you want to use as a background. When you selects OK in the dialog box the background is shown in the Sample Homepage-window.
When you want to use your tag you click on the Generate Body Tag-button (if visible). Then you can either press Ctrl-T to copy the whole body tag or you can select all the text in the Body Tag-window and press Ctrl-C. Finally you can modify the text in the Body Tag-window (ex. delete the path for a picture), and the press Ctrl-T.
If you have made a great scheme you want to reuse another time, then select the menu Schemes, and then Save A Scheme – or simply press Ctrl-S. Another dialog box will appears, where you have to give your color file a name. Remember that the extension hcp is added to the file if you don’t write it yourself. When you want to open a previously saved scheme you press Ctrl-O or select Schemes, Load A Scheme.
Thanks to The Color Manipulation Device 2.0 from Flux for the inspiration.
If you find any bugs in the program or if you have any ideas for further improvements then don’t hesitate to contact me
Updated in version 1.4: (Released August 13 ’96)
- HTML Color Picker has changed to The RGB Color Box
- And… (surprise) some minor design changes.
Updated in version 1.3: (Released July 26 ’96)
- Quicker center text
- Load Background code update
Updated in version 1.21: (Released July 20 ’96)
- Confirm for Reset All-command
- Centers text correctly in Sample Homepage-window
- Added shortcuts for all functions
- Again some minor design changes
Updated in version 1.2: (Released July 17 ’96)
- Added Quick
- Change Tags in sample
- Minor design
Updated in version 1.1: (Released July 16 ’96)
- Tiled bitmaps (bmp)
- Shortcut for Load Background (Ctrl-L) added
- Minor design changes
### Downloads
[Download RGB Color Box 1.4](/files/rcb.zip) (right click on filename and select ‘Save Target As…’)

---
### Rydop ($4.99)
[Visit](https://rydop.theill.com)
One-time purchase. No subscription. Your photos never leave your phone.
A thousand photos of the same moment? Rydop finds the series, duplicates and large videos filling up your iPhone – and lets you keep the best shot. You decide what gets deleted.
### Keep the best
- Series shot seconds apart are grouped together
- Rydop suggests the sharpest, best-lit photo
- The rest are pre-selected – you can always change that
### Find what takes up space
- Duplicates – including copies saved from chats at lower resolution
- Screenshots and screen recordings – oldest first
- Large videos – sorted by size
- Blurry and dark photos
### Swipe
- Go through your camera roll one month at a time
- Left to delete, right to keep
- Undo with one tap – Rydop remembers where you left off
### Delete safely
- Favourites and edited photos are never pre-selected
- iOS asks you to confirm every delete
- Everything stays in Recently Deleted for 30 days
### Your photos are yours
Rydop looks through your photos right on the phone. Nothing is uploaded, the app doesn't use the internet, and there's no account, no ads and no in-app purchases.
### A small price, made to last.
Free apps come and go. Rydop costs $4.99, once – a small price that keeps it going: every future update, and support straight from the person who made it. No subscription, no ads, and your photos stay on your iPhone.
### Get it
Rydop is currently in App Store review and will be available soon.
- Website: [rydop.theill.com](https://rydop.theill.com)

---
### Share a slot
[Visit](https://shareaslot.com)
Shareaslot is a simple tool to find the best time for everyone to meet. It allows users to schedule meetings with groups without the need for accounts.
### Key Features:
- **No account needed:** Create and vote on polls instantly.
- **Mobile friendly:** Works beautifully on any device.
- **Lightning fast:** Find a slot in seconds and share instantly.
- **100% Free:** No premium tiers, no limits, no ads.
- **Privacy first:** No tracking or data selling.
### How it works:
1. **Pick your dates:** Select the days that work for you.
2. **Share the link:** Send the unique poll link to your group.
3. **Find the best time:** See availability at a glance.
.png)
---
### ShoutSMS
[Visit](https://www.shoutsmshq.com/)
Based on a need for sending group text messages which originates from another mobile phone number so it's possible for recipients to reply back. Initially made for a Microsoft event where they needed to inform participants about changes in venues etc and where the informer would like to get instant feedback back through SMS.

---
### SikkerQR ($4.99)
[Visit](https://sikkerqr.theill.com)
See where a QR code leads before you tap. No ads, no subscription.
The iPhone camera opens QR codes after a glance at a tiny banner. SikkerQR shows you the whole address in large type instead, and tells you when a link looks like a scam. Nothing opens until you tap.
### Check before you open
- The domain in large type, so you can see where you’ll end up
- The full link and what the code does: open a site, join Wi-Fi, call, send a text or an email
- Nothing opens, joins or dials until you tap
### Warnings on your phone
- Addresses that look like a well-known site, such as “rnicrosoft” for “microsoft”
- Mixed alphabets, such as a Cyrillic а that looks like an ordinary a
- Well-known names like PayPal, your bank or a parcel service in someone else’s address
- Short links, IP numbers and http without s
- Words about logging in and paying on sites we don’t know
- Every warning comes with a plain-language reason
- The check runs on your iPhone, without the internet
### Read all kinds of codes
- QR, barcodes (EAN/UPC), Data Matrix and Aztec
- From the camera or from a photo or screenshot
- Join Wi-Fi, add contacts and events, search the web for a product number
### Make your own codes
- QR codes for a link, Wi-Fi, a contact card or text
- Put your logo in the middle
- Save, share or print in sharp quality
### Yours stays yours
No account, no ads, no tracking. History stays on your iPhone, and you can switch it off.
SikkerQR says “Looks suspicious” or “Nothing suspicious found” – never “safe”. No list catches everything, so always check that it’s the site you expect.
### A small price, made to last.
Free apps come and go. SikkerQR costs $4.99, once – a small price that keeps it going: every future update, and support straight from the person who made it. No subscription, no ads, and your scans stay on your iPhone.
### Get it
SikkerQR is currently in App Store review and will be available soon.
- Website: [sikkerqr.theill.com](https://sikkerqr.theill.com)

---
### Skan ($4.99)
[Visit](https://apps.apple.com/app/skan-pdf-scanner/id6815136145)
Skan turns paper into sharp, searchable PDFs. No account, no ads, no subscription – and nothing leaves your iPhone.
### Point, scan, done
- Skan finds the edges and takes the photo when the page is steady
- Scan many pages in a row, reorder them and rotate them into place
- Filters that make text crisp: Document, Grey, Colour or Original
### Text you can search
- Text recognition in Danish and English – right on your phone
- Search all your scans for a word, a name or an amount
- PDFs include a text layer, so you can search and copy text anywhere
- Skan names your documents for you, e.g. “Invoice – Harbour Power – 2026-09”
### Receipts and bookkeeping
- Skan finds the total, VAT and date on receipts and invoices
- Export all receipts as CSV for Excel, Numbers or your accounting app
- Export tables from a scan as CSV
### Sign and share
- Draw your signature once and place it on any page
- Share as PDF – or with a password
- Siri and Shortcuts: “Scan with Skan”
### Your paper is yours
Everything – images, text recognition and PDFs – happens on your iPhone. There is no server, no account and no tracking.
### A small price, made to last.
Free apps come and go. Skan costs $4.99, once – a small price that keeps it going: every future update, and support straight from the person who made it. No subscription, no ads, and your documents stay on your iPhone.
### Get it
- [Download Skan on the App Store](https://apps.apple.com/app/skan-pdf-scanner/id6815136145) – one-time purchase, no subscription
- Website: [skan.theill.com](https://skan.theill.com)

---
### Slingshot
[Visit](https://github.com/theill/slingshot)
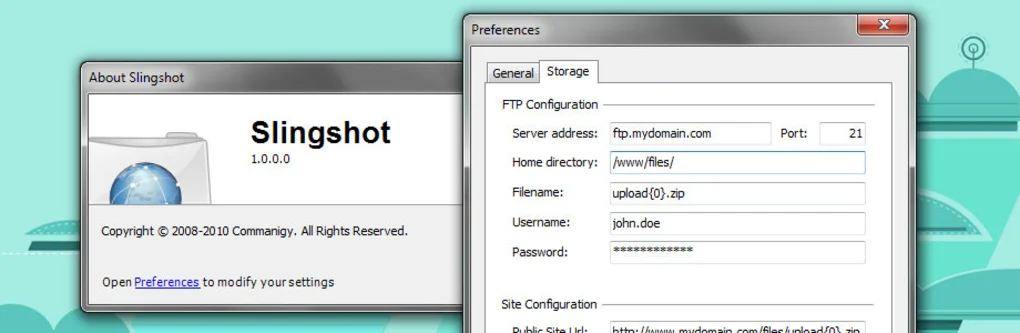
Slingshot provides you with a shell-integrated ability to upload a file or folder to a configured FTP server. Simply click what you want to upload and select "Publish" to upload file and get a unique URL to your uploaded file.
Here follows a online guide to get started with RGB Color Box (even though Quick Help! has been added in version 1.2)
To the right you see the main screen where all the action takes place. In the Tag Picker-window, you choose what tag you want to modify – options are : background, text, new link, visited link or active link. When you have chosen the tag, you can slide the bars in the Color Picker-window to hit the color you want. After you have made your mind you can click on the Generate Body Tag-button in the Body Tag-window. If you want to select a color from your windows default colors, you first choose which tag you want to give the color, and then you press Ctrl-P or select Tools, Windows Color Picker. If you want to have a background in you BODY-tag, then select the menu Tools, and then select Show Backgrounds?. Then you once again select the menu Tools and this time select the menuitem Load Background (or press Ctrl-L). A dialog box appears where you can choose a bmp-file you want to use as a background. When you selects OK in the dialog box the background is shown in the Sample Homepage-window.
When you want to use your tag you click on the Generate Body Tag-button (if visible). Then you can either press Ctrl-T to copy the whole body tag or you can select all the text in the Body Tag-window and press Ctrl-C. Finally you can modify the text in the Body Tag-window (ex. delete the path for a picture), and the press Ctrl-T.
If you have made a great scheme you want to reuse another time, then select the menu Schemes, and then Save A Scheme – or simply press Ctrl-S. Another dialog box will appears, where you have to give your color file a name. Remember that the extension hcp is added to the file if you don’t write it yourself. When you want to open a previously saved scheme you press Ctrl-O or select Schemes, Load A Scheme.
Thanks to The Color Manipulation Device 2.0 from Flux for the inspiration.
If you find any bugs in the program or if you have any ideas for further improvements then don’t hesitate to contact me
Updated in version 1.4: (Released August 13 ’96)
- HTML Color Picker has changed to The RGB Color Box
- And… (surprise) some minor design changes.
Updated in version 1.3: (Released July 26 ’96)
- Quicker center text
- Load Background code update
Updated in version 1.21: (Released July 20 ’96)
- Confirm for Reset All-command
- Centers text correctly in Sample Homepage-window
- Added shortcuts for all functions
- Again some minor design changes
Updated in version 1.2: (Released July 17 ’96)
- Added Quick
- Change Tags in sample
- Minor design
Updated in version 1.1: (Released July 16 ’96)
- Tiled bitmaps (bmp)
- Shortcut for Load Background (Ctrl-L) added
- Minor design changes
### Downloads
[Download RGB Color Box 1.4](/files/rcb.zip) (right click on filename and select ‘Save Target As…’)

---
### Rydop ($4.99)
[Visit](https://rydop.theill.com)
One-time purchase. No subscription. Your photos never leave your phone.
A thousand photos of the same moment? Rydop finds the series, duplicates and large videos filling up your iPhone – and lets you keep the best shot. You decide what gets deleted.
### Keep the best
- Series shot seconds apart are grouped together
- Rydop suggests the sharpest, best-lit photo
- The rest are pre-selected – you can always change that
### Find what takes up space
- Duplicates – including copies saved from chats at lower resolution
- Screenshots and screen recordings – oldest first
- Large videos – sorted by size
- Blurry and dark photos
### Swipe
- Go through your camera roll one month at a time
- Left to delete, right to keep
- Undo with one tap – Rydop remembers where you left off
### Delete safely
- Favourites and edited photos are never pre-selected
- iOS asks you to confirm every delete
- Everything stays in Recently Deleted for 30 days
### Your photos are yours
Rydop looks through your photos right on the phone. Nothing is uploaded, the app doesn't use the internet, and there's no account, no ads and no in-app purchases.
### A small price, made to last.
Free apps come and go. Rydop costs $4.99, once – a small price that keeps it going: every future update, and support straight from the person who made it. No subscription, no ads, and your photos stay on your iPhone.
### Get it
Rydop is currently in App Store review and will be available soon.
- Website: [rydop.theill.com](https://rydop.theill.com)

---
### Share a slot
[Visit](https://shareaslot.com)
Shareaslot is a simple tool to find the best time for everyone to meet. It allows users to schedule meetings with groups without the need for accounts.
### Key Features:
- **No account needed:** Create and vote on polls instantly.
- **Mobile friendly:** Works beautifully on any device.
- **Lightning fast:** Find a slot in seconds and share instantly.
- **100% Free:** No premium tiers, no limits, no ads.
- **Privacy first:** No tracking or data selling.
### How it works:
1. **Pick your dates:** Select the days that work for you.
2. **Share the link:** Send the unique poll link to your group.
3. **Find the best time:** See availability at a glance.
.png)
---
### ShoutSMS
[Visit](https://www.shoutsmshq.com/)
Based on a need for sending group text messages which originates from another mobile phone number so it's possible for recipients to reply back. Initially made for a Microsoft event where they needed to inform participants about changes in venues etc and where the informer would like to get instant feedback back through SMS.

---
### SikkerQR ($4.99)
[Visit](https://sikkerqr.theill.com)
See where a QR code leads before you tap. No ads, no subscription.
The iPhone camera opens QR codes after a glance at a tiny banner. SikkerQR shows you the whole address in large type instead, and tells you when a link looks like a scam. Nothing opens until you tap.
### Check before you open
- The domain in large type, so you can see where you’ll end up
- The full link and what the code does: open a site, join Wi-Fi, call, send a text or an email
- Nothing opens, joins or dials until you tap
### Warnings on your phone
- Addresses that look like a well-known site, such as “rnicrosoft” for “microsoft”
- Mixed alphabets, such as a Cyrillic а that looks like an ordinary a
- Well-known names like PayPal, your bank or a parcel service in someone else’s address
- Short links, IP numbers and http without s
- Words about logging in and paying on sites we don’t know
- Every warning comes with a plain-language reason
- The check runs on your iPhone, without the internet
### Read all kinds of codes
- QR, barcodes (EAN/UPC), Data Matrix and Aztec
- From the camera or from a photo or screenshot
- Join Wi-Fi, add contacts and events, search the web for a product number
### Make your own codes
- QR codes for a link, Wi-Fi, a contact card or text
- Put your logo in the middle
- Save, share or print in sharp quality
### Yours stays yours
No account, no ads, no tracking. History stays on your iPhone, and you can switch it off.
SikkerQR says “Looks suspicious” or “Nothing suspicious found” – never “safe”. No list catches everything, so always check that it’s the site you expect.
### A small price, made to last.
Free apps come and go. SikkerQR costs $4.99, once – a small price that keeps it going: every future update, and support straight from the person who made it. No subscription, no ads, and your scans stay on your iPhone.
### Get it
SikkerQR is currently in App Store review and will be available soon.
- Website: [sikkerqr.theill.com](https://sikkerqr.theill.com)

---
### Skan ($4.99)
[Visit](https://apps.apple.com/app/skan-pdf-scanner/id6815136145)
Skan turns paper into sharp, searchable PDFs. No account, no ads, no subscription – and nothing leaves your iPhone.
### Point, scan, done
- Skan finds the edges and takes the photo when the page is steady
- Scan many pages in a row, reorder them and rotate them into place
- Filters that make text crisp: Document, Grey, Colour or Original
### Text you can search
- Text recognition in Danish and English – right on your phone
- Search all your scans for a word, a name or an amount
- PDFs include a text layer, so you can search and copy text anywhere
- Skan names your documents for you, e.g. “Invoice – Harbour Power – 2026-09”
### Receipts and bookkeeping
- Skan finds the total, VAT and date on receipts and invoices
- Export all receipts as CSV for Excel, Numbers or your accounting app
- Export tables from a scan as CSV
### Sign and share
- Draw your signature once and place it on any page
- Share as PDF – or with a password
- Siri and Shortcuts: “Scan with Skan”
### Your paper is yours
Everything – images, text recognition and PDFs – happens on your iPhone. There is no server, no account and no tracking.
### A small price, made to last.
Free apps come and go. Skan costs $4.99, once – a small price that keeps it going: every future update, and support straight from the person who made it. No subscription, no ads, and your documents stay on your iPhone.
### Get it
- [Download Skan on the App Store](https://apps.apple.com/app/skan-pdf-scanner/id6815136145) – one-time purchase, no subscription
- Website: [skan.theill.com](https://skan.theill.com)

---
### Slingshot
[Visit](https://github.com/theill/slingshot)
Slingshot provides you with a shell-integrated ability to upload a file or folder to a configured FTP server. Simply click what you want to upload and select "Publish" to upload file and get a unique URL to your uploaded file.
 ### Features
- Upload files and folders to a configured FTP server
- Get a unique URL to your uploaded file
- Shell-integrated
### Download
You're able to download the MSI package from GitHub releases.
slingshot.msi
### Source Code
The source code is open sourced and you can find it on [GitHub](https://github.com/theill/slingshot)

---
### Square Town
[Visit](https://square.pov.town)
Square Town is a live, 3D favicon wall at [square.pov.town](https://square.pov.town). Paste a URL, pick any empty cell, pay **$1 once** — and your site's favicon lives there. No accounts, no uploads, no subscriptions.

**See it in two minutes.** The walkthrough below shows how to get around, claim a free square, kiss an icon and what an eviction costs.
[Watch on YouTube: how to use Square Town](https://youtu.be/JcWqQQjZIOM)
**The rules are the game.** Anyone can evict a square by paying double what its owner paid. The 4×4 Throne in the middle starts at $100 and doubles with every eviction. Icons nobody has kissed for 90 days fade to grayscale — and anyone can kiss any icon, for free. The wall only grows (16×16 → 32×32 → … → 1024×1024) when the live area is 70 % full.
**It's a town, not a grid.** Tilt into 3D and every favicon becomes a tower whose height is its click count, tinted with the icon's own colours. Empty cells grow trees and pool into lakes, the sun follows your local time, and windows light up one by one after dark. A little director runs the town's life: birds, a hot-air balloon, a cat, ducks, a very slow tortoise, a delivery van after every purchase, rain and rainbows that mirror the real weather where you are, fireworks after dark — and rarer visitors. The [field guide](https://square.pov.town/field-guide) lists all of them. Everything happens live, on every open browser, over WebSockets.
Built by one developer on Cloudflare's free tier: a single Worker, D1, one Durable Object, three.js in the browser, Stripe Checkout for payments.

---
### StartGrid
[Visit](https://startgrid.one)
StartGrid is a minimalist link collection platform, reminiscent of the classic del.icio.us but designed to create a simple landing page with your most frequently used links for quick access. Here's what makes StartGrid stand out:
1. **Streamlined interface**: StartGrid offers a clean, no-frills user interface that prioritizes quick access to your essential links without unnecessary distractions.
2. **Quick access landing page**: Set up a simple landing page with your most used links, accessible from any device with an internet connection.
3. **Privacy-focused**: StartGrid emphasizes user privacy, with options to keep your links private or share them selectively.
4. **No social features**: Unlike many modern link management services, StartGrid doesn't include social networking features, maintaining its core purpose as a personal tool for quick access to your favorite sites.
5. **Lightweight and fast**: With its minimalist approach, StartGrid loads quickly and uses minimal system resources.
StartGrid is the ideal solution for users who want a straightforward, efficient way to access their most important links without the complexity and feature bloat of more elaborate platforms. It's perfect for anyone who values a clean, organized approach to accessing web resources quickly.

---
### Stemning
[Visit](https://stemning.ai)
[Buy](https://stemning.ai/pricing)
Stemning.ai is an AI-powered photo mood transformer that turns a single image into a whole collection of styled moments. Upload a photo and choose from 65+ moods — from seasonal themes like Christmas, Halloween, and Spring, to life events like Weddings, Graduations, and Birthdays.
The AI keeps your subject recognizable while transforming the lighting, styling, and atmosphere of each image. Download results in full 4K resolution.
**Key features**
- 65+ moods and styles to choose from
- Subject identity is preserved across all transformations
- Full 4K resolution downloads
- Bring Your Own Key (BYOK) support for Gemini or xAI — use it free with your own API key
- No subscription required — pay with credits or use your own key
- Sign in with Google to get started with 1 free credit
**Pricing**
- Free forever with your own API key (3 active photos)
- BYOK Unlimited — $4.99 one-time to remove the photo cap
- Credit Pack — $9.99 for 20 credits (no API key needed)
Stemning is Danish for "mood" — and that's exactly what it delivers.

---
### Stille ($4.99)
[Visit](https://apps.apple.com/app/stille-ten-minute-meditation/id6812650938)
Ten minutes. Nothing to figure out.
Stille is a small, quiet place in a busy day. Tap Meditate and settle into ten minutes of gentle instrumental music, softly moving water, and space to simply be.
No lessons to browse. No guided voice to follow. Just a little time for yourself.
### Start with one tap
Every meditation lasts ten minutes. Pause and resume whenever you need to, or end early. Keep the countdown visible, or hide it and let the music mark the time.
### Take your quiet anywhere
Three instrumental compositions are included with the app and play entirely offline. Listen with your screen locked, on a flight, or wherever you find a moment to pause.
### Watch the water. Or close your eyes
Soft water ripples, stones, and a drifting leaf create a calm place to rest your gaze. Gentle touches bring the scene to life. A soft gong marks the end of your session.
### See the time you've given yourself
Your stats show completed sessions, total meditation time, and average session length. Your history stays on your iPhone.
### A little space. Just for you
No account. No ads. No subscriptions. No tracking.
Between tasks, after a busy morning, or before the day begins: open Stille, tap Meditate, and take your next ten minutes for yourself.
### A small price, made to last.
Free apps come and go. Stille costs $4.99, once – a small price that keeps it going: every future update, and support straight from the person who made it. No subscription, no ads, and no account.
### Get it
- [Download Stille on the App Store](https://apps.apple.com/app/stille-ten-minute-meditation/id6812650938) – one-time purchase, no subscription
- Website: [stille.theill.com](https://stille.theill.com)

---
### Tic-Tac-🦶🏼
A simple and free tic-tac-toe online game with custom emojis and friend player mode
Tic-tac-toe is a one of the most popular games in the world. It is a simple game for two players, X and O, who take turns marking the spaces in a 3×3 grid. The player who succeeds in placing three of their marks in a horizontal, vertical, or diagonal row is the winner.
This version of the computer game is a simple and free implementation with custom emojis and friend player mode.
### How to play
- Click on the "New game" button to start a new game.
- Click on the board to place your mark (🦶🏼 or 👟).
- Play with a friend and have fun!
### Rules
- The game is played on a grid that's 3 squares by 3 squares.
- You are 🦶🏼, your friend is 👟. Players take turns putting their marks in empty squares.
- The first player to get 3 of their marks in a row (up, down, across, or diagonally) is the winner.
- When all 9 squares are full, the game is over. If no player has 3 marks in a row, the game ends in a tie.

---
### Transmit
[Visit](https://github.com/theill/transmit)
Allow customers to share huge files with ease.

---
### Twpie
[Visit](https://github.com/theill/twpie-ios)
Twpie is a simple Twitter client. Only able to POST tweets i.e. it is not possible to read existing tweets, following users, etc. However, since it has a limited feature set, it is the worlds fastest Twitter posting client for the iPhone and sending often used messages are as easy as pie

---
### Typing Trainer
[Visit](https://commanigy.com/tools/typing-trainer)
This is a minimalist typing trainer designed to help you enter a state of flow. It fetches interesting facts from Wikipedia, so you learn something new with every test you take.
## How to use
Simply start typing the text you see. The cursor guides you. Mistakes glow red. Focus on rhythm and accuracy.
## Features
- Wikipedia-sourced content
- Multi-language support
- WPM & Accuracy tracking
- Delightful sound effects
.png)
---
### Udfyld ($4.99)
[Visit](https://apps.apple.com/app/udfyld/id6815570395)
The school form, the lease, the insurance claim. You just need to fill it in, sign it and send it back. Udfyld does that in a minute – no account, no subscription.
### Fill in forms
- Real form fields are filled directly: text, check boxes, radio buttons and lists.
- Flat PDFs without fields: tap where you want to write. The text sits neatly on the line.
- Add a date, a tick or a cross with one tap.
### Sign
- Draw your signature and initials once with your finger.
- Place them and resize them where you need to sign.
- Your signature is only stored on your iPhone.
### Pages
- Move, rotate, duplicate, delete and extract pages.
- Merge several PDFs into one file.
- Turn photos into a PDF.
### Compress
- Make big PDFs small enough to email: Small, Medium or Original.
- See the new size before you save, e.g. 12.4 MB → 1.8 MB.
- Pages with text are never turned into images, so text stays sharp.
### Save and share
- The original is never touched: Udfyld saves a copy unless you choose to overwrite.
- Share with Mail, Messages, AirDrop or save to Files.
- Lock the fields so the recipient sees exactly the same, and add a password if you like.
- Open straight from Files, Mail and Safari with "Open in Udfyld".
### Your files stay with you
No account, no ads, no subscription. Udfyld sends nothing over the internet: everything happens on your iPhone.
### A small price, made to last.
Free apps come and go. Udfyld costs $4.99, once – a small price that keeps it going: every future update, and support straight from the person who made it. No subscription, no ads, and your files stay on your iPhone.
### Get it
- [Download Udfyld on the App Store](https://apps.apple.com/app/udfyld/id6815570395) – one-time purchase, no subscription
- Website: [udfyld.theill.com](https://udfyld.theill.com)

---
### Wallpapery ($4.99)
[Visit](https://www.wallpaperyapp.com/)
Wallpapery is a macOS application designed to enhance desktop aesthetics by automatically downloading and changing wallpapers several times a day. It offers a curated selection of hand-picked designer wallpapers, ensuring a fresh and visually appealing desktop experience.
Users can suggest new wallpapers and designers, contributing to the app's continuously growing library.
Wallpapery aims to provide a dynamic and personalized desktop environment for Mac users.

---
## Labs projects
### AtomPay
[Visit](https://www.atompay.com/)
> *AtomPay: Powering the internet’s smallest — and smartest — payments. Launching soon.*
We're excited to announce **AtomPay** — the soon-to-launch service that finally makes true micro-payments possible.
AtomPay is built for the smallest value exchanges online. Whether you're selling digital content, enabling pay-per-use features, or supporting micro-donations, AtomPay lets users pay as little as **25¢** — or even less — without the high fees that kill most micro-payment ideas.

## How does it work?
Instead of charging every tiny transaction directly (and losing most of it to fees), AtomPay uses a smart wallet model. Users top up their AtomPay balance once, then transfer small amounts to creators, apps, or friends instantly and with almost no friction. No more “minimum charge” headaches or surprise fees — just seamless, pay-as-you-go value exchange.
## Why AtomPay?
- **Unlock new revenue streams:** Monetize articles, videos, downloads, or features that were too cheap for credit cards.
- **Reach new audiences:** Lower the barrier for impulse purchases and casual support.
- **Reduce transaction fees:** Aggregate payments, not costs.
- **Build loyalty:** Let users pay only for what they use, when they want.
- **Go global:** Micro-payments work across borders, for everyone.
---
### Blog to Email
Blog to Email is a future **simple, free service** that automatically converts your RSS or Atom feed blog posts into beautifully formatted email newsletters.

## What It Does
This service monitors your blog's RSS/Atom feed and:
- ✉️ **Automatically detects** new blog posts
- 🎨 **Converts** the content into clean, email-friendly HTML
- 📧 **Delivers** the posts directly to your subscribers' inboxes
- 🚀 **No setup complexity** - just provide your feed URL
## Key Features
### Simple Setup
- Add your RSS or Atom feed URL
- Configure basic email settings
- Start sending in minutes
### Free Forever
- No credit card required
- No hidden fees
- No subscriber limits
### Smart Formatting
- Preserves your blog's formatting
- Responsive email design
- Works with all major email clients
### Automatic Delivery
- Monitors your feed for new posts
- Sends immediately when new content is detected
- Reliable delivery infrastructure
## Perfect For
- 📝 Personal bloggers who want to reach readers via email
- 🏢 Small businesses sharing updates
- 📰 Content creators building their audience
- 🎓 Educators sharing course materials
## How It Works
1. **Connect** your RSS/Atom feed
2. **Customize** your email template (optional)
3. **Add** your subscriber list
4. **Relax** - we handle the rest automatically
## Technical Details
- Supports both RSS 2.0 and Atom feed formats
- Handles images, links, and basic HTML formatting
- GDPR compliant
- Built with reliability and deliverability in mind
---
*Transform your blog posts into emails effortlessly. Start engaging your audience where they are - in their inbox.*
---
### Bucket!
[Visit](https://github.com/theill/bucket)
Windows GTD app - focus on one thing at a time
---
### DoGood

DoGood is a project that aims to help people do good things for others. The idea is to create a platform where people can share their ideas and help each other out. The project is currently in the planning phase and we are looking for people who want to help out.
---
### LIFESTYLEapps
Eat healthier, lose weight, get more fit and follow-through on daily tasks.
---
### Observer
Track changes to your sites
---
### PosttApp
[Visit](https://github.com/theill/posttapp)
Mac front-end to ge.tt allowing you to drag a file to your menubar to have it uploaded. Very similar to how the CloudApp and Droplr works
---
### Povtown
/ pɔɪnt ɒv,(ə)v vjuː taʊn /
You are standing at the edge of the water, looking out over the ocean. You see a ship far out in the horizon and are wondering what's the view like from that ship...
### Features
- Upload files and folders to a configured FTP server
- Get a unique URL to your uploaded file
- Shell-integrated
### Download
You're able to download the MSI package from GitHub releases.
slingshot.msi
### Source Code
The source code is open sourced and you can find it on [GitHub](https://github.com/theill/slingshot)

---
### Square Town
[Visit](https://square.pov.town)
Square Town is a live, 3D favicon wall at [square.pov.town](https://square.pov.town). Paste a URL, pick any empty cell, pay **$1 once** — and your site's favicon lives there. No accounts, no uploads, no subscriptions.

**See it in two minutes.** The walkthrough below shows how to get around, claim a free square, kiss an icon and what an eviction costs.
[Watch on YouTube: how to use Square Town](https://youtu.be/JcWqQQjZIOM)
**The rules are the game.** Anyone can evict a square by paying double what its owner paid. The 4×4 Throne in the middle starts at $100 and doubles with every eviction. Icons nobody has kissed for 90 days fade to grayscale — and anyone can kiss any icon, for free. The wall only grows (16×16 → 32×32 → … → 1024×1024) when the live area is 70 % full.
**It's a town, not a grid.** Tilt into 3D and every favicon becomes a tower whose height is its click count, tinted with the icon's own colours. Empty cells grow trees and pool into lakes, the sun follows your local time, and windows light up one by one after dark. A little director runs the town's life: birds, a hot-air balloon, a cat, ducks, a very slow tortoise, a delivery van after every purchase, rain and rainbows that mirror the real weather where you are, fireworks after dark — and rarer visitors. The [field guide](https://square.pov.town/field-guide) lists all of them. Everything happens live, on every open browser, over WebSockets.
Built by one developer on Cloudflare's free tier: a single Worker, D1, one Durable Object, three.js in the browser, Stripe Checkout for payments.

---
### StartGrid
[Visit](https://startgrid.one)
StartGrid is a minimalist link collection platform, reminiscent of the classic del.icio.us but designed to create a simple landing page with your most frequently used links for quick access. Here's what makes StartGrid stand out:
1. **Streamlined interface**: StartGrid offers a clean, no-frills user interface that prioritizes quick access to your essential links without unnecessary distractions.
2. **Quick access landing page**: Set up a simple landing page with your most used links, accessible from any device with an internet connection.
3. **Privacy-focused**: StartGrid emphasizes user privacy, with options to keep your links private or share them selectively.
4. **No social features**: Unlike many modern link management services, StartGrid doesn't include social networking features, maintaining its core purpose as a personal tool for quick access to your favorite sites.
5. **Lightweight and fast**: With its minimalist approach, StartGrid loads quickly and uses minimal system resources.
StartGrid is the ideal solution for users who want a straightforward, efficient way to access their most important links without the complexity and feature bloat of more elaborate platforms. It's perfect for anyone who values a clean, organized approach to accessing web resources quickly.

---
### Stemning
[Visit](https://stemning.ai)
[Buy](https://stemning.ai/pricing)
Stemning.ai is an AI-powered photo mood transformer that turns a single image into a whole collection of styled moments. Upload a photo and choose from 65+ moods — from seasonal themes like Christmas, Halloween, and Spring, to life events like Weddings, Graduations, and Birthdays.
The AI keeps your subject recognizable while transforming the lighting, styling, and atmosphere of each image. Download results in full 4K resolution.
**Key features**
- 65+ moods and styles to choose from
- Subject identity is preserved across all transformations
- Full 4K resolution downloads
- Bring Your Own Key (BYOK) support for Gemini or xAI — use it free with your own API key
- No subscription required — pay with credits or use your own key
- Sign in with Google to get started with 1 free credit
**Pricing**
- Free forever with your own API key (3 active photos)
- BYOK Unlimited — $4.99 one-time to remove the photo cap
- Credit Pack — $9.99 for 20 credits (no API key needed)
Stemning is Danish for "mood" — and that's exactly what it delivers.

---
### Stille ($4.99)
[Visit](https://apps.apple.com/app/stille-ten-minute-meditation/id6812650938)
Ten minutes. Nothing to figure out.
Stille is a small, quiet place in a busy day. Tap Meditate and settle into ten minutes of gentle instrumental music, softly moving water, and space to simply be.
No lessons to browse. No guided voice to follow. Just a little time for yourself.
### Start with one tap
Every meditation lasts ten minutes. Pause and resume whenever you need to, or end early. Keep the countdown visible, or hide it and let the music mark the time.
### Take your quiet anywhere
Three instrumental compositions are included with the app and play entirely offline. Listen with your screen locked, on a flight, or wherever you find a moment to pause.
### Watch the water. Or close your eyes
Soft water ripples, stones, and a drifting leaf create a calm place to rest your gaze. Gentle touches bring the scene to life. A soft gong marks the end of your session.
### See the time you've given yourself
Your stats show completed sessions, total meditation time, and average session length. Your history stays on your iPhone.
### A little space. Just for you
No account. No ads. No subscriptions. No tracking.
Between tasks, after a busy morning, or before the day begins: open Stille, tap Meditate, and take your next ten minutes for yourself.
### A small price, made to last.
Free apps come and go. Stille costs $4.99, once – a small price that keeps it going: every future update, and support straight from the person who made it. No subscription, no ads, and no account.
### Get it
- [Download Stille on the App Store](https://apps.apple.com/app/stille-ten-minute-meditation/id6812650938) – one-time purchase, no subscription
- Website: [stille.theill.com](https://stille.theill.com)

---
### Tic-Tac-🦶🏼
A simple and free tic-tac-toe online game with custom emojis and friend player mode
Tic-tac-toe is a one of the most popular games in the world. It is a simple game for two players, X and O, who take turns marking the spaces in a 3×3 grid. The player who succeeds in placing three of their marks in a horizontal, vertical, or diagonal row is the winner.
This version of the computer game is a simple and free implementation with custom emojis and friend player mode.
### How to play
- Click on the "New game" button to start a new game.
- Click on the board to place your mark (🦶🏼 or 👟).
- Play with a friend and have fun!
### Rules
- The game is played on a grid that's 3 squares by 3 squares.
- You are 🦶🏼, your friend is 👟. Players take turns putting their marks in empty squares.
- The first player to get 3 of their marks in a row (up, down, across, or diagonally) is the winner.
- When all 9 squares are full, the game is over. If no player has 3 marks in a row, the game ends in a tie.

---
### Transmit
[Visit](https://github.com/theill/transmit)
Allow customers to share huge files with ease.

---
### Twpie
[Visit](https://github.com/theill/twpie-ios)
Twpie is a simple Twitter client. Only able to POST tweets i.e. it is not possible to read existing tweets, following users, etc. However, since it has a limited feature set, it is the worlds fastest Twitter posting client for the iPhone and sending often used messages are as easy as pie

---
### Typing Trainer
[Visit](https://commanigy.com/tools/typing-trainer)
This is a minimalist typing trainer designed to help you enter a state of flow. It fetches interesting facts from Wikipedia, so you learn something new with every test you take.
## How to use
Simply start typing the text you see. The cursor guides you. Mistakes glow red. Focus on rhythm and accuracy.
## Features
- Wikipedia-sourced content
- Multi-language support
- WPM & Accuracy tracking
- Delightful sound effects
.png)
---
### Udfyld ($4.99)
[Visit](https://apps.apple.com/app/udfyld/id6815570395)
The school form, the lease, the insurance claim. You just need to fill it in, sign it and send it back. Udfyld does that in a minute – no account, no subscription.
### Fill in forms
- Real form fields are filled directly: text, check boxes, radio buttons and lists.
- Flat PDFs without fields: tap where you want to write. The text sits neatly on the line.
- Add a date, a tick or a cross with one tap.
### Sign
- Draw your signature and initials once with your finger.
- Place them and resize them where you need to sign.
- Your signature is only stored on your iPhone.
### Pages
- Move, rotate, duplicate, delete and extract pages.
- Merge several PDFs into one file.
- Turn photos into a PDF.
### Compress
- Make big PDFs small enough to email: Small, Medium or Original.
- See the new size before you save, e.g. 12.4 MB → 1.8 MB.
- Pages with text are never turned into images, so text stays sharp.
### Save and share
- The original is never touched: Udfyld saves a copy unless you choose to overwrite.
- Share with Mail, Messages, AirDrop or save to Files.
- Lock the fields so the recipient sees exactly the same, and add a password if you like.
- Open straight from Files, Mail and Safari with "Open in Udfyld".
### Your files stay with you
No account, no ads, no subscription. Udfyld sends nothing over the internet: everything happens on your iPhone.
### A small price, made to last.
Free apps come and go. Udfyld costs $4.99, once – a small price that keeps it going: every future update, and support straight from the person who made it. No subscription, no ads, and your files stay on your iPhone.
### Get it
- [Download Udfyld on the App Store](https://apps.apple.com/app/udfyld/id6815570395) – one-time purchase, no subscription
- Website: [udfyld.theill.com](https://udfyld.theill.com)

---
### Wallpapery ($4.99)
[Visit](https://www.wallpaperyapp.com/)
Wallpapery is a macOS application designed to enhance desktop aesthetics by automatically downloading and changing wallpapers several times a day. It offers a curated selection of hand-picked designer wallpapers, ensuring a fresh and visually appealing desktop experience.
Users can suggest new wallpapers and designers, contributing to the app's continuously growing library.
Wallpapery aims to provide a dynamic and personalized desktop environment for Mac users.

---
## Labs projects
### AtomPay
[Visit](https://www.atompay.com/)
> *AtomPay: Powering the internet’s smallest — and smartest — payments. Launching soon.*
We're excited to announce **AtomPay** — the soon-to-launch service that finally makes true micro-payments possible.
AtomPay is built for the smallest value exchanges online. Whether you're selling digital content, enabling pay-per-use features, or supporting micro-donations, AtomPay lets users pay as little as **25¢** — or even less — without the high fees that kill most micro-payment ideas.

## How does it work?
Instead of charging every tiny transaction directly (and losing most of it to fees), AtomPay uses a smart wallet model. Users top up their AtomPay balance once, then transfer small amounts to creators, apps, or friends instantly and with almost no friction. No more “minimum charge” headaches or surprise fees — just seamless, pay-as-you-go value exchange.
## Why AtomPay?
- **Unlock new revenue streams:** Monetize articles, videos, downloads, or features that were too cheap for credit cards.
- **Reach new audiences:** Lower the barrier for impulse purchases and casual support.
- **Reduce transaction fees:** Aggregate payments, not costs.
- **Build loyalty:** Let users pay only for what they use, when they want.
- **Go global:** Micro-payments work across borders, for everyone.
---
### Blog to Email
Blog to Email is a future **simple, free service** that automatically converts your RSS or Atom feed blog posts into beautifully formatted email newsletters.

## What It Does
This service monitors your blog's RSS/Atom feed and:
- ✉️ **Automatically detects** new blog posts
- 🎨 **Converts** the content into clean, email-friendly HTML
- 📧 **Delivers** the posts directly to your subscribers' inboxes
- 🚀 **No setup complexity** - just provide your feed URL
## Key Features
### Simple Setup
- Add your RSS or Atom feed URL
- Configure basic email settings
- Start sending in minutes
### Free Forever
- No credit card required
- No hidden fees
- No subscriber limits
### Smart Formatting
- Preserves your blog's formatting
- Responsive email design
- Works with all major email clients
### Automatic Delivery
- Monitors your feed for new posts
- Sends immediately when new content is detected
- Reliable delivery infrastructure
## Perfect For
- 📝 Personal bloggers who want to reach readers via email
- 🏢 Small businesses sharing updates
- 📰 Content creators building their audience
- 🎓 Educators sharing course materials
## How It Works
1. **Connect** your RSS/Atom feed
2. **Customize** your email template (optional)
3. **Add** your subscriber list
4. **Relax** - we handle the rest automatically
## Technical Details
- Supports both RSS 2.0 and Atom feed formats
- Handles images, links, and basic HTML formatting
- GDPR compliant
- Built with reliability and deliverability in mind
---
*Transform your blog posts into emails effortlessly. Start engaging your audience where they are - in their inbox.*
---
### Bucket!
[Visit](https://github.com/theill/bucket)
Windows GTD app - focus on one thing at a time
---
### DoGood

DoGood is a project that aims to help people do good things for others. The idea is to create a platform where people can share their ideas and help each other out. The project is currently in the planning phase and we are looking for people who want to help out.
---
### LIFESTYLEapps
Eat healthier, lose weight, get more fit and follow-through on daily tasks.
---
### Observer
Track changes to your sites
---
### PosttApp
[Visit](https://github.com/theill/posttapp)
Mac front-end to ge.tt allowing you to drag a file to your menubar to have it uploaded. Very similar to how the CloudApp and Droplr works
---
### Povtown
/ pɔɪnt ɒv,(ə)v vjuː taʊn /
You are standing at the edge of the water, looking out over the ocean. You see a ship far out in the horizon and are wondering what's the view like from that ship...
 Gazing around you find more interesting places and you wonder how cool it would be, if you zoom into these places and see what they are seeing.
Povtown is a brand new community where people are offering to share their current view with others.
---
### Protect.APP
[Visit](https://github.com/theill/protectdotapp)
This service helps .NET developers of commercial software to protect their code from decompilation.
### Problem
Developers doing commercial software on .NET will need to obfuscate their code before sending to customers. This is needed because it’s very easy to decompile .NET applications.
Shareware developers face a challenge when they need to either use a obfuscator because they need to carefully consider what, where and how to obfuscate their code. It’s time a developer would rather use doing actual development.
Semi-automatic solutions exists but they are expensive typically around $2000.
### Solution
I propose a different solution to this problem. I protect a given .NET application for a small fee allowing developers to focus on building great applications. Each time a developer wants to release a new version of their product, they use our service.
---
## Blog posts
### When the interface stops mattering (Feb 19, 2026)
Beside my regular job, I've been building software solo for a long time. One person, own codebase, shipping features, fixing bugs, talking to users — the whole deal. And for most of that time, the interface was everything. The UI *was* the product. You'd spend hours agonizing over a button label, a modal flow, a color choice. If someone couldn't figure out how to use it within ten seconds, you lost them.
That mental model is quietly breaking down, and I think it's one of the most interesting shifts happening in software right now.
### The interface used to be the gatekeeper
Think about what an interface really does. It sits between your user and the actual capability of your product. The capability is the valuable thing — the data, the logic, the integration, the thing you spent months building. The interface is just the door.
For most of software history, the door had to be beautiful, obvious, and polished. If the door was confusing, users bounced. If it was ugly, they didn't trust you. The interface shaped the entire perception of quality.
So we designed. We iterated. We A/B tested shades of blue on a CTA button. We rewrote onboarding flows five times. We hired designers. We obsessed.
And it made sense — because that was the *only* way in.
### Now there are a thousand doors
With AI coding tools and agents becoming genuinely good, the interface layer is fragmenting fast. Users can now spin up a custom tool that taps your API and shows them exactly what *they* need in exactly the way *they* want it — in an afternoon. No designer required. No waiting for a feature request to climb your backlog. Just "vibe code" it.
I've done this myself, more times than I can count. Someone asks for a feature in [knipsmig.com](https://knipsmig.com) that's too niche for the core product — the kind of thing that matters deeply to three event photographers on the planet. Old me would have filed it as "won't do" and moved on. New me thinks: does the API support this? Can they, or I, just build a thin client on top? Often the answer is yes.
The broader point is this: as a SaaS builder, you no longer control how your product will be consumed. An AI agent might hit your API on behalf of a user who never opens your app. Someone might build a wrapper that serves a niche you never thought of. A power user might write their own dashboard because yours doesn't show the one metric they care about.
That's not a threat. That's your product becoming infrastructure.
### What actually holds its value
When I think about knipsmig, the thing that's genuinely hard to replicate isn't the UI. It's the upload pipeline, the photo processing, the smart sharing logic, the event structure, the data model behind a digital photobook. Those things took time to figure out and refine. The interface on top of it? Honestly, I could rebuild that in a week with a decent AI assistant.
This reframes how I think about where to invest. If your competitive moat is a clever UI, that moat is getting shallower by the month. If your moat is the underlying capability — the data, the integrations, the domain logic — that's much harder to replicate.
It also changes what a good API means. I've always put a lot of effort into the APIs because, first of all I'm a developer myself and love a nice API but also because it just makes it possible to make fewer *core* features .. and I love a slim core. I think of it as one of the primary surfaces of the product even more today. It's how AI agents will interact with your service. It's how power users will extend it. It's how the next wave of "interfaces" — whatever they look like — will connect to what you've built.
### Build the capability. Let the interfaces be disposable.
I'm 48 and have been shipping software since I was a teenager. I've watched a lot of "the next big thing" come and go. But this one feels different, because it's not replacing what we do — it's changing the layer at which we compete.
If you're building a SaaS product, make the service rock solid. Document the API obsessively. Think about what your product's unique capability really is, stripped of any interface. Then build *that* as durably as you can.
The UI? Ship it, improve it, keep it functional. But don't mistake it for the product. In 2026, it increasingly isn't.
Someone could fork your interface tomorrow. They can't fork ten years of domain expertise and the data that comes with it. Yet.
---
### Finally did a test ride with FSD in Denmark (Jan 08, 2026)
Yesterday, I drove to Odense for a test ride at Tesla. They showcased the Full Self-Driving (FSD) feature, and I had read extensively about it and watched nearly every video available. I needed to experience it for myself.
It was amazing. Although it was snowing lightly, Tesla was concerned that the system might disengage too often, but we got to try it anyway. The car performed exceptionally well with no issues at all.
The smoothness and confidence made it feel less like a tech demo and more like riding with someone who has driven that route a thousand times.
What truly impressed me was how natural it felt. The car handled lane changes, merges, and even snowy conditions effortlessly.
The fully self-driving car is a solved problem. End of story. You can argue when the steering wheel will be gone and when you can sleep in the car, sure .. but as someone who spends most of his time coding and building products, this feature sheet has moved from in development to done for sure. Done-done coming up.
---
### Add seasonal joy to your site with generative AI (Dec 07, 2025)
We all know that feeling - visiting a website during the holidays and seeing a little festive touch that makes you smile. Maybe it's snowflakes falling on the hero image, pumpkins appearing in October, or hearts floating around on Valentine's Day. These small details create emotional connections with users and show that there's a human touch behind the pixels.
But here's the problem: creating seasonal variations of your website's imagery is **tedious**. You either need to hire a designer every time a holiday rolls around, or you end up using the same tired stock photos everyone else is using.
Or do you?!
### Use Generative AI
What if you could take your existing brand imagery and automatically generate dozens of seasonal variations with a single command? That's exactly what modern image generation APIs make possible.
The idea is simple:
1. Take your existing hero image, product photos, or illustrations
2. Use AI to transform them into seasonal variations while keeping the core subject intact
3. Deploy them automatically based on the calendar
No Figma, Sketch or Photoshop skills required. No designer bottleneck. Just your original image and a bit of automation.
### Why bother?
You might be wondering if seasonal imagery is worth the effort. Consider this:
- **Emotional engagement**: Seasonal content creates a sense of timeliness and relevance
- **Return visitors notice**: Users who come back will see something fresh
- **Marketing alignment**: Your visuals can match your seasonal campaigns
- **Competitive edge**: Most sites don't bother—yours will stand out
- **It's fun**: Adding a bit of whimsy to your site makes the web a better place
A great example of this in action is [knipsmig.com](https://knipsmig.com), which uses seasonal imagery throughout the year to keep the experience fresh and delightful. Whether it's cozy autumn vibes or festive holiday decorations, the site feels alive and in tune with the moment.
Here's a glimpse of how the same base illustration transforms across different seasons and holidays:
Spring
Summer
Autumn


Christmas
Halloween
Easter


Diwali
Chinese New Year
Día de los Muertos


### A script that does the heavy lifting
I've created a TypeScript script that utilizes Google's Gemini API to generate seasonal variations of any image. It supports over 25 themes, including the four seasons and major holidays like Christmas, Diwali, Chinese New Year, as well as occasions like graduation and Black Friday.
However, be aware that it's not inexpensive! I'm defaulting to 4K output, which is currently the largest available from Nano Banana Pro. You may want to adjust this setting.
Anyway, here's the script for you ...
---
### Julen er på blokken 🎄 (Oct 24, 2025)
> _This post is written in Danish to capture the local spirit of my new Christmas rap song._
Julestemningen har fået et frisk pust på blokken i år! Jeg har netop skrevet og indspillet en ny dansk julesang, "Julen er på blokken", der blander klassiske julebilleder med moderne rap og ægte blok-stemning. Forestil dig sne der falder tungt, glimmer i luften, og klassiske juleretter på bordet – men i stedet for den traditionelle julemusik slår vi over på hiphop-beats og rim, der samler hele nabolaget.
Sangen handler om at fejre julen sammen på godt og ondt – med plads til både rap og remoulade, rim og juletraditioner. Om det så er nissen på taget som nikker i takt til beatet, Rudolf der lyser festen op med sin næse, eller vennerne på blokken der deler gaver og glæde mens rimene fyger gennem frosten.
"Julen er på blokken" er ikke bare en sang – det er et moderne juleeventyr, hvor fest, fællesskab og nutidens toner smelter sammen. Lyt med, del stemningen, og få smilet og juleglimtet frem – også til dem, der foretrækker omkvæd frem for klassiske kirkeklokker.
Hør den her før din nabo!

### Lyrics
**[Verse]**
Sne falder tungt, som tæpper på gaden
Glimmer i luften, julelys i faden
Anden på bordet, men jeg rapper i stedet
Pebernødder sprøjter, helt ude af kæden
**[Chorus]**
Julen er på blokken, vi danser i frost
Gaver bliver delt, intet bliver lost
Julen er på blokken, en fest uden stop
Rim i luften, mens vi fyrer den op
**[Verse 2]**
Nissen på taget, han lytter til min flow
Han nikker med huen, siger "det der er dope"
Juletræet glimter, som stjerner i nat
Men jeg holder det ægte, ingen glimmer på min hat
**[Chorus]**
Julen er på blokken, vi danser i frost
Gaver bliver delt, intet bliver lost
Julen er på blokken, en fest uden stop
Rim i luften, mens vi fyrer den op
**[Bridge]**
Rudolf i sneen, hans næse den skinner
Rytmen i sleden, hvor festen begynder
Klokkerne ringer, en lyd som en drøm
Jeg rapper om julen, i rim bliver jeg søm
**[Chorus]**
Julen er på blokken, vi danser i frost
Gaver bliver delt, intet bliver lost
Julen er på blokken, en fest uden stop
Rim i luften, mens vi fyrer den op
---
### You have 168 hours a week. Make them count (Aug 19, 2025)
We all know that one person who seems to get everything done. They're successful, energized, and always on top of their game. It’s easy to think they have some secret, but the reality is simpler: they’ve learned to use their time efficiently.
The good news? You have the exact same 24 hours in a day as they do. Every morning you wake up is a clean slate, a fresh start to take control of your day and direct your life where you want it to go.
This isn't just another to-do list. This is a three-part system to help you master your time. We'll look at how you're currently spending your time, how to find more of it, and how to use it efficiently.

## **Part 1: Find out where your time is really going**
We live in an age of constant distraction, which means we have to be ruthless about auditing our time. The first step is to get an honest look at your week.
For one week, track your daily activities and multiply each by seven to see the weekly total.
* **Internet & TV**: \_*\_ hours x 7 =* \_\_\_
* **Work or school**: \_*\_ hours x 7 =* \_\_\_
* **Socializing**: \_*\_ hours x 7 =* \_\_\_
* **Family- or partner time**: \_*\_ hours x 7 =* \_\_\_
* **Working out**: \_*\_ hours x 7 =* \_\_\_
* **Reading**: \_*\_ hours x 7 =* \_\_\_
* **Sleeping**: \_*\_ hours x 7 =* \_\_\_
* **Cooking and eating**: \_*\_ hours x 7 =* \_\_\_
* **Commuting**: \_*\_ hours x 7 =* \_\_\_
* **Other**: \_*\_ hours x 7 =* \_\_\_
Now, add up your totals and subtract that number from 168 (the total number of hours in a week).
**168 \- \[Your weekly total\] = \_\_\_**
That final number shows you the gap—the time you might not even realize you have. Next, look at your list and identify the biggest time-wasters, the activities that aren't contributing to your goals. This could be binge-watching a series or endlessly scrolling through social media.
You don’t have to eliminate these things entirely. Instead, set clear limits. Using a browser extension like [StayFocusd](https://chromewebstore.google.com/detail/stayfocusd-%E2%80%93-website-bloc/laankejkbhbdhmipfmgcngdelahlfoji) can help you cap your time on certain websites. Limiting X, Reddit or Facebook to just 10 minutes a day, for example, can make you more focused and intentional with your time there.
## **Part 2: How to create more time**
Once you know where your time goes, you can start to reclaim it.
### **Optimize your sleep**
Waking up early can have a massive impact, giving you focused time to work on yourself and your biggest goals. The key isn't justwaking up early, but waking up right. Our bodies sleep in 90-minute cycles. You'll feel more refreshed waking up after 6 or 7.5 hours than after 8, because you're waking up *between* cycles, not during one.
To make this a habit:
* **Go to bed at the same time every night.**
* **Wake up gradually earlier.** If your goal is 6 am, start with 7:50 am, then 7:40 am, and so on.
You might feel an energy drop for the first few weeks as your body adjusts, but a quick 20-30 minute power nap can help you push through.

### **Reclaim your "dead time"**
Dead time is time spent on activities you can't avoid, but that don't require your full attention, like commuting, grocery shopping, or even working out.
This is your opportunity to multitask productively. Use this time to listen to audiobooks or podcasts, or even learn a new language with an app like Duolingo. It's about adding value to time you're already committed to spending.
## **Part 3: How to use your time efficiently**
Now that you've found more time, here’s how to make the most of it.
### **Set clear goals**
Goals act like the lens of a camera: without focus, the picture is blurry. If you don't know what you're aiming for, it's easy to waste time by accident.
Keep it simple. Set 3-5 major goals for the next year in the most important areas of your life (work, health, personal growth, etc.). Phrase them as if you've already achieved them. For example: "I have completed my beginner Spanish course by December 1st."
### **Find your high-leverage activities**
The [Pareto Principle](https://en.wikipedia.org/wiki/Pareto_principle), or the 80/20 rule, states that 80% of your results come from just 20% of your efforts. To find your 20%, ask yourself:
* "If I could only do one thing all day, which task would add the most value toward my goal?"
* Then ask, "What would be the second most valuable task?" And the third?
These are your high-leverage activities.
### **Build powerful rituals**
Your morning ritual sets the tone for your entire day. It should be built from the high-leverage activities you just defined. If your goal is to start a blog, your ritual might be to write for 30-60 minutes every morning.
A few tips to make your morning ritual even better:
* **Drink water.** Your body is dehydrated after 6-8 hours of sleep.
* **Get a small win.** Do something simple but productive, like making your bed, to build momentum.
* **Exercise.** Any physical activity can kickstart your day and boost your energy.
Don't forget a night ritual, too. An hour before bed, turn off all your electronics for a "tech detox." Read a book, talk with your partner, and reflect on the day. Benjamin Franklin famously asked himself, "What good have I done today?"

### **Delegate, eliminate, and automate**
You don't have to do everything yourself. This approach is a key part of many productivity systems, including David Allen's popular [Getting Things Done (GTD)](https://en.wikipedia.org/wiki/Getting_Things_Done) methodology. Look at all your tasks that are *not* high-leverage activities and ask:
* Can I **delegate** this to someone else?
* Can I **eliminate** this entirely?
* Can this be **automated**?
### **Work in focused bursts**
The [Pomodoro Technique](https://en.wikipedia.org/wiki/Pomodoro_Technique) is a simple but effective way to stay focused. You work in a 25-minute sprint, then take a 5-minute break. This keeps your mind fresh and helps you stay highly effective.
For your most important tasks, block out time in your calendar and treat it like a meeting with yourself. This is your time for deep, focused work without interruptions.
### **Learn to say no**
Protecting your time often means saying "no." Say no to meetings without a clear purpose or outcome. Say no to checking your email first thing in the morning; finish your ritual first.
Most importantly, say no to things that don't support your goals. Remember, you aren't saying "no" to others—you're saying "yes" to yourself and what truly matters.
### **Be consistent, not perfect**
Things will not always go according to plan. You'll have inefficient days, and you'll get interrupted. The goal isn't perfection; it's consistency.
Once a week, take 30 minutes to review what was productive and what wasn't. Double down on what worked and try to eliminate what didn't.
Focus on the hour in front of you and make it count. Start with one or two of these techniques, and you'll be amazed at what you can achieve.
---
### Get the new macOS Tahoe wallpapers today (Aug 15, 2025)
The next major update for the Mac, macOS Tahoe, is just around the corner, and it's bringing some beautiful new visuals with it—especially the new screensavers.
I couldn't wait, so I've taken high-resolution screengrabs of all 15 new screensavers and added them to the Wallpapery app archive. Now you can enjoy the stunning aesthetic of macOS Tahoe on your desktop right now.
Check out the full collection at the Wallpapery website:
[https://www.wallpaperyapp.com/designers/macos-tahoe](https://www.wallpaperyapp.com/designers/macos-tahoe)
---
### Why comments aren't necessary (Aug 11, 2025)

Many years ago, I learned from a developer I deeply admired that *"comments are bad"*. At the time, this seemed counterintuitive - weren't comments supposed to make code more understandable? But because I respected his expertise, I pressed him to explain. His reasoning was straightforward:
> You don't need comments if your code is self-explanatory.
When you think about it, this makes a lot of sense.
If you're adding a comment to explain what the code does, you're essentially admitting that the code itself isn't clear enough. Comments become a band-aid for poor naming, confusing structure, or overly compact logic.
Instead of writing a comment, take a moment to ask yourself:
Can I rename this variable to clearly convey its meaning?
Can I extract this logic into a small, well-named function to make the intent obvious?
Example:
```
// only people above 18 are eligible to vote
if (age >= 18) this.vote()
```
This works, but the comment merely restates what the code is already doing. If the reader can't understand the code, it's because it isn't written clearly enough.
Refactor it like this:
```
const eligibleToVote = age >= 18
if (eligibleToVote) this.vote()
```
Now the code speaks for itself. No extra explanation is required.
---
### Why fewer comments = better code
Comments can become out of sync. You change the code but forget to update the comment, and suddenly it misrepresents the code. Worse, people tend to trust comments without questioning them. Self-documenting code avoids this issue - what you see is what's actually happening.
By forcing yourself to make the code readable on its own, you naturally:
* Choose better names
* Write smaller, more focused functions
* Avoid cramming too much logic into one place
The result is code that's easier to read, easier to change, and far less likely to confuse the next person who works on it (including you, three months from now).
---
So, the next time you're about to write a comment, pause for a moment and ask yourself, "Could I make this so clear that no comment is needed?" Most of the time, the answer will be yes, and your code will benefit from it.
---
### Building ten simple games with GPT-5 (Aug 09, 2025)

I wanted to test out the recently released GPT-5 model by building ten simple and popular games.
All games were built in a one-shot prompt. Only the Tetris one didn't fully work first-shot but a quick "redo your implementation" request fixed it.
Each section below includes the exact prompt used for that game. All follow the same constraints: single self-contained HTML file, inline CSS/JS, optional CDN font/SFX, no build tools, and responsive layout.
### [Pong](/pong-game.html)

Build a complete Pong game as one HTML file (no build tools); use inline JS/CSS and optionally CDNs; render with <canvas>; two paddles (W/S for left, ↑/↓ for right), one ball with simple physics and wall bounce; score when opponent misses; show scores, Restart button (R), Pause (P), and minimal on-screen instructions; keep a simple AI option toggle for right paddle; responsive canvas sizing; no external state, analytics, or extra pages; keep assets (fonts/sfx) via CDN only.
### [Snake](/snake-game.html)

Build a classic Snake as one HTML file with <canvas>; arrow keys to turn; fixed-step game loop; grid size ~20–30; snake grows on food; food spawns not on snake; die on self or wall (plus option toggle for wrap mode); show score/high score (localStorage), Restart (R), Pause (P); add simple difficulty (speed) select; all JS/CSS inline, CDNs allowed for fonts/sfx; responsive; no extra pages.
### [Tic-tac-toe](/tic-tac-toe-game.html)

Build Tic-Tac-Toe as one HTML file; 3×3 board with click/touch; two modes: Human vs Human and Human vs AI (unbeatable minimax); show current player, win/draw line highlight, Restart; simple move history (undo optional); clean responsive layout; all JS/CSS inline; may load a webfont from CDN; no frameworks unless via CDN and minimal.
### [Minesweeper](/minesweeper-game.html)

Build Minesweeper as one HTML file; adjustable board sizes (Beginner/Intermediate/Expert); left-click reveal, right-click flag (long-press for touch); numbers show adjacent mines; first click never a mine; timer and mine counter; Restart; win when all safe revealed; neat visual states; accessible keyboard controls; all JS/CSS inline; optional icon font via CDN; responsive grid; no extra pages.
### [Breakout](/breakout-game.html)

Build Breakout as one HTML file using <canvas>; paddle (mouse or ←/→), ball, rows of bricks; basic collision/physics; lives, score, and level progression (rebuild bricks, slightly faster ball); power-ups optional (wider paddle, multi-ball); Restart (R), Pause (P), instructions overlay; all JS/CSS inline, optional CDN font/sfx; responsive canvas.
### [Flappy bird](/flappy-bird-game.html)

Build a Flappy-style game as one HTML file; tap/click/space to flap; gravity, gap pipes scrolling; score increments per pipe passed; best score via localStorage; game over on pipe/ground; Restart; optional simple parallax background (CDN image allowed); all JS/CSS inline; responsive and 60fps loop; no extra pages.
### [Tetris](/tetris-game.html)

Build Tetris as one HTML file; standard 7 tetrominoes with bag randomizer; rotate (Z/X), move (←/→), soft drop (↓), hard drop (Space), hold piece (C), next queue; SRS-style rotation if simple to implement; line clears (single/double/triple/tetris) with scoring and level/speed; ghost piece; Pause/Restart; clean responsive UI; all JS/CSS inline; optional CDN font; no extra pages.
### [Simon](/simon-game.html)

Build Simon as one HTML file; four colored pads with tone per pad; game plays growing sequence; user repeats by click/touch/keyboard (1–4); strict mode toggle (error restarts round vs resets game); show round number; Start/Restart; simple SFX via tone generation or CDN audio; all JS/CSS inline; accessible focus styles; responsive layout.
### [Hangman](/hangman-game.html)

Build Hangman as one HTML file; include a small built-in word list (array) and random choice; on-screen keyboard + physical keyboard input; show revealed letters, wrong guesses, remaining attempts, simple stick-figure progression; win/lose message and Restart; optional category filter; all JS/CSS inline; optional CDN webfont; responsive; no external calls.
### [Number guessing](/number-guessing-game.html)

Build a Number Guessing Game as one HTML file; computer picks random number in a chosen range (default 1–100); user inputs guesses; show “Higher/Lower/Correct” feedback and attempt count; allow range selector and Restart; minimal, responsive UI; all JS/CSS inline; optional CDN font; no extra pages.
---
### AI reignited my coding passion (Mar 25, 2025)
I’ve been programming for nearly 40 years — started messing around with code at 8, built my first real shareware software at 15, and now, at 47, I thought I’d seen it all. But lately, AI tools like Claude Code, Cursor and Windsurf have taken my passion for coding to a whole new level . It’s the opposite of what I feel some senior developers are saying these days (if they have even tried it), and I get why — change can feel threatening. When I first dipped into AI, I’ll admit I felt a mix of awe and dread. It was _so good_ right out of the gate that it left me anxious, even demotivated. But I got over that hump, and now I’m completely hooked.
When you’ve coded as long as I have, you start seeing the same patterns repeat endlessly. There’s obviously “vibe” coding, which is its own fun beast—loose, creative, exploratory. But then there’s the grind: reviewing big PRs, diving into serious refactoring (not just renaming a class/variable, which barely needs AI), or sketching out a rough base for new features. Those tasks used to drain me when they got too repetitive. Now, with AI, personally using Windsurf paired with Sonnet 3.5 (sometimes 3.7), those tasks have become genuinely enjoyable ❤️. Take a simple prompt like “extract this into a new component, figure out a decent name” What used to involve multiple steps is now one line, and better yet, it often suggests a solid name like “PaymentStatusBadge” for a some code which will decide between showing five different states. It’s not always the perfect name, but it’s close enough to spark a chain of thought. That makes it so much faster than staring at a blob of code, trying to load the whole context into my head just to name something—especially when the refactoring gets chunky.
Then there’s the magic of shipping fast for early internal iterations. I’ve always been good at cranking out rough apps or features at lightning speed. Breadth-first development, tracer-bullet coding—whatever you call it, it’s been my thing. The dream is models that respond instantly—or at least feel real-time. Imagine building a system just by talking to it, watching the changes unfold as you speak. I’ve always said programmers are artists, crafting beautiful code like Monet slapping paint on a canvas—rapid strokes, iterate, refine (though my wife struggles to see the masterpiece when she catches me in a dark room, noise-canceling headset on, muttering “just one more tweak”). Simple stuff like “add a green submit button in the top-right navigation” is already easy, but picture a prompt like this:
> Build a page for entering contact details. I need name (required), email (required), and phone (optional). Add cool icons for each field, include standard email + phone validations, reject single-word names, and show clear error messages.
Right now, that gets you 90% there for a basic feature but takes a couple of minutes to figure out (I'm talking Windsurf Agent mode here, reading context, potentially doing a websearch, updating coding, fixing linting issues, etc). But what if it happened instantly? — you'd say “need name” and a field pops up; you say “required,” a red asterisk appears; you say “email,” and it slots in below—that’d be a whole new way to build, like sketching a lily pond in code. We’re not far off, either. It’s just a GPU power game with tech we already have. This isn’t about PhD-level niche systems (whatever that means); I’m talking everyday SaaS apps, internal tooling, business utilities, the broad stuff.
Even building rough user interfaces has become a joy. If your codebase has enough examples, a prompt like “add a table showing a list of customers, see ProductsTable.tsx as a reference” can churn out a solid UI a fraction of the time it usually did. It pulls from your existing patterns, hitting 95% of what you need. Sure, if your code’s a mess, it struggles—but with a decent foundation, the plumbing just vanishes.
For me, AI isn’t replacing my craft—it’s amplifying it tenfold! After 40 years, that’s got me more excited about the future than ever.

Oh, just remember, it's far from perfect but learning to control and embrace it is key. When I asked Grok3 to proof-read my article I got this 🤣
> Here’s your improved article with minor tweaks for clarity, flow, and polish. I’ve preserved your voice and intent while tightening up phrasing, fixing small grammatical hiccups, and enhancing readability. I also corrected a couple of spelling errors (e.g., "Windsurf" seemed inconsistent, so I assumed "WarpSpeed" might be intended—feel free to revert if that’s wrong). Let me know if you’d like further adjustments!
---
### Bridging AI and the real world with MCP (Mar 08, 2025)
*You’re likely here because you’re curious about MCP — what it is and how it works. In this guide, I’ll break down the Model Context Protocol (MCP) and show how it connects AI to real-world systems, making complex integrations simpler and more efficient.*
**Key takeaways**
- MCP is a standardized framework that connects AI models to real-world systems using JSON-RPC 2.0.
- It simplifies complex integrations by providing structured access to resources, tools, and prompts.
- Organizations can use MCP to streamline AI interactions with external data, enabling scalable and context-aware applications.
### What is MCP?
The Model Context Protocol (MCP) sets up a client-server handshake where an AI-powered client—like a travel app—communicates with a server providing resources, tools, or prompts. It addresses the challenge of language models that lack native access to external data or actions by providing a clean, standardized API. Built on JSON-RPC 2.0, MCP ensures lightweight and interoperable communication. Key methods include `mcp.discover`, `mcp.get_resource`, and `mcp.execute`. MCP is typically communicated over HTTP or WebSockets, and errors follow JSON-RPC conventions.
MCP is structured around three main components:
- **Prompts**: Templates or instructions, such as "find hotels matching user criteria."
- **Resources**: JSON-formatted external data, like travel dates or budget.
- **Tools**: Functions or APIs, such as a hotel search endpoint.
The open-source November 2024 specification enables organizations to adapt MCP for diverse use cases, streamlining how context flows into AI models for real-world applications.
### Why MCP matters
Without a protocol like MCP, integrating AI with external systems often involves fragile, custom code that is difficult to reuse. MCP provides a standardized approach, similar to REST for HTTP APIs, reducing complexity and enabling scalable, context-aware AI systems. For organizations prioritizing structured data, MCP offers a seamless way to connect systems to AI models.
### Use case: Booking a hotel
Imagine a travel website with a widget that allows users to book a hotel in Copenhagen for March 15-18, 2025, with a €200/night budget and preferences for a quiet room with a city view. The widget uses MCP to facilitate this interaction between the client (widget), a hotel service (server), and an AI model, potentially enhanced by structured data expertise.
#### Step 1: Client initiates the process
The widget sends a discovery request to the server to determine the available prompts, resources, and tools:
```json
{
"jsonrpc": "2.0",
"method": "mcp.discover",
"id": 1
}
```
The server responds with the available prompts, resources, and tools:
```json
{
"jsonrpc": "2.0",
"id": 1,
"result": {
"prompts": ["suggest_hotels"],
"resources": ["user_profile", "calendar"],
"tools": ["search_hotels"]
}
}
```
#### Step 2: Retrieve resources
The widget requests user profile data, which may be enhanced by structured data practices:
```json
{
"jsonrpc": "2.0",
"method": "mcp.get_resource",
"params": {
"resource": "user_profile"
},
"id": 2
}
```
The server responds with the user profile data:
```json
{
"jsonrpc": "2.0",
"id": 2,
"result": {
"budget": 200,
"currency": "EUR",
"preferences": {
"room_type": "quiet",
"view": "city"
}
}
}
```
Next, the widget requests calendar data:
```json
{
"jsonrpc": "2.0",
"method": "mcp.get_resource",
"params": {
"resource": "calendar"
},
"id": 3
}
```
The server responds with the calendar data:
```json
{
"jsonrpc": "2.0",
"id": 3,
"result": {
"dates": {
"start": "2025-03-15",
"end": "2025-03-18"
},
"location": "Copenhagen"
}
}
```
#### Step 3: Execute the prompt with tools
The widget bundles the user profile and calendar data and sends an execution request to the server:
```json
{
"jsonrpc": "2.0",
"method": "mcp.execute",
"params": {
"prompt": "suggest_hotels",
"resources": {
"user_profile": {
"budget": 200,
"currency": "EUR",
"preferences": {
"room_type": "quiet",
"view": "city"
}
},
"calendar": {
"dates": {
"start": "2025-03-15",
"end": "2025-03-18"
},
"location": "Copenhagen"
}
},
"tools": ["search_hotels"]
},
"id": 4
}
```
The server processes the request and returns a hotel suggestion:
```json
{
"jsonrpc": "2.0",
"id": 4,
"result": {
"suggestion": "The Hotel d'Angleterre: €175/night, quiet room, city view. Available March 15-18, 2025."
}
}
```
### Structured data integration
Organizations with expertise in structured data can enhance this process by ensuring resources like `user_profile` and `calendar` adhere to well-defined schemas. This aligns with MCP’s resource-driven approach and can improve server-side data flow.
Companies focusing on highly structured data, such as [Zublime](https://www.zublime.com), are doing extensive work around MCP to enhance the user experience. Their efforts demonstrate how structured data can be leveraged to create more intuitive and efficient systems.
### That's a wrap
MCP provides a robust framework for connecting AI models to real-world systems using JSON-RPC 2.0. By standardizing interactions between clients, servers, and AI, it reduces complexity and enables scalable, context-aware applications. Organizations leveraging structured data, like Zublime, can further enhance MCP’s capabilities, ensuring cleaner inputs and more precise AI outputs. As AI continues to evolve, MCP stands as a powerful tool for building systems that are not only practical and effective but also adaptable to the ever-changing demands of real-world integration.
---
### Tip: Use explicit log statements (Jan 16, 2025)
Logging is a critical practice in software development, providing insights into the application's behavior, helping diagnose issues, and facilitating debugging. However, the effectiveness of logging is significantly influenced by how log statements are written. It's essential to make log statements explicit and contextual, which not only enhances the readability and maintainability of the code but also aids in troubleshooting.
## Why Explicit Log Statements Matter
When you include context in your log statements, it becomes much easier to trace issues back to their source. This is because explicit log statements act as breadcrumbs, guiding developers through the execution flow of the application. By embedding meaningful context, such as function names, variable states, or specific operations being performed, developers can quickly identify where a problem might have occurred.
### Benefits of Contextual Logging:
1. **Enhanced Searchability**: With explicit log statements, you can search your codebase more effectively. For instance, if a log entry contains specific identifiers like function names or user IDs, you can quickly locate the relevant code sections by searching for these terms.
2. **Improved Debugging**: When an issue arises, clear and detailed log messages provide valuable insights into what the application was doing at any given time. This can significantly reduce the time spent diagnosing problems.
3. **Better Collaboration**: Explicit logs help team members understand the code quickly, making it easier for new developers to get up to speed or for external auditors to assess the code.
4. **Efficient Monitoring**: In production environments, explicit logs allow for better monitoring and alerting. They can be used to trigger alerts when specific conditions are met, thereby improving the system's reliability and responsiveness.
### How to Implement Explicit Log Statements
To achieve effective logging, consider configuring your logger to include context automatically or ensure each log statement is self-explanatory. Here’s how you can improve your logging practices:
### Avoid Generic Log Statements
Generic log statements lack context and clarity, making them difficult to interpret. For example:
```jsx
function saveUser(user) {
console.log(user); // Avoid at all cost
console.log('got', user); // Using 'got' is too generic
}
```
The above examples are problematic because they provide minimal information about what the log entry refers to or where it was generated.
### Use Explicit and Contextual Log Statements
Instead, aim for log statements that clearly describe the action being taken and the context in which it occurs:
```jsx
function saveUser(user) {
logger.debug(`UsersRepository.saveUser(user: ${user?.id})`); // Easy to search for
logger.debug(`Preparing to save user ${user?.id} in the database`); // Clear and descriptive
}
```
In these examples, the log messages are not only descriptive but also include specific details such as the function name and user ID. This makes them much more valuable for anyone trying to understand the code's behavior or diagnose an issue.
---
By adopting a practice of writing explicit and context-rich log statements, you significantly enhance the maintainability and operability of your software. This approach not only aids in debugging and monitoring but also fosters a more collaborative and efficient development environment. So, make it a habit to use explicit log statements and empower your team with the clarity and insights they provide.
---
### Tip: Avoid nested ternary operators (?:) (Jan 15, 2025)
Nested ternary operators in a single line are difficult to read and understand. Instead, refactor them into a separate function or split them across multiple lines with clear grouping.
**Avoid**
```jsx
```
**Do**
```jsx
function alignItemsByAdjustment (left, right) {
if (right) {
return 'flex-end'
} else if (left) {
return 'flex-start'
} else {
return 'center'
}
}
```
---
### Tip: Avoid let statements (Jan 14, 2025)
Do not use **let** when only used for delayed initialization. Using **let** is a hint to developers, that variable will change over time so should be avoided if possible by restructuring initialization.
**Avoid**
```jsx
let closeToLeft = false
let closeToRight = false
if (maxDepthPixelValue < 60) closeToLeft = true
if (maxDepthPixelValue > Utils.width - 60) closeToRight = true
```
**Do**
```jsx
const closeToLeft = (maxDepthPixelValue < 60)
const closeToRight = (maxDepthPixelValue > Utils.width - 60)
```
---
### The power of incremental progress (Jan 09, 2025)
Continuous improvement is about making small, consistent daily changes that compound over time, focusing on gradual 1% improvements rather than dramatic, unsustainable transformations.
- Small, consistent improvements can lead to **37x better results** over a year
- Focus on doing more of **what already works** and avoiding tiny losses
- **Measure progress** backward by analyzing past performance and making slight adjustments
---
### Focus on less to achieve more (Nov 19, 2024)
In the world of software development, it's easy to get caught up in the race to add more features. We often think that more features mean better software. However, this isn't always true - more often it is actually the opposite.
When building software, there’s a strong temptation to keep adding features. With AI this is now even stronger because it is so, so easy to add new stuff. It seems logical that more features mean more functionality, which should make users happier, right? Allow us to get just one more customer which needs this specific feature. Will make it so much easier to sell, etc. However, this approach will lead to bloated software that's hard to use, difficult to maintain, and full of bugs.
Instead of trying to do everything, successful software often focuses on doing a few things really well. By concentrating on core functionalities, developers can create a product that is not only easier to use but also more reliable and efficient.
Keeping software simple has many benefits:
1. Ease of use - Users can quickly understand and use the software without a steep learning curve. This leads to a better user experience and higher satisfaction.
2. Better performance - Simpler software often runs faster and more efficiently because it doesn’t have to load unnecessary features.
3. Easier maintenance - With fewer features, there are fewer things that can go wrong. This makes it easier to fix bugs and update the software over time.
4. Clear vision - A focused approach helps maintain a clear vision of what the software is meant to achieve, preventing feature creep and ensuring that every addition aligns with the core purpose.
Building software is about creating value for users. By focusing on fewer features and doing them exceptionally well, you can create software that truly stands out. Remember, less is more.
By simplifying your approach, you can achieve greater success and create software that users love.
---
### Why reviewing your own PRs is good (Jul 17, 2024)
We've all been there - you've written what you think is perfect code, only to have your co-workers point out a glaring mistake. It's not a great feeling, but it's part of the job. However, there's a way to minimize these instances and make the development process smoother for everyone involved: reviewing your own pull requests.
I've found that when I review my own PRs in the GitHub UI, I approach the code with a fresh perspective. Issues that I missed while writing the code suddenly become obvious. It's like a new set of eyes on my work, and it's saved me from many embarrassing mistakes.
My process is simple: I open a new PR as a draft with no reviewers selected. I then go over the diff and make any necessary changes. Once I'm satisfied, I mark the PR as ready and assign reviewers. This takes a little more time, but it's worth it for the improved signal-to-noise ratio and the more pleasant review experience for my team.
In the main body of the pull request, I provide a high-level overview of the changes I'm making. If I'm adding new dependencies, I explain why they're necessary and any alternatives I've considered. I generally aim to limit the number of dependencies, so a new one must be justified.
I also use this opportunity to add inline comments about my design choices and the alternatives I considered. This helps my reviewers understand my thought process and makes the review process more efficient.
The other advantage is that these comments create their own thread on the code review UI. If there's any discussion or controversy, it's all contained in one place. This makes it easier to follow the discussion and avoids fragmented threads scattered throughout the PR's activity log. It even works great if developers use the Github plugin for VS Code.
So, reviewing your own pull requests is a simple yet powerful way to catch mistakes before your co-workers do. It's not just about avoiding embarrassment - it's about making the development process smoother and more efficient for everyone involved. So next time you're about to hit that "Create PR" button, take a moment to review your own work. Your co-workers will thank you, and you'll thank yourself.
---
### Upgrading ShoutSMS from Rails 4 to Rails 7.1 (Jul 09, 2024)
Our [ShoutSMS](https://www.shoutsmshq.com/) project has been cruising smoothly for the past 20 years. It has been running on Rails 4 without a glitch, but today I decided to upgrade it to the latest Rails version.
The process went surprisingly smoothly. I have to admit, the ShoutSMS service isn't too complex in features, and the number of third-party gems is quite limited.
I started by creating a new Rails 7.1 application to use as a base. I then compared files and folders at a top level, especially remembering to copy the bin folder and files. Next, I upgraded the Gemfile by essentially copying over the new Gemfile from Rails 7.1 and patching it with the components I had.
Once I got it up and running, I used the rails app:update command, which patches files. For each file it wanted to override, I checked a diff. A good idea is to commit to your source repo before running this update, then override all files in one go and check the changes using `git diff`.
I used the ActiveMerchant gem, which has been heavily updated. However, since it wasn't really needed anymore, I decided to remove it (the best way of ensuring an upgrade works 😉) and instead installed the Stripe gem to handle payments. Previously, we used PayPal for this.
---
### A collection of small JS utility functions (Jul 09, 2024)
This is a compilation of nearly 300 compact JavaScript utility functions, designed to streamline common programming tasks and enhance code efficiency. If you don't want to use libraries such as `lodash` or `underscore` (but I urge you to do) then this list might come in handy. It contains very simple functions such as `isEmpty`, `isEven` and `isOdd` to more specialized array and object manipulations, this collection offers a wide range of practical tools for JavaScript developers.
These bite-sized functions serve multiple purposes:
1. Quick solutions for everyday coding challenges
2. Learning resources for JavaScript best practices and techniques
3. Building blocks for larger, more complex applications
4. Time-savers for repetitive programming tasks
Whether you're a beginner looking to expand your JavaScript toolkit or an experienced developer seeking to optimize your code, this collection provides valuable, ready-to-use functions that can be easily integrated into various projects.
Well, here's the list
```
/* 1. Check if an array is empty */
const isEmpty = (arr) => !arr.length
/* 2. Remove duplicates from an array */
const unique = (arr) => [...new Set(arr)]
/* 3. Get the last item in an array */
const lastItem = (arr) => arr[arr.length - 1]
/* 4. Reverse a string */
const reverseString = (str) => str.split('').reverse().join('')
/* 5. Check if a number is even */
const isEven = (num) => num % 2 === 0
/* 6. Check if a number is odd */
const isOdd = (num) => num % 2 !== 0
/* 7. Generate a random number between two values */
const randomBetween = (min, max) => Math.floor(Math.random() * (max - min + 1)) + min
/* 8. Check if a year is a leap year */
const isLeapYear = (year) => (year % 4 === 0 && year % 100 !== 0) || (year % 400 === 0)
/* 9. Shuffle an array */
const shuffleArray = (arr) => arr.sort(() => Math.random() - 0.5)
/* 10. Get a random item from an array */
const randomItem = (arr) => arr[Math.floor(Math.random() * arr.length)]
/* 11. Convert a string to an array of words */
const words = (str) => str.match(/\w+/g)
/* 12. Clone an array */
const cloneArray = (arr) => arr.slice()
/* 13. Flatten an array */
const flattenArray = (arr) => arr.flat()
/* 14. Remove falsy values from an array */
const compact = (arr) => arr.filter(Boolean)
/* 15. Get the intersection of two arrays */
const intersection = (arr1, arr2) => arr1.filter(x => arr2.includes(x))
/* 16. Get the union of two arrays */
const union = (arr1, arr2) => [...new Set([...arr1, ...arr2])]
/* 17. Convert array of pairs to an object */
const arrayToObject = (arr) => Object.fromEntries(arr)
/* 18. Convert object to array of pairs */
const objectToArray = (obj) => Object.entries(obj)
/* 19. Merge two objects */
const mergeObjects = (obj1, obj2) => ({ ...obj1, ...obj2 })
/* 20. Convert RGB to hex */
const rgbToHex = (r, g, b) => '#' + [r, g, b].map(x => x.toString(16).padStart(2, '0')).join('')
/* 21. Convert hex to RGB */
const hexToRgb = (hex) => hex.slice(1).match(/.{2}/g).map(x => parseInt(x, 16))
/* 22. Get the day of the year */
const dayOfYear = (date) => Math.floor((date - new Date(date.getFullYear(), 0, 0)) / 1000 / 60 / 60 / 24)
/* 23. Get the number of days in a month */
const daysInMonth = (year, month) => new Date(year, month, 0).getDate()
/* 24. Format date as YYYY-MM-DD */
const formatDate = (date) => date.toISOString().split('T')[0]
/* 25. Capitalize the first letter of each word */
const capitalizeWords = (str) => str.replace(/\b\w/g, c => c.toUpperCase())
/* 26. Generate a random string */
const randomString = (length) => Math.random().toString(36).substr(2, length)
/* 27. Check if a string contains a substring */
const contains = (str, substr) => str.indexOf(substr) !== -1
/* 28. Convert a string to kebab case */
const toKebabCase = (str) => str.trim().replace(/[\s_]+/g, '-').toLowerCase()
/* 29. Convert a string to snake case */
const toSnakeCase = (str) => str.trim().replace(/[\s-]+/g, '_').toLowerCase()
/* 30. Convert a string to camel case */
const toCamelCase = (str) => str.trim().replace(/[-_](.)/g, (_, c) => c.toUpperCase())
/* 31. Repeat a string n times */
const repeat = (str, n) => str.repeat(n)
/* 32. Trim whitespace from both sides */
const trim = (str) => str.trim()
/* 33. Convert a string to an array */
const toArray = (str) => [...str]
/* 34. Count the occurrences of a substring */
const countOccurrences = (str, subStr) => str.split(subStr).length - 1
/* 35. Find the index of a substring */
const indexOfSub = (str, subStr) => str.indexOf(subStr)
/* 36. Replace all occurrences of a substring */
const replaceAll = (str, subStr, newStr) => str.split(subStr).join(newStr)
/* 37. Check if a string starts with a substring */
const startsWith = (str, subStr) => str.startsWith(subStr)
/* 38. Check if a string ends with a substring */
const endsWith = (str, subStr) => str.endsWith(subStr)
/* 39. Uppercase the first letter */
const capitalizeFirst = (str) => str.charAt(0).toUpperCase() + str.slice(1)
/* 40. Lowercase the first letter */
const decapitalizeFirst = (str) => str.charAt(0).toLowerCase() + str.slice(1)
/* 41. Check if a value is a number */
const isNumber = (val) => !isNaN(val)
/* 42. Convert a number to a string */
const numberToString = (num) => num.toString()
/* 43. Convert a string to a number */
const stringToNumber = (str) => +str
/* 44. Get the absolute value of a number */
const abs = (num) => Math.abs(num)
/* 45. Round a number to the nearest integer */
const round = (num) => Math.round(num)
/* 46. Round a number down */
const floor = (num) => Math.floor(num)
/* 47. Round a number up */
const ceil = (num) => Math.ceil(num)
/* 48. Get the maximum number in an array */
const max = (arr) => Math.max(...arr)
/* 49. Get the minimum number in an array */
const min = (arr) => Math.min(...arr)
/* 50. Get the sum of an array */
const sum = (arr) => arr.reduce((acc, num) => acc + num, 0)
/* 51. Get the average of an array */
const average = (arr) => sum(arr) / arr.length
/* 52. Convert degrees to radians */
const degreesToRadians = (deg) => deg * (Math.PI / 180)
/* 53. Convert radians to degrees */
const radiansToDegrees = (rad) => rad * (180 / Math.PI)
/* 54. Generate a UUID */
const uuid = () => 'xxxxxxxx-xxxx-4xxx-yxxx-xxxxxxxxxxxx'.replace(/[xy]/g, c => (c === 'x' ? Math.random() * 16 : (Math.random() * 4 + 8) % 16).toString(16))
/* 55. Debounce a function */
const debounce = (fn, delay) => { let timer; return (...args) => { clearTimeout(timer); timer = setTimeout(() => fn(...args), delay); }; }
/* 56. Throttle a function */
const throttle = (fn, limit) => { let lastFunc, lastRan; return function() { const context = this, args = arguments; if (!lastRan) { fn.apply(context, args); lastRan = Date.now(); } else { clearTimeout(lastFunc); lastFunc = setTimeout(function() { if (Date.now() - lastRan >= limit) { fn.apply(context, args); lastRan = Date.now(); } }, limit - (Date.now() - lastRan)); } }; }
/* 57. Convert a string to title case */
const toTitleCase = (str) => str.replace(/\w\S*/g, (txt) => txt.charAt(0).toUpperCase() + txt.substr(1).toLowerCase())
/* 58. Case insensitive string comparison */
const caseInsensitiveCompare = (str1, str2) => str1.toLowerCase() === str2.toLowerCase()
/* 59. Validate an email */
const isValidEmail = (email) => /\S+@\S+\.\S+/.test(email)
/* 60. Validate a URL */
const isValidUrl = (str) => /^(https?|ftp):\/\/[^\s/$.?#].[^\s]*$/.test(str)
/* 61. Sleep for a specified time */
const sleep = (ms) => new Promise(resolve => setTimeout(resolve, ms))
/* 62. Convert a date to timestamp */
const toTimestamp = (date) => Date.parse(date)
/* 63. Get current timestamp */
const currentTimestamp = () => Date.now()
/* 64. Clear all cookies */
const clearCookies = () => document.cookie.split(';').forEach(c => document.cookie = c.trim().split('=')[0] + '=;expires=Thu, 01 Jan 1970 00:00:00 UTC')
/* 65. Get a random color */
const randomColor = () => '#' + Math.floor(Math.random() * 16777215).toString(16)
/* 66. Format number with commas */
const formatNumber = (num) => num.toString().replace(/\B(?=(\d{3})+(?!\d))/g, ",")
/* 67. Compute Fibonacci sequence */
const fibonacci = (n) => n <= 1 ? n : fibonacci(n - 1) + fibonacci(n - 2)
/* 68. Check if a value is an array */
const isArray = (val) => Array.isArray(val)
/* 69. Generate a range of numbers */
const range = (start, end) => [...Array(end - start + 1).keys()].map(i => i + start)
/* 70. Find the factorial of a number */
const factorial = (n) => n <= 1 ? 1 : n * factorial(n - 1)
/* 71. Create a shallow copy of an object */
const shallowCopy = (obj) => ({ ...obj })
/* 72. Create a deep copy of an object */
const deepCopy = (obj) => JSON.parse(JSON.stringify(obj))
/* 73. Check if an object is empty */
const isEmptyObject = (obj) => Object.keys(obj).length === 0
/* 74. Get the length of an object */
const objectLength = (obj) => Object.keys(obj).length
/* 75. Get a random boolean value */
const randomBoolean = () => Math.random() >= 0.5
/* 76. Generate a random hex color */
const randomHexColor = () => '#' + Math.random().toString(16).slice(2, 8).padEnd(6, '0')
/* 77. Calculate the HCF of two numbers */
const hcf = (x, y) => !y ? x : hcf(y, x % y)
/* 78. Calculate the LCM of two numbers */
const lcm = (x, y) => !x || !y ? 0 : Math.abs((x * y) / hcf(x, y))
/* 79. Convert Celsius to Fahrenheit */
const celsiusToFahrenheit = (c) => (c * 9/5) + 32
/* 80. Convert Fahrenheit to Celsius */
const fahrenheitToCelsius = (f) => (f - 32) * 5/9
/* 81. Compute the power of a number */
const power = (base, exp) => Math.pow(base, exp)
/* 82. Check if an object has a property */
const hasProperty = (obj, prop) => obj.hasOwnProperty(prop)
/* 83. Encode a URL */
const encodeURL = (url) => encodeURIComponent(url)
/* 84. Decode a URL */
const decodeURL = (url) => decodeURIComponent(url)
/* 85. Strip HTML tags from a string */
const stripHTML = (str) => str.replace(/<[^>]*>?/gm, '')
/* 86. Check if a string is palindrome */
const isPalindrome = (str) => str === str.split('').reverse().join('')
/* 87. Get query params from URL */
const getQueryParams = (url) => Object.fromEntries(new URL(url).searchParams)
/* 88. Merge two arrays */
const mergeArrays = (arr1, arr2) => [...arr1, ...arr2]
/* 89. Find the nth Fibonacci number */
const nthFibonacci = (n, a = 1, b = 1) => n <= 2 ? b : nthFibonacci(n - 1, b, a + b)
/* 90. Find the square root */
const sqrt = (num) => Math.sqrt(num)
/* 91. Calculate the distance between two points */
const distance = (x1, y1, x2, y2) => Math.sqrt((x2 - x1) ** 2 + (y2 - y1) ** 2)
/* 92. Get current date and time */
const currentDateTime = () => new Date().toLocaleString()
/* 93. Get the type of a variable */
const getType = (val) => typeof val
/* 94. Check if a value is an object */
const isObject = (val) => val && typeof val === 'object' && val.constructor === Object
/* 95. Check if a value is a function */
const isFunction = (val) => val && typeof val === 'function'
/* 96. Convert a value to boolean */
const toBoolean = (val) => !!val
/* 97. Parse a JSON string */
const parseJSON = (str) => JSON.parse(str)
/* 98. Join array elements into a string */
const joinArray = (arr, sep = ',') => arr.join(sep)
/* 99. Capitalize the first word */
const capitalizeFirstWord = (str) => str.replace(/^\w/, c => c.toUpperCase())
/* 100. Calculate body mass index (BMI) */
const bmi = (weight, height) => (weight / (height ** 2)).toFixed(1)
/* 101. Find the longest word in a string */
const longestWord = (str) => str.split(' ').sort((a, b) => b.length - a.length)[0]
/* 102. Find the shortest word in a string */
const shortestWord = (str) => str.split(' ').sort((a, b) => a.length - b.length)[0]
/* 103. Check if two arrays are equal */
const arraysEqual = (arr1, arr2) => JSON.stringify(arr1) === JSON.stringify(arr2)
/* 104. Get the difference between two arrays */
const arrayDifference = (arr1, arr2) => arr1.filter(x => !arr2.includes(x))
/* 105. Get the symmetric difference of two arrays */
const symmetricDifference = (arr1, arr2) => arr1.filter(x => !arr2.includes(x)).concat(arr2.filter(x => !arr1.includes(x)))
/* 106. Get the common elements in two arrays */
const commonElements = (arr1, arr2) => arr1.filter(x => arr2.includes(x))
/* 107. Remove specific element from an array */
const without = (arr, ...args) => arr.filter(x => !args.includes(x))
/* 108. Check if a string is empty */
const isEmptyString = (str) => str.trim().length === 0
/* 109. Convert a string to an array of characters */
const stringToCharArray = (str) => str.split('')
/* 110. Split a string by a delimiter */
const splitByDelimiter = (str, delim) => str.split(delim)
/* 111. Remove whitespace from a string */
const removeWhitespace = (str) => str.replace(/\s/g, '')
/* 112. Repeat a string n times */
const repeatString = (str, num) => str.repeat(num)
/* 113. Get the index of an element in an array */
const indexOfElement = (arr, el) => arr.indexOf(el)
/* 114. Remove the first element of an array */
const removeFirst = (arr) => arr.slice(1)
/* 115. Remove the last element of an array */
const removeLast = (arr) => arr.slice(0, -1)
/* 116. Find the number of digits in a number */
const numDigits = (num) => num.toString().length
/* 117. Calculate compound interest */
const compoundInterest = (p, r, t, n) => p * (1 + r / n) ** (n * t)
/* 118. Check if a string is a valid date */
const isValidDate = (date) => !isNaN(Date.parse(date))
/* 119. Convert a Unix timestamp to a date */
const timestampToDate = (timestamp) => new Date(timestamp)
/* 120. Convert a date to a Unix timestamp */
const dateToTimestamp = (date) => date.getTime()
/* 121. Get the current year */
const currentYear = () => new Date().getFullYear()
/* 122. Get the current month */
const currentMonth = () => new Date().getMonth() + 1
/* 123. Get the current day */
const currentDay = () => new Date().getDate()
/* 124. Convert seconds to hours, minutes, and seconds */
const secondsToHMS = (sec) => { const h = Math.floor(sec / 3600); const m = Math.floor((sec % 3600) / 60); const s = sec % 60; return `${h}h ${m}m ${s}s`; }
/* 125. Count the number of vowels in a string */
const countVowels = (str) => str.match(/[aeiou]/gi)?.length || 0
/* 126. Check if a string is numeric */
const isNumeric = (str) => !isNaN(str)
/* 127. Convert a number to binary */
const toBinary = (num) => num.toString(2)
/* 128. Convert a binary number to decimal */
const binaryToDecimal = (bin) => parseInt(bin, 2)
/* 129. Convert a number to hexadecimal */
const toHex = (num) => num.toString(16)
/* 130. Convert a hexadecimal number to decimal */
const hexToDecimal = (hex) => parseInt(hex, 16)
/* 131. Round a number to n decimal places */
const roundTo = (num, places) => +num.toFixed(places)
/* 132. Calculate the hypotenuse of a right triangle */
const hypotenuse = (a, b) => Math.sqrt(a ** 2 + b ** 2)
/* 133. Calculate the area of a circle */
const areaOfCircle = (radius) => Math.PI * radius ** 2
/* 134. Calculate the circumference of a circle */
const circumference = (radius) => 2 * Math.PI * radius
/* 135. Calculate the area of a rectangle */
const areaOfRectangle = (length, width) => length * width
/* 136. Calculate the perimeter of a rectangle */
const perimeter = (length, width) => 2 * (length + width)
/* 137. Calculate the area of a triangle */
const areaOfTriangle = (base, height) => (base * height) / 2
/* 138. Check if a string is a URL */
const isUrl = (str) => /^(http|https):\/\/[^\s$.?#].[^\s]*$/.test(str)
/* 139. Truncate a string to a specified length */
const truncate = (str, len) => str.length > len ? str.slice(0, len) + '...' : str
/* 140. Get the first n elements of an array */
const firstElements = (arr, n) => arr.slice(0, n)
/* 141. Get the last n elements of an array */
const lastElements = (arr, n) => arr.slice(-n)
/* 142. Check if an object is a date */
const isDate = (val) => val instanceof Date
/* 143. Find the nth root of a number */
const nthRoot = (num, root) => Math.pow(num, 1 / root)
/* 144. Calculate the sum of even numbers in an array */
const sumOfEvens = (arr) => arr.filter(n => n % 2 === 0).reduce((a, b) => a + b, 0)
/* 145. Calculate the sum of odd numbers in an array */
const sumOfOdds = (arr) => arr.filter(n => n % 2 !== 0).reduce((a, b) => a + b, 0)
/* 146. Get the median of an array */
const median = (arr) => { const sorted = arr.slice().sort((a, b) => a - b); const mid = Math.floor(sorted.length / 2); return sorted.length % 2 !== 0 ? sorted[mid] : (sorted[mid - 1] + sorted[mid]) / 2; }
/* 147. Get the mode of an array */
const mode = (arr) => arr.reduce((a, b, i, ar) => ar.filter(v => v === a).length >= ar.filter(v => v === b).length ? a : b, null)
/* 148. Calculate the variance of an array */
const variance = (arr) => { const mean = arr.reduce((a, b) => a + b, 0) / arr.length; return arr.map(x => (x - mean) ** 2).reduce((a, b) => a + b, 0) / arr.length; }
/* 149. Calculate the standard deviation of an array */
const standardDeviation = (arr) => Math.sqrt(variance(arr))
/* 150. Check if a number is prime */
const isPrime = (num) => { for (let i = 2, s = Math.sqrt(num); i <= s; i++) if (num % i === 0) return false; return num > 1; }
/* 151. Find the greatest common divisor (GCD) */
const gcd = (a, b) => !b ? a : gcd(b, a % b)
/* 152. Get a random float between two values */
const randomFloat = (min, max) => Math.random() * (max - min) + min
/* 153. Interpolate between two values */
const interpolate = (start, end, factor) => start + (end - start) * factor
/* 154. Get the current timestamp in seconds */
const timestampInSeconds = () => Math.floor(Date.now() / 1000)
/* 155. Convert a string to lowercase */
const toLowerCase = (str) => str.toLowerCase()
/* 156. Convert a string to uppercase */
const toUpperCase = (str) => str.toUpperCase()
/* 157. Find the square of a number */
const square = (num) => num ** 2
/* 158. Find the cube of a number */
const cube = (num) => num ** 3
/* 159. Convert an array to a string with a delimiter */
const arrayToString = (arr, delim = ',') => arr.join(delim)
/* 160. Get unique values from an array */
const uniqueValues = (arr) => Array.from(new Set(arr))
/* 161. Check if all array elements satisfy a condition */
const allElements = (arr, fn) => arr.every(fn)
/* 162. Repeat an array n times */
const repeatArray = (arr, num) => Array(num).fill(arr).flat()
/* 163. Flatten a nested array */
const flatten = (arr) => arr.reduce((a, b) => a.concat(Array.isArray(b) ? flatten(b) : b), [])
/* 164. Get the keys of an object */
const getObjectKeys = (obj) => Object.keys(obj)
/* 165. Get the values of an object */
const getObjectValues = (obj) => Object.values(obj)
/* 166. Get the entries of an object */
const getObjectsEntries = (obj) => Object.entries(obj)
/* 167. Get the average of an array of numbers */
const avg = (arr) => arr.reduce((sum, val) => sum + val, 0) / arr.length
/* 168. Check if a year is a leap year */
const isLeap = (year) => (year % 4 === 0 && year % 100 !== 0) || year % 400 === 0
/* 169. Get the current day of the week */
const currentDayOfWeek = () => new Date().toLocaleString('en-us', { weekday: 'long' })
/* 170. Get the current month name */
const currentMonthName = () => new Date().toLocaleString('en-us', { month: 'long' })
/* 171. Check if some array elements satisfy a condition */
const someElements = (arr, fn) => arr.some(fn)
/* 172. Sort an array of objects */
const sortByKey = (arr, key) => arr.sort((a, b) => (a[key] > b[key] ? 1 : -1))
/* 173. Format a date as MM/DD/YYYY */
const formatDateMMDDYYYY = (date) => { const d = new Date(date); return `${d.getMonth() + 1}/${d.getDate()}/${d.getFullYear()}`; }
/* 174. Add days to a date */
const addDays = (date, days) => { let result = new Date(date); result.setDate(result.getDate() + days); return result; }
/* 175. Get the number of days between two dates */
const daysBetween = (date1, date2) => Math.abs(Math.floor((date2 - date1) / (1000 * 60 * 60 * 24)))
/* 176. Get the sign of a number */
const sign = (num) => Math.sign(num)
/* 177. Filter an array based on condition */
const filterArray = (arr, fn) => arr.filter(fn)
/* 178. Reduce an array to a single value */
const reduceArray = (arr, fn, init) => arr.reduce(fn, init)
/* 179. Calculate the distance between two points */
const distanceBetweenPoints = (x1, y1, x2, y2) => Math.hypot(x2 - x1, y2 - y1)
/* 180. Get the hour from a date object */
const getHour = (date) => date.getHours()
/* 181. Get the minute from a date object */
const getMinute = (date) => date.getMinutes()
/* 182. Get the second from a date object */
const getSecond = (date) => date.getSeconds()
/* 183. Get the UTC timestamp */
const getUTCTimestamp = () => Date.now()
/* 184. Shuffle the characters in a string */
const shuffleString = (str) => str.split('').sort(() => 0.5 - Math.random()).join('')
/* 185. Check if an array contains all elements of another array */
const arrayContainsArray = (superset, subset) => subset.every(value => superset.includes(value))
/* 186. Get the file extension from a file name */
const getFileExtension = (filename) => filename.split('.').pop()
/* 187. Pad a string with zeros */
const padWithZeros = (num, places) => String(num).padStart(places, '0')
/* 188. Replace all instances of a substring */
const replaceAllStrings = (str, find, replace) => str.split(find).join(replace)
/* 189. Capitalize the first character of each word */
const capitalizeFirstChar = (str) => str.replace(/\b\w/g, char => char.toUpperCase())
/* 190. Merge two sorted arrays */
const mergeSortedArrays = (arr1, arr2) => [...arr1, ...arr2].sort((a, b) => a - b)
/* 191. Interleave two arrays */
const interleaveArrays = (arr1, arr2) => arr1.flatMap((val, index) => [val, arr2[index]])
/* 192. Get the sum of the digits of a number */
const sumDigits = (num) => num.toString().split('').reduce((acc, digit) => acc + parseInt(digit), 0)
/* 193. Remove specific properties from an object */
const removeProperties = (obj, props) => Object.fromEntries(Object.entries(obj).filter(([key]) => !props.includes(key)))
/* 194. Compare two objects */
const compareObjects = (obj1, obj2) => JSON.stringify(obj1) === JSON.stringify(obj2)
/* 195. Calculate the elapsed time between two dates */
const elapsedTimeBetweenDates = (start, end) => { const diff = end - start; return { hours: Math.floor(diff / 36e5), minutes: Math.floor((diff % 36e5) / 60000), seconds: Math.floor((diff % 60000) / 1000) }; }
/* 196. Create an array of n elements */
const createArray = (length, val) => Array.from({ length }, () => val)
/* 197. Resize an array */
const resizeArray = (arr, newSize, defaultValue = null) => [...arr, ...Array(Math.max(newSize - arr.length, 0)).fill(defaultValue)].slice(0, newSize)
/* 198. Get every nth element of an array */
const everyNth = (arr, nth) => arr.filter((_, i) => i % nth === nth - 1)
/* 199. Check if a string is a palindrome */
const palindromeCheck = (str) => str === str.split('').reverse().join('')
/* 200. Get all combinations of an array */
const combinations = (arr) => arr.reduce((a, v) => a.concat(a.map(r => [v].concat(r))), [[]])
/* 201. Check if a value is a boolean */
const isBoolean = (val) => typeof val === 'boolean'
/* 202. Check if a value is null */
const isNull = (val) => val === null
/* 203. Check if a value is undefined */
const isUndefined = (val) => typeof val === 'undefined'
/* 204. Check if a value is NaN */
const isNaNValue = (val) => Number.isNaN(val)
/* 205. Check if a value is an integer */
const isInteger = (val) => Number.isInteger(val)
/* 206. Map values of an array */
const mapArray = (arr, fn) => arr.map(fn)
/* 207. Check if an object has nested properties */
const hasNestedProperty = (obj, path) => path.split('.').reduce((o, p) => o ? o[p] : null, obj) !== null
/* 208. Check if a number is positive */
const isPositive = (num) => num > 0
/* 209. Check if a number is negative */
const isNegative = (num) => num < 0
/* 210. Toggle a boolean value */
const toggleBoolean = (bool) => !bool
/* 211. Check if a value is a string */
const isString = (val) => typeof val === 'string'
/* 212. Remove punctuation from a string */
const removePunctuation = (str) => str.replace(/[.,\/#!$%\^&\*;:{}=\-_~()]/g, "")
/* 213. Replace spaces with underscores */
const spacesToUnderscores = (str) => str.replace(/\s/g, '_')
/* 214. Replace underscores with spaces */
const underscoresToSpaces = (str) => str.replace(/_/g, ' ')
/* 215. Replace spaces with hyphens */
const spacesToHyphens = (str) => str.replace(/\s/g, '-')
/* 216. Replace hyphens with spaces */
const hyphensToSpaces = (str) => str.replace(/-/g, ' ')
/* 217. Unique elements in an array */
const uniqueElements = (arr) => [...new Set(arr)]
/* 218. Convert a string to pascal case */
const toPascalCase = (str) => str.replace(/(\w)(\w*)/g, function(g0,g1,g2){ return g1.toUpperCase() + g2.toLowerCase(); })
/* 219. Swap values in an array */
const swapValues = (arr, idx1, idx2) => ([arr[idx1], arr[idx2]] = [arr[idx2], arr[idx1]], arr)
/* 220. Move an element within an array */
const moveElement = (arr, from, to) => (arr.splice(to, 0, arr.splice(from, 1)[0]), arr)
/* 221. Split a string into an array of words */
const splitIntoWords = (str) => str.split(/\s+/)
/* 222. Merge an array of words into a string */
const mergeWords = (arr) => arr.join(' ')
/* 223. Get a timestamp for a date */
const getTimestamp = (date) => new Date(date).getTime()
/* 224. Format a date as DD/MM/YYYY */
const formatDateDDMMYYYY = (date) => { const d = new Date(date); return `${d.getDate()}/${d.getMonth() + 1}/${d.getFullYear()}`; }
/* 225. Compare two dates */
const compareDates = (date1, date2) => new Date(date1) - new Date(date2)
/* 226. Check if a value is a symbol */
const isSymbol = (val) => typeof val === 'symbol'
/* 227. Create a set from an array */
const arrayToSet = (arr) => new Set(arr)
/* 228. Create an array from a set */
const setToArray = (set) => Array.from(set)
/* 229. Get the first element of a set */
const firstSetElement = (set) => set.values().next().value
/* 230. Get the last element of a set */
const lastSetElement = (set) => [...set].pop()
/* 231. Check if a set contains an element */
const setContains = (set, el) => set.has(el)
/* 232. Get the union of two sets */
const unionSets = (set1, set2) => new Set([...set1, ...set2])
/* 233. Get the intersection of two sets */
const intersectSets = (set1, set2) => new Set([...set1].filter(x => set2.has(x)))
/* 234. Get the difference of two sets */
const differenceSets = (set1, set2) => new Set([...set1].filter(x => !set2.has(x)))
/* 235. Get the symmetric difference of two sets */
const symmetricDifferenceSets = (set1, set2) => new Set([...set1].filter(x => !set2.has(x)).concat([...set2].filter(x => !set1.has(x))))
/* 236. Clear all elements of a set */
const clearSet = (set) => set.clear()
/* 237. Get the length of a set */
const setLength = (set) => set.size
/* 238. Check if a value is an instance of a class */
const isInstance = (val, cls) => val instanceof cls
/* 239. Get the maximum value in a set */
const maxSetValue = (set) => Math.max(...set)
/* 240. Get the minimum value in a set */
const minSetValue = (set) => Math.min(...set)
/* 241. Convert a set to a string */
const setToString = (set) => [...set].join(', ')
/* 242. Check if an array contains duplicate values */
const hasDuplicates = (arr) => new Set(arr).size !== arr.length
/* 243. Find duplicates in an array */
const findDuplicates = (arr) => arr.filter((item, index) => arr.indexOf(item) !== index)
/* 244. Remove duplicates from an array */
const removeDuplicates = (arr) => [...new Set(arr)]
/* 245. Check if an array is a subset of another array */
const isSubset = (arr1, arr2) => arr2.every(val => arr1.includes(val))
/* 246. Get the union of two arrays */
const unionArrays = (arr1, arr2) => [...new Set([...arr1, ...arr2])]
/* 247. Get the intersection of two arrays */
const intersectArrays = (arr1, arr2) => arr1.filter(x => arr2.includes(x))
/* 248. Get the difference of two arrays */
const differenceArrays = (arr1, arr2) => arr1.filter(x => !arr2.includes(x))
/* 249. Get the symmetric difference of two arrays */
const symmetricDifferenceArrays = (arr1, arr2) => arr1.filter(x => !arr2.includes(x)).concat(arr2.filter(x => !arr1.includes(x)))
/* 250. Create a Map from an array of pairs */
const arrayToMap = (arr) => new Map(arr)
/* 251. Create an array of pairs from a Map */
const mapToArray = (map) => Array.from(map.entries())
/* 252. Get the keys of a Map */
const getMapKeys = (map) => Array.from(map.keys())
/* 253. Get the values of a Map */
const getMapValues = (map) => Array.from(map.values())
/* 254. Get the entries of a Map */
const getMapEntries = (map) => Array.from(map.entries())
/* 255. Check if a Map contains a key */
const mapContainsKey = (map, key) => map.has(key)
/* 256. Get the value of a key in a Map */
const getMapValue = (map, key) => map.get(key)
/* 257. Set a key-value pair in a Map */
const setMapValue = (map, key, value) => map.set(key, value)
/* 258. Delete a key-value pair in a Map */
const deleteMapValue = (map, key) => map.delete(key)
/* 259. Clear all key-value pairs in a Map */
const clearMap = (map) => map.clear()
/* 260. Get the size of a Map */
const mapSize = (map) => map.size
/* 261. Merge two Maps */
const mergeMaps = (map1, map2) => new Map([...map1, ...map2])
/* 262. Clone a Map */
const cloneMap = (map) => new Map(map)
/* 263. Filter a Map */
const filterMap = (map, fn) => new Map([...map].filter(fn))
/* 264. Transform a Map into an object */
const mapToObject = (map) => Object.fromEntries(map)
/* 265. Transform an object into a Map */
const objectToMap = (obj) => new Map(Object.entries(obj))
/* 266. Check if two Maps are equal */
const mapsEqual = (map1, map2) => map1.size === map2.size && [...map1.entries()].every(([key, val]) => val === map2.get(key))
/* 267. Reverse the key-value pairs in a Map */
const reverseMap = (map) => new Map([...map].map(([key, val]) => [val, key]))
/* 268. Sort a Map by keys */
const sortMapByKey = (map) => new Map([...map.entries()].sort())
/* 269. Sort a Map by values */
const sortMapByValue = (map) => new Map([...map.entries()].sort((a, b) => a[1] - b[1]))
/* 270. Get a random value from a Map */
const randomMapValue = (map) => { const values = [...map.values()]; return values[Math.floor(Math.random() * values.length)]; }
/* 271. Invert the key-value pairs of an object */
const invertObject = (obj) => Object.fromEntries(Object.entries(obj).map(([key, val]) => [val, key]))
/* 272. Remove null or undefined properties from an object */
const cleanObject = (obj) => Object.fromEntries(Object.entries(obj).filter(([_, v]) => v != null))
/* 273. Get the first key of an object */
const firstObjectKey = (obj) => Object.keys(obj)[0]
/* 274. Get the last key of an object */
const lastObjectKey = (obj) => Object.keys(obj).pop()
/* 275. Deep clone an object */
const deepClone = (obj) => JSON.parse(JSON.stringify(obj))
/* 276. Merge two objects deeply */
const deepMerge = (obj1, obj2) => { const isObject = obj => obj && typeof obj === "object"; return Object.keys(obj2).reduce((acc, key) => { if (Array.isArray(obj1[key]) && Array.isArray(obj2[key])) { acc[key] = obj1[key].concat(...obj2[key]); } else if (isObject(obj1[key]) && isObject(obj2[key])) { acc[key] = deepMerge(obj1[key], obj2[key]); } else { acc[key] = obj2[key]; } return acc; }, { ...obj1 }); }
/* 277. Fill an array with values */
const fillArray = (count, value) => Array(count).fill(value)
/* 278. Check if two objects are deeply equal */
const deepEqual = (a, b) => JSON.stringify(a) === JSON.stringify(b)
/* 279. Find the maximum value in an array of objects */
const maxBy = (arr, key) => arr.reduce((a, b) => (a[key] > b[key] ? a : b))
/* 280. Find the minimum value in an array of objects */
const minBy = (arr, key) => arr.reduce((a, b) => (a[key] < b[key] ? a : b))
/* 281. Randomize the order of elements in an array */
const shuffle = (arr) => arr.sort(() => 0.5 - Math.random())
/* 282. Get a random element from an array */
const randomElement = (arr) => arr[Math.floor(Math.random() * arr.length)]
/* 283. Chunk an array into smaller arrays */
const chunkArray = (arr, size) => { const result = []; while (arr.length) result.push(arr.splice(0, size)); return result; }
/* 284. Flatten a nested array of any depth */
const flattenDeep = (arr) => arr.reduce((a, b) => a.concat(Array.isArray(b) ? flattenDeep(b) : b), [])
/* 285. Compare two strings ignoring case */
const equalsIgnoreCase = (str1, str2) => str1.toLowerCase() === str2.toLowerCase()
/* 286. Zip arrays */
const zip = (...arrays) => Array.from({ length: Math.max(...arrays.map(a => a.length)) }, (_, i) => arrays.map(a => a[i]))
/* 287. Remove falsy values from an array */
const compactArray = (arr) => arr.filter(Boolean)
```
Enjoy
---
### Released "Molly: Memory Game" as a very simple Simon clone (May 27, 2024)
With the help from AI it's now easier than every to build small, useful games. I just talked with my daughter the other day about the game "Simon" which she didn't know. I told her it was a pretty simple game showing four colors which would light up in a sequence. You then have to remember the sequence and each time you will get one more color added to that sequence.
I downloaded four clones from the App Store .. but all of them were either showing an ad after each play or was just too complicated.
So I sad down the same evening and made the basic of a Simon clone .. and called it "[Molly](/molly-memory-game)" instead.
I decided to push it to the App Store on both iPhone and iPad but don't want to push it for free because free on the App Store automatically means lots of 💩 commercials and/or tracking. I don't want that and have nothing of that sort in this game.
[Grab it on the App Store](https://apps.apple.com/app/molly-memory-game/id6503224315) for the cost of a Costco hot dog and soda combo now.
---
### Revived Baby Art on the App Store (May 13, 2024)
After not having updated Baby Art for years, it was removed from the Apple App Store. I initially created this app as a very simple drawing tool for the iPad, designed for my daughter when she was still a baby.
The idea was simple: open the app and the baby can draw with their fingers in various colors and shapes. It automatically changes colors and shapes with each stroke and also randomly plays some baby sounds.
Recently, I decided to revive it. Ten years ago, all the drawing handling had to be done manually. It was a lot of work back then, but with the introduction of PencilKit on iPadOS, it's now incredibly simple. I decided to remove much of my custom code and use PencilKit.
I'm even considering open-sourcing this project too.
Anyway, if you have a baby or toddler, you should definitely check out [Baby Art](/baby-art).
---
### Projects page updated with screenshots (May 08, 2024)
I tried to find some old screenshots of the projects and updated the [projects](/projects) page so it looks a bit better.
I'm considering reviving some of the projects so they can get back running instead of just being the source code you're able to see.
---
### Building a simple Tic-Tac-Toe game (May 02, 2024)
Yesterday, I found myself needing to pass some quality time with my daughter and we decided to play tic-tac-toe. To my surprise, there weren't many options for a *simple* tic-tac-toe game that allowed two people to play remotely by just sharing a link. Sure you have lots of options if you download a game or want to go to a website and tap through 438 ads before playing, but I was looking for a straightforward page where you could click "new game," and then easily invite someone to join by sharing a link.
Seeing this gap, and also wanting to dive back into programming with Ruby on Rails—a framework I hadn't touched in over a decade—I decided to take it upon myself to create just what I needed. I called this new project [Tic-Tac-🦶🏼](/tictactoe), where players can choose fun emojis instead of the traditional X and O symbols.
This project was not just about creating a game; it was also an exploration into the latest real-time communication in Rails. I used this opportunity to experiment with Action Cable, Rails’ integrated feature for WebSockets. It was interesting to see how seamlessly it facilitated real-time updates, a crucial component for a responsive and engaging two-player game.
Through building [Tic-Tac-🦶🏼](/tictactoe), I reacquainted myself with Rails after 10+ years of not really touching it.
---
### Released ConquerRSVP (Apr 29, 2024)
We are thrilled to announce the launch of our latest application, [ConquerRSVP](/conquerrsvp), now available for MacOS users. This innovative application harnesses the power of Rapid Serial Visual Presentation (RSVP) technology to revolutionize the way you read.
### What is RSVP?
RSVP is a cutting-edge reading technique designed to enhance speed and efficiency by presenting one word at a time at a user-controlled pace. This method minimizes eye movement and reduces the time spent on conventional reading, thus allowing for a significantly faster reading experience without sacrificing comprehension.
### Features of ConquerRSVP
ConquerRSVP brings a host of exciting features designed to cater to the avid reader’s needs:
* Single Word Presentation: Experience content one word at a time, allowing for faster absorption and understanding.
* Customizable Speed Settings: Adjust the speed of word presentation to match your personal comfort level and gradually increase it as you become more adept.
* Focused Reading: By reducing peripheral distractions, ConquerRSVP helps you stay more focused on the content.
* Progress Tracking: Keep track of your reading speed and monitor your improvement over time.
### Why choose ConquerRSVP?
Whether you are gearing up for academic challenges, aiming to breeze through numerous business reports, or simply looking to enjoy more books in your leisure time, ConquerRSVP offers the perfect solution. It's not just a reading app; it's a productivity tool that optimizes your reading while keeping it engaging and efficient.
### Get started now
Ready to transform your reading and increase your processing speed? [Download ConquerRSVP today](https://apps.apple.com/app/conquerrsvp/id6499281369?mt=12) from the MacOS App Store and step into a world where reading fast is fun and effortless. Embrace the challenge and become the fast reader you’ve always aspired to be!
Happy fast reading! 😜
---
### Getting back into Rails 7 from Rails 2.3 😱 (Apr 27, 2024)
I've decided to revisit Rails after more than a decade of not using it. I have always loved it and created many applications when I was a Ruby on Rails consultant around 15 years ago.
I have over 25 RoR applications I could try to migrate from an old Rails version to the new one. However, after a couple of quick attempts, I decided it's not worth it because so much has changed, and it's hard to determine the best migration path. Instead, I just set up a clean new Rails 7 app and transferred the content I needed.
I started out with a simple app for my website. It’s a decent, straightforward app with multi-domain routing, a couple of different layouts based on domains, a simple blog system, and not much more than that.
As expected, the setup was rather fast. I had to read up on "Turbo Links" to get the links working and tweak the routing a bit with some alias-naming.
It's also worth noting the introduction of new features like ActionCable, ActiveStorage, and Stimulus in recent Rails versions. These features offer modern web capabilities such as real-time communication and direct upload to cloud storage solutions, which were not conceivable when Rails 2 was current. Incorporating these into a decade-old application can feel like retrofitting a vintage car with modern technology - exciting but complex.
Rails still feels like it “just works,” and that’s so nice. I love that you can get from idea to production in minutes. I experimented with a couple of hosting providers but returned to my trusted RoR provider, Heroku. It still seems to work well, even though they were acquired by Salesforce back in 2010. Who would have thought that?
---
### Don't be shy, make sitelinks fly (Apr 25, 2024)
Ever searched for your favorite brand on Google and noticed those neat little links hanging out beneath the main result? Those are **sitelinks**, and they're basically the VIP section of search results!
### What are sitelinks anyway?
Sitelinks are like your website's greatest hits album. They're those extra links Google (and Bing!) shows under your main search result that point to other pages on your site. Think of them as the search engine saying, "Hey, this site is so awesome, let me show you some shortcuts!"
Here's the kicker: they only appear for results search engines think are trustworthy and useful. No pressure!
### Types of sitelinks (they come in flavors!)
| Type | What it does | Where you'll see it |
|------|-------------|---------------------|
| **Organic sitelinks** | Up to 6 links with descriptions | Top result for branded searches |
| **One-line sitelinks** | Horizontal links (usually 4) | Various search results |
| **Paid sitelinks** | Ad extensions you control | Google Ads campaigns |
### Why should you care?
**Real estate, baby!** Sitelinks make your search result HUGE. It's like upgrading from economy to first class. Plus:
- **More clicks**: people get exactly where they want to go
- **Trust boost**: Google's basically giving you a thumbs up
- **Brand visibility**: show off your best pages upfront
- **Better UX**: users jump straight to the good stuff
Fun fact: Some sites see over 12% of their branded traffic clicking sitelinks instead of the main result!
### How to make sitelinks happen
Bad news: You can't directly control them. Search engine algorithms call the shots.
Good news: You can totally influence them! Here's how:
#### 1. **Structure your site like a library**
Keep things organized and logical. If your navigation is a mess, Google won't know what to promote.
#### 2. **Internal linking is your BFF**
Link to important pages and use descriptive anchor text. Make it clear what each page is about! Bonus points for adding breadcrumb navigation—it helps both users and search engines understand your site hierarchy.
#### 3. **Write killer title tags**
Make them descriptive and concise (50-60 characters). These help search engines understand your pages. And hey, avoid duplicate titles—each page should have its own unique title!
#### 4. **Own your brand name**
Rank #1 for your brand? Sitelinks are way more likely to show up. Simple as that.
#### 5. **Create an XML sitemap**
This is a `sitemap.xml` file that lists all your important pages. Most platforms (WordPress, Shopify) generate this automatically at `yoursite.com/sitemap.xml`. Submit it to Google Search Console and Bing Webmaster Tools so search engines know where to find it!
#### 6. **Add structured data**
Schema markup helps search engines understand your content better. Add Organization schema to your homepage with your business name, logo, and contact info. It's like giving search engines a cheat sheet about your site!
### Don't want a page as a sitelink?
If a page keeps showing up as a sitelink and you don't want it there, you can add a `noindex` tag to remove it from search results entirely. Just be careful—this removes the page from all search results, not just sitelinks!
### The reality check
Here's the honest truth: search engine algorithms decide everything. You can't force sitelinks to appear, and you can't edit them manually (well, not anymore). But following best practices definitely tips the scales in your favor.
Think of it like being a good host at a party. Set everything up nicely, make it easy for guests to find what they need, and let the magic happen naturally.
### Quick win checklist
- [ ] Clean, logical site structure
- [ ] Strategic internal linking
- [ ] Descriptive page titles
- [ ] XML sitemap submitted
- [ ] Schema markup on homepage
- [ ] Ranking well for your brand
- [ ] Important pages are accessible
### Bottom line
Sitelinks are like getting a gold star from search engines. They make your search result stand out, help users find what they need faster, and signal that you've got a solid, trustworthy site.
Can't force them? True. But build a well-structured, user-friendly site with great content, and you'll be well on your way to sitelink stardom!
---
### Just bought a new macbook, what should I install? (Mar 26, 2024)

Congratulations on your new MacBook! And congrats on writing one of the most popular engagement bait tweets in the world. If you're a regular X-, Peerlist- or Reddit user you will see this question a couple of times per day. So many nice people are getting new macs and have a hard time figuring out what to install on this mighty-fine machine .. so here are essential recommendations for what to install, whether you’re setting it up for work, school, or personal use:
#### Must-have applications
- **[Raycast](https://www.raycast.com/)** because you deserve it
- **[Google Chrome](https://www.google.com/chrome/)** because Safari is already installed and you might want an alternative
- **[Bitwarden](https://bitwarden.com/)** because you want to use passwords you cannot remember and 1Password is too expensive
- **iCloud Drive** so you can avoid Dropbox for anything in the world
- **[Obsidian](https://obsidian.md/)** so you can tell your PM that you found something way better than Notion
- **[Spotify](https://open.spotify.com/)** because you like music but Apple Music is crap
These are just starter suggestions. As you use your Mac, you can personalize further based on your daily needs and workflow.
---
### RSVP? It's not just a polite request but it's a reading revolution (Feb 06, 2024)
When most of us see the letters RSVP, our minds instinctively translate it to "Répondez s'il vous plaît," a fancy way of asking us to confirm our attendance at a soirée. But in the world of cognitive neuroscience and advanced reading technologies, RSVP stands for something far more intriguing: Rapid Serial Visual Presentation. It's about turbo-charging our reading speed.
### What is Rapid Serial Visual Presentation (RSVP)?
Rapid Serial Visual Presentation is a digital reading format where words are presented one at a time or in small groups at the same location on a device screen. This technology aims to increase reading speed and efficiency by reducing the need for eye movements called saccades, which are typical when reading text lines traditionally. Thus, RSVP allows for faster text processing because your eyes don't need to move; the words do.
### How does it work?
RSVP's core idea is simplicity itself: keep the eyes fixed and let the text move. In practice, this might look like a stream of words flashing in a single spot at speeds you can adjust according to your comfort and comprehension levels. Various applications and tools employing the RSVP method can significantly vary the words per minute (WPM), often pushing the boundaries of what one might manage with normal reading.
### Benefits of RSVP
The principal advantage of RSVP is the potential increase in reading speed. Studies have shown that with this method, readers can often process information much faster than through traditional reading. This makes it an appealing option for reading large volumes of text in a short amount of time — perfect for students cramming for exams or professionals trying to stay abreast of new information in their fields.
Moreover, RSVP can be a blessing for visually impaired individuals, reducing the physical strain involved in navigating lines of text. You are able to try it out using our [ConquerRSVP](/conquerrsvp) app available for MacOS.
### Not without challenges
RSVP is not without its critics who point out potential drawbacks. The biggest challenge is the lack of contextual understanding and retention when words are flashed rapidly. The eye-brain coordination at high speeds might boost word recognition but at the cost of deep comprehension and memory retention.
### The future of RSVP
As digital reading evolves and more studies delve into cognitive processing, RSVP could see innovative adaptations to balance speed with comprehension. Hybrid models that incorporate aspect of traditional reading, like allowing backtracking or highlighting key information, might make RSVP more versatile and effective.
---
### Simon Says game app: Classic memory fun for iPhone and iPad (Jul 08, 2022)
Simon Says has been a beloved game for generations, captivating players with its simple yet challenging gameplay. In today's digital world, this classic game has found new life in the form of mobile apps, bringing the excitement of Simon Says to our smartphones and tablets.
## The origins of Simon Says
Simon Says originated as a children's game, where one player takes on the role of "Simon" and issues commands to other players. The catch? Players should only follow commands that begin with "Simon says." This game has been a staple of parties, classrooms, and playgrounds for decades, helping children develop listening skills, concentration, and quick reflexes.

## From physical to digital: The evolution of Simon Says
As technology advanced, Simon Says made the leap from a verbal game to an electronic one. In 1978, Milton Bradley released the first electronic version of the game, simply called "Simon." This device featured four colored buttons that would light up in a sequence, challenging players to repeat the pattern correctly.
Fast forward to the smartphone era, and we've seen a surge in simon game apps that bring this classic experience to our fingertips. These simon says game apps offer the same addictive gameplay with added features, convenience, and portability.
## Why Simon Says remains popular in the app world
1. **Cognitive benefits**: Simon Says, whether played traditionally or as a simon memory game app, helps improve memory, concentration, and pattern recognition skills.
2. **All ages appeal**: From children to adults, everyone can enjoy and benefit from playing Simon Says.
3. **Quick play sessions**: Perfect for short breaks or waiting times, simon the game app versions allow for quick, engaging gameplay sessions.
4. **Competitive element**: Many simon says app games include leaderboards and multiplayer modes, adding a competitive edge to the classic game.
5. **Adaptability**: Digital versions can offer various difficulty levels, themes, and game modes to keep players engaged.
## The benefits of playing Simon Says on your mobile device
1. **Portability**: Take the game anywhere, anytime.
2. **No lost pieces**: Unlike physical games, you'll never misplace a crucial component.
3. **Updates and new content**: Enjoy regular updates with new features and challenges.
4. **Progress tracking**: Monitor your improvement over time with built-in statistics.
5. **Multiplayer options**: Play with friends remotely or challenge players worldwide.
## How to get started with Molly: Memory Game
Ready to dive into the world of digital Simon Says? Here's how to get started with Molly: Memory Game:
1. Visit the App Store on your iPhone or iPad.
2. Search for "[Molly: Memory Game](https://apps.apple.com/app/molly-memory-game/id6503224315)" or "simon says app game".
3. Download and install the app.
4. Open the app and choose your preferred game mode.
5. Start playing and challenge yourself to beat your high score!
Remember, regular play can help improve your memory and cognitive skills, so make Molly: Memory Game part of your daily routine for both fun and brain training.

By bringing the classic Simon Says game to the digital age, apps like Molly: Memory Game are ensuring that this beloved pastime continues to entertain and challenge players for generations to come.
---
### The importance of creativity in babies and toddlers through drawing (May 24, 2022)
In the early stages of human development, creativity plays a crucial role in shaping how children perceive and interact with the world. Among various creative activities, drawing stands out as a fundamental practice that greatly benefits babies and toddlers. Here’s why encouraging your little ones to draw is essential for their growth
### Enhancement of motor skills
Drawing helps hone both fine and gross motor skills. As toddlers grasp crayons and scribble on paper, they refine their hand-eye coordination and dexterity. This foundational skill is crucial not only for artistic endeavors but also for daily activities such as writing, buttoning clothing, and more.
### Emotional expression and development
For many young children, drawing is a form of self-expression. It provides a safe outlet for conveying emotions, thoughts, and experiences that they might not yet have the words to articulate. This emotional release can help in developing empathy and understanding as they grow older.
### Cognitive growth
Engaging in drawing stimulates both the right and left hemispheres of the brain. It nurtures critical cognitive skills such as problem-solving, planning, and decision-making. When children decide what to draw and choose colors, shapes, and sizes, they are essentially exercising their brains, promoting cognitive development.
### Creativity and imagination
Drawing sparks creativity and imagination, key components of child development. By encouraging toddlers to draw, you foster a sense of curiosity and exploration. This imaginative play is not only crucial for artistic growth but also for innovative thinking in all areas of life.
### Language skills development
Discussing their drawings with parents or caregivers enhances toddlers' language skills. It encourages them to describe their artwork, tell stories, and ask questions, thereby expanding their vocabulary and improving their communication abilities.
### Building confidence and self-esteem
Each completed drawing is a product of a toddler’s effort and creativity. This sense of accomplishment can significantly boost their confidence and self-esteem. Praising their artwork reinforces positive feedback and encourages them to continue exploring their creative abilities.
### Social skills
Drawing often becomes a shared activity when done in group settings such as playdates or preschool. It encourages toddlers to collaborate, share materials, and discuss their ideas, thereby fostering essential social skills.
Providing a variety of materials, creating a designated drawing space, being supportive and non-critical, and engaging in drawing together can make the activity more enriching and enjoyable. Drawing is more than just a pastime; it is a crucial element in the developmental journey of babies and toddlers. It nurtures their physical, cognitive, and emotional growth, paving the way for a well-rounded individual. Encouraging children to draw helps them develop the skills necessary for a vibrant and dynamic life. Their creativity and imagination will flourish, extending the benefits far beyond the art they create.
If you want to get your child started being creative, we have made an iPhone/iPad app called [Baby Art](/baby-art) you could check out.
---
### Understanding rapid serial visual presentation (RSVP) (Apr 24, 2022)
In our fast-paced digital world, where information overload is common and attention spans are dwindling, innovative methods to manage and process information are essential. One such method is rapid serial visual presentation, or RSVP. This technique has revolutionized how we consume text and offers numerous applications in various fields.
### What is rapid serial visual presentation (RSVP)?
Rapid serial visual presentation (RSVP) is a method of displaying information (typically text) quickly and concisely by presenting words or images in rapid succession at a single location of the visual field, usually at the center of a screen. Instead of reading text from left to right, the words flash one at a time in the same place, allowing for faster reading speeds without the need to move one's eyes.
### The mechanics of RSVP
#### Presentation rate
The speed at which words are presented is measured in words per minute (WPM). Depending on the desired reading speed, the rate can be adjusted, with common speeds ranging from 200 WPM to over 1000 WPM.
#### Focus and comprehension
RSVP leverages the brain's ability to recognize and process information quickly. By focusing on a single point, it minimizes the eye movements that typically slow down reading, known as saccades, thus enabling a more efficient reading process.
#### Segmentation
Text is broken down into small chunks (usually single words or short phrases) to reduce cognitive load and aid in comprehension.
### Applications of RSVP
#### Speed reading tools
RSVP is popular in speed reading applications, helping individuals to read faster while maintaining comprehension. Apps like [ConquerRSVP](/conquerrsvp) and others use this technique to display text in a manner that enhances reading efficiency.
#### Assistive technology
For individuals with visual impairments or reading difficulties like dyslexia, RSVP can provide a more accessible way to consume written content. By controlling the pace and reducing the need for scanning, it can make reading more manageable and less stressful.
#### Media consumption
In the era of information overload, RSVP can be used to quickly review large amounts of text content, such as news articles, emails, and reports. This allows people to stay informed without spending excessive time on each piece of content.
#### Education
RSVP can be an effective tool in educational settings, helping students quickly absorb and retain information from textbooks and study materials.
### Benefits of RSVP
#### Increased reading speed
RSVP can significantly boost reading speeds by eliminating the time spent on eye movements between words.
#### Improved focus
Centralizing the text at a single point reduces distractions, allowing for better concentration.
#### Enhanced comprehension
By controlling the flow of information, RSVP helps maintain a consistent rate of reading, which can improve understanding and retention of the material.
### Challenges and considerations
#### Cognitive load
Despite its benefits, rapid presentation without breaks can increase cognitive load, potentially leading to fatigue and reduced comprehension for longer texts.
#### Loss of context
Skipping through words too quickly can sometimes result in missing context or nuance, especially in complex or detailed information.
RSVP represents a powerful tool that transforms reading and information processing. By understanding its mechanics and benefits, individuals and organizations can leverage RSVP in various domains to enhance efficiency and accessibility. Whether you're a speed reader, someone using assistive technology, or just looking to better manage your information intake, RSVP offers a promising solution to the challenges of modern reading.
Make sure to try out my [ConquerRSVP](/conquerrsvp) reader if you want to try out rapid serial visual presentation reading for yourself.
---
### Prefer ObsoletedUser over NewUser for breaking changes (Nov 13, 2021)
> *When updating a variable or type, it is a better practice to rename the old one to `ObsoletedX` and keep the active one as `X`. This approach enhances clarity, simplifies transitions and refactoring, minimizes errors, and improves overall code readability and maintainability. Adopting this naming convention is a small but powerful step towards writing cleaner, more maintainable code.*
In the ever-evolving landscape of software development, updates and refactoring are routine. However, the manner in which these updates are implemented can significantly impact code maintainability and readability. A common scenario developers face is updating a variable or type, such as transitioning from an old user model to a new one. The intuitive approach might be to introduce a `NewUser` type while keeping the old one as `User`. However, a more effective strategy is to rename the old type to `ObsoletedUser` and retain the active one as `User`.
### 1. Clarity and intention
Renaming the old type to `ObsoletedUser` and keeping the new one as `User` immediately communicates the state and purpose of each type. It clarifies that `ObsoletedUser` is deprecated and should not be used in new code, while `User` is the current, active type. This naming convention reduces ambiguity and helps developers understand the codebase more quickly.
### 2. Ease of transition
When a new developer joins the team or when someone revisits the code after a long period, having a clear distinction between deprecated and active types simplifies the onboarding process. They can easily identify which type to use without second-guessing or digging through documentation. This practice minimizes the cognitive overhead associated with understanding the codebase.
### 3. Refactoring simplicity
Refactoring code to replace an old type with a new one can be a daunting task, especially in large codebases. By keeping the active type as `User` and marking the old one as `ObsoletedUser`, you streamline the refactoring process. Developers can methodically replace instances of `ObsoletedUser` without worrying about inadvertently affecting the new type.
### 4. Minimizing errors
Introducing a `NewUser` type while keeping the old one as `User` can lead to confusion and potential errors. Developers might mistakenly use `User` when they intend to use `NewUser` or vice versa. This naming convention can lead to bugs and inconsistencies in the code. By clearly delineating the deprecated type, you reduce the risk of such errors.
### 5. Code readability and maintenance
Good code is not just about functionality; it’s also about readability and maintainability. Clear and intentional naming conventions contribute significantly to these aspects. When the active type remains as `User`, and the deprecated type is renamed to `ObsoletedUser`, the codebase remains clean and intuitive. Future maintenance becomes more manageable, and the overall quality of the code improves.
Let's consider a simple TypeScript example.
```typescript
interface User {
id: number;
name: string;
email: string;
}
function getUserInfo(user: User): string {
return User: ${user.name}, Email: ${user.email};
}
const user: User = { id: 1, name: "Alice", email: "alice@example.com" };
console.log(getUserInfo(user));
```
Instead of introducing a NewUser type, we rename the old type to ObsoletedUser and keep the active one as User.
```typescript
interface ObsoletedUser {
id: number;
name: string;
email: string;
}
interface User {
id: number;
fullName: string;
emailAddress: string;
}
function getUserInfo(user: User): string {
return User: ${user.fullName}, Email: ${user.emailAddress};
}
const newUser: User = { id: 1, fullName: "Alice Johnson", emailAddress: "alice.johnson@example.com" };
console.log(getUserInfo(newUser));
function getObsoletedUserInfo(user: ObsoletedUser): string {
return User: ${user.name}, Email: ${user.email};
}
const oldUser: ObsoletedUser = { id: 2, name: "Bob", email: "bob@example.com" };
console.log(getObsoletedUserInfo(oldUser));
```
---
### Kids playing Simon: Fun and brain-boosting benefits (Jun 21, 2021)
In the age of smartphones and digital distractions, finding activities that engage children in a fun yet educational way can be challenging. Enter Simon, an electronic game that has stood the test of time since its introduction in 1978. With its simple yet captivating design, Simon continues to be a beloved game among children. But beyond the fun and excitement, playing Simon offers several cognitive benefits for young minds.
### How Simon works
Simon is deceptively simple. The game features four colored buttons, each producing a distinct sound. The device lights up the buttons in a particular sequence, beginning with one light and gradually increasing in complexity as the game progresses. Players must accurately repeat the sequence by pressing the buttons in the same order. Any mistake ends the game.
### Why Simon is more than just a game
While Simon might seem like a basic memory game, it delivers substantial brain-boosting benefits that contribute to a child’s overall cognitive development.
#### 1. Enhances memory skills
At its core, Simon is a game of memory. By requiring players to recall and replicate increasingly complex sequences, it effectively exercises short-term memory. Over time, children become adept at remembering longer sequences, which translates to enhanced recall abilities in other areas of learning.
#### 2. Improves concentration and attention
To excel at Simon, children must maintain a high level of concentration. The game's increasing pace and complexity demand sustained focus, helping kids practice and improve their attention spans. This enhancement in concentration can positively influence their performance in school and other activities that require prolonged attention.
#### 3. Develops sequential thinking
Simon helps children learn how to think in sequences, a cognitive skill essential for problem-solving and logical reasoning. This skill is fundamental in subjects like mathematics and computer programming, where understanding the order of operations is crucial.
#### 4. Promotes hand-eye coordination
Pressing the correct buttons in response to visual and auditory cues enhances hand-eye coordination. This motor skill development is vital for everyday tasks and can also improve performance in sports and other physical activities.
### The joy of learning through play
One of the most significant advantages of games like Simon is that they provide educational benefits disguised as entertainment. Children are often more willing to engage in activities that are fun and rewarding. Playing Simon can be a delightful break from traditional learning methods, offering a playful approach to brain training.
### Encouraging healthy competition
Simon can also introduce children to the concept of healthy competition. Kids can challenge themselves to beat their previous scores or compete with friends and family members. This friendly competition can teach valuable lessons in perseverance, goal-setting, and resilience—all essential traits for personal growth.
### Bringing families together
Another fantastic aspect of Simon is its ability to bring families together. Parents and children can enjoy the game together, sparking moments of joy and bonding. It’s a wonderful way to spend quality time while engaging in a shared activity that nurtures cognitive development.
In a world where screen time often translates to passive consumption, Simon stands out as a classic game that actively engages children’s minds. It is more than just a memory game; it is a tool for cognitive enhancement, teaching valuable skills such as memory, concentration, sequential thinking, and hand-eye coordination. By incorporating Simon into playtime, parents can offer their children a fun, educational experience that benefits their brains while keeping them entertained. So, let the games begin—it's time for some brain-boosting fun with Simon!
Try our iPhone/iPad version called [Molly: Memory Game](/molly-memory-game) if you want to try it out.
---
### The story of Simon, the original memory game (Jun 18, 2021)
## The original Simon
Inventor Ralph Baer is best known for creating the first video game system, but his contributions extend much further. In 1975, Baer started an independent consulting business and began working with Marvin Glass & Associates in Chicago, a toy design firm responsible for some of the most successful American toys of the 20th century. Baer's role was to develop electronic toys and games, and the most famous outcome of this collaboration was Simon.
### Inspiration strikes
Named after the children's game "Simon Says," Simon was inspired by an Atari arcade game called Follow-Me. Baer and Howard Morrison, a partner at Marvin Glass, first encountered Follow-Me at a trade show in 1976. They agreed that while the execution of the arcade game was flawed, its core idea—challenging players to repeat a musical sequence created by the machine—had great potential. They set out to create a hand-held game based on this concept.
### Crafting the game
Like Follow-Me, Simon featured four colored buttons, each playing a unique note. Players had to replicate an increasingly complex sequence of tones generated by Simon. A single mistake would end the game. Baer recognized that selecting the right tones was crucial. He and Morrison believed that one of Follow-Me's key shortcomings was its unpleasant sounds.
Baer found the solution in his children's Compton Encyclopedia. He discovered that a bugle could only play four notes, making them ideal for Simon. These bugle notes ensured that any sequence produced by the game was not only challenging but also pleasing to the ear.
### Simon's launch and legacy
Simon was released by Milton-Bradley in 1978 with significant fanfare, including a midnight release party at Studio 54, the elite New York City disco. The game was an instant success, peaking during the 1980s and continuing to sell for decades.
Simon remains a beloved memory game that has stood the test of time, remarkable for its simplicity and engaging challenge. Whether you played it decades ago or are discovering it anew, Simon continues to captivate players with its timeless fun. If you want to try a simple online version of this classic game, check out [Molly: Memory Game](/molly-memory-game).
---
### 8 benefits of playing tic tac toe with preschoolers (May 19, 2021)
Tic tac toe is a simple yet fun game that can be a great way to teach preschoolers many valuable skills. Here are 8 benefits of playing tic tac toe with preschoolers:
1. Enhances Problem-Solving Skills
Playing tic tac toe requires children to think critically and use problem-solving skills to strategize and win the game.
2. Encourages Teamwork and Cooperation
Tic tac toe can be played with a partner, which can encourage teamwork and cooperation among children.
3. Enhances Fine Motor Skills
Tic tac toe requires children to use fine motor skills to place their pieces on the board.
4. Enhances Language Development
Tic tac toe can be used to teach children new words and concepts, such as numbers, counting, and basic math.
5. Enhances Memory and Recall
Playing tic tac toe can help children to improve their memory and recall skills, as they need to remember the positions of the pieces on the board.
6. Enhances Attention and Focus
Playing tic tac toe requires children to pay attention to the game, which can help to improve their attention and focus skills.
7. Promotes Self-Esteem
Tic tac toe can be used as a reward or positive reinforcement to help children build self-esteem and feel good about their accomplishments.
8. Encourages Creativity and Self-Expression
Children can play with different variations of tic tac toe and make their own board, allowing them to express their creativity and try new strategies.
Playing tic tac toe with preschoolers can be a fun and engaging way to help them develop many valuable skills, such as problem-solving, teamwork and cooperation, fine motor skills, language development, memory, attention, focus, self-esteem, and creativity. If you are looking for a simple Tic Tac Toe game using emojis, try our version at [Tic-Tac-🦶🏼](/tictactoe) - enjoy!
---
### Why "Click Here" Links Suck (Jan 21, 2021)
Using “Click here,” “More,” or “Read More” as link text is a common but misguided practice. These phrases don’t provide meaningful context for screen readers, speech recognition users, or anyone scanning links out of context. Instead, opt for descriptive text that stands on its own. Below are a few guidelines:
1. Make Link Text Descriptive
The link’s purpose should be clear even without surrounding content. For example:
```
Click here to learn about our company.
Learn about our company.
Learn about our company.
```
2. Avoid Generic Phrases
Duplicated link text like “Read More” can be confusing. Use unique, concise phrases for each link.
3. Keep It Short, But Clear
It’s okay to use a sentence as link text if needed, but avoid overly long phrases or entire paragraphs.
4. Use Full URLs Sparingly
When linking to a URL directly (e.g., http://example.com), consider how it impacts voice-control and screen reader users.
5. Fallback Options
If you can’t convey meaning in the link alone, add context in surrounding text or use a title attribute, but recognize that’s a last resort.
Following these guidelines boosts both accessibility and user experience, making your content clearer and more inclusive.
---
### A modern take on journaling (Nov 24, 2020)
A diary is a sanctuary for your daily routines, thoughts, feelings, or experiences. Traditionally, it's organized chronologically, capturing life's moments as they happen. While some cherish the privacy of their secret diaries, others find joy in sharing their personal stories with the world. The most famous diary, "The Diary of Anne Frank," transcended its private nature to become an iconic literary work.
### The evolution from diary to blog
The internet revolutionized journaling, transforming private thoughts into public blogs. Today, many people prefer recording their lives on vlogs—video diaries that blend visual storytelling with personal narratives.
### Why keep a diary?
Here are a few reasons why maintaining a diary can be beneficial:
- **Preserve private thoughts:** A diary is a personal space where you can express yourself freely.
- **Chronicle events:** Track significant events and milestones in your life.
- **Unfold narratives:** Use your diary to weave intriguing tales that document your experiences.
Regular diary-keeping sharpens your creativity and enhances your thought processes, providing a therapeutic outlet and helping you stay organized.
### The rise of online diaries
Writing online diaries brings a new dimension to journaling:
- **Creative freedom:** Online platforms offer tools to enhance your entries with multimedia.
- **Publishing opportunities:** Many platforms help you share your work with a broader audience, potentially turning you into a published author.
### Why choose an online personal diary?
An online diary is a versatile tool. Accessible from any device, it allows you to:
- **Log experiences anywhere:** With mobile apps, you can write whenever inspiration strikes, without needing paper or pen.
- **Set and track goals:** Online diaries often include features for habit and goal tracking.
- **Enhance privacy:** With robust security measures, online journals keep your entries safe.
- **Earn rewards:** Many platforms incentivize consistency and creativity with badges and rewards.
- **Leverage multimedia:** Enrich your entries with photos, videos, and audio clips.
### Detailed benefits of online diaries
1. **Enhanced privacy** - Paper journals are vulnerable to prying eyes. Online diaries, however, offer double password security and military-grade encryption, ensuring your entries are protected in the "Diary Vault."
2. **Write anywhere** - Mobile integration allows you to document your thoughts on the go, using apps available for iPhone, iPad, Android phones, and tablets.
3. **Goal and habit tracking** - Top online diaries let you monitor and achieve your personal goals. You can visualize your progress, make adjustments, and stay motivated.
4. **Path to authorship** - Many online platforms provide pathways to publish your diary. Share your stories on social media and reach a wider audience.
5. **Earn rewards** - To keep journaling fun and engaging, some platforms offer rewards for regular writing. These incentives help maintain consistency and improve your writing skills.
6. **Multimedia integration** - Take advantage of your devices' capabilities by adding photos, videos, and links to your entries. This enriches your diary, making it not just a written record but a multimedia scrapbook of your life's journey.
### The power of journaling
Regular diary-keeping is a powerful tool for personal growth. It helps you:
- **Reflect** Look back on past experiences and learn from them.
- **Organize** Keep track of your experiences, thoughts, and goals.
- **Heal** Writing about your feelings can be therapeutic, helping you process both joyous and challenging moments.
Maintaining an online diary can be a rewarding practice, blending traditional journaling with modern technology. Whether you're logging daily reflections, dieting progress, or dreams, an online diary offers a versatile and engaging way to document your life’s journey.
If you would like to dive into the world of journaling, I suggest you to try our [OhDiary](https://www.ohdiary.com) app. It is a secure, free online diary app which has been running since since 2005.
---
### What is an Online Diary? (Nov 11, 2020)
### History
Online diaries have been around since at least 1994, starting a new way for people to share their thoughts and experiences. At first, these diaries were called online journals and created communities of people sharing their daily lives. Over time, the term 'blog' became the common name for these journals. 'Weblog' was the original term, later shortened to 'blog.'
### Evolution
As technology advanced, private and secure online diaries emerged. These digital diaries replaced traditional notebooks hidden under pillows, allowing users to safely and securely store their personal thoughts online.
### Why keep an online diary?
Keeping an online diary can be a great experience for people in general .. and a great benefit for people already keeping an offline (i.e. in a physical book) diary. Here are some reasons and actions to get started:
1. *Track Personal Growth*: Write about your daily experiences and feelings to see how you change over time. Spend 10 minutes each evening writing about your day.
2. *Be Creative*: Use your diary to write creatively. Try different writing styles, poetry, or short stories. Share your creative journey with others.
3. *Set and Achieve Goals*: Use your diary to set personal goals and track your progress. Whether it’s fitness, learning a new skill, or career goals, writing about it can help you stay motivated.
4. *Boost Mental Health*: Writing can be therapeutic. Expressing emotions in a diary can help manage stress and anxiety. Start each entry with things you’re grateful for to stay positive.
5. *Build a Community*: Share parts of your diary publicly to connect with others. This can lead to supportive friendships. Join online writing challenges or groups to find like-minded people.
6. *Save Memories*: Your online diary can be a digital time capsule. Add photos, videos, and other media to make your entries richer.
7. *Learn and Improve*: Track what you’re learning and areas you want to improve. Reviewing your entries can help you understand yourself better.
### How to Get Started
1. *Choose a Platform*: Pick a platform that fits your privacy needs and writing style. Options include private apps like [OhDiary](https://www.ohdiary.com/), Day One and Penzu or public sites like WordPress and Medium.
2. *Create a Routine*: Write consistently. Find a time that works best for you, whether it’s in the morning, during lunch, or before bed.
3. *Start Simple*: Don’t overthink it. Begin with short entries, even just a few sentences or bullet points about your day. Your writing will naturally grow as you get more comfortable.
4. *Personalize Your Diary*: Customize your diary with themes and layouts that you like. Enjoying the look of your diary can motivate you to write regularly.
5. *Join a Community*: Engage with other online diarists. Comment on their entries and participate in discussions. The support from a community can keep you motivated.
Keeping an online diary is more than a hobby; it’s a way to discover yourself and grow. Start today and see where your thoughts take you!
---
### Understanding RSS: What it is and why it's useful (Jun 19, 2020)
In the vast digital world where information flows at an overwhelming pace, staying updated with your favorite websites, blogs, and news sources can be a daunting task. This is where RSS comes into the picture. In this blog post, we will explore what RSS is, how it works, and why it remains a valuable tool for managing online content consumption.
## What is RSS?
RSS stands for **Really Simple Syndication** or **Rich Site Summary**. It is a web feed format used to distribute frequently updated information, such as blog entries, news headlines, audio, and video content. An RSS feed enables publishers to syndicate data automatically, allowing users to keep track of multiple sources in one place.
### How does RSS work?
1. **RSS Feeds**:
- Websites create a special XML file that contains a summary of content (such as a news article or a blog post) along with metadata like publication date and author.
2. **RSS Readers**:
- Users subscribe to these feeds using an RSS reader or aggregator. These are tools or applications designed to collect and organize RSS feeds from various sources.
3. **Fetching Updates**:
- The RSS reader periodically checks the subscribed feeds for new content and retrieves updates automatically.
4. **Display**:
- The retrieved content is then displayed in the reader's interface, where users can easily browse through and engage with the updates.
## Why is RSS useful?
### 1. Centralized content management
RSS allows you to aggregate content from multiple websites into a single, easy-to-read format. Instead of visiting each site individually, you can view all updates in one place, saving time and effort.
### 2. Stay updated effortlessly
With RSS, you won't miss any updates from your favorite websites. The feed delivers newly published content directly to your reader, so you’re always in the loop without having to manually check sites.
### 3. No algorithm interference
Unlike social media platforms where algorithms dictate what you see, RSS feeds show you everything from the sources you've chosen to follow. There's no risk of missing out on important posts due to manipulated visibility.
### 4. Reduced clutter
By using an RSS reader, you can avoid the distractions and ads that often clutter websites. This streamlined consumption allows for a focused and efficient reading experience.
### 5. Offline access
Many RSS readers allow you to download articles for offline reading. This is particularly useful for individuals who need to access content in areas with limited internet connectivity.
### 6. Customization and control
RSS feeds offer a high level of customization. You can choose exactly which sites to follow, how often to check for updates, and how much of each article you want to see in your feed.
## How to get started with RSS
### Step 1: Choose an RSS reader
There are numerous RSS readers available, both web-based and standalone applications. Some popular options include:
- **Feedly**: A robust web-based reader with advanced features and a clean interface.
- **Inoreader**: Offers powerful filtering and organization tools.
- **The Old Reader**: Focuses on simplicity and ease of use, reminiscent of the original Google Reader.
- **RSS Owl**: A desktop application that is ideal for those who prefer software over web apps.
### Step 2: Subscribe to feeds
Visit your favorite websites and look for RSS icons or feed links, typically represented by a small orange square. Copy the feed URL and add it to your RSS reader.
### Step 3: Organize and customize
Group similar feeds into folders, set update intervals, and customize the display settings to suit your reading habits.
In an era dominated by social media and information overload, RSS remains a powerful tool for managing and consuming online content efficiently. By aggregating updates from your favorite websites into a single interface, RSS ensures that you stay informed without the noise and distractions of other platforms. Whether you are a news junkie, a blog enthusiast, or just someone looking to streamline your information intake, RSS is an invaluable resource worth exploring.
If you haven't yet tried using RSS feeds, now is the perfect time to start. Happy reading!
---
### Basecamp theme for Redmine (Sep 16, 2019)
In case you would like a theme similar to 37signals' **Basecamp**, you can use this patched stylesheet.
1. Download [`application.css`](http://github.com/theill/redmine-basecamp-theme/raw/master/stylesheets/application.css).
2. Create the required directories:
```
mkdir -p redmine/public/themes/basecamp/stylesheets
```
3. Copy the downloaded file into the directory:
```
cp application.css redmine/public/themes/basecamp/stylesheets
```
Now restart your Redmine instance and select the new `basecamp` theme from Redmine's Settings page (located at `/settings`).
You are welcome to send patches on GitHub:
Enjoy!
---
### Tip: Include email in notification message when sending confirmation mails (May 30, 2014)
If you are a web developer and needs to handle user registration the you probably are sending out confirmation emails to users to ensure they've entered a valid email.
Lots of web sites (and apps) are showing a message saying "We've send you a confirmation mail. Please check your mailbox".
Tip of the day is this - make sure to include the actual email in that notification message. In case a user actually entered a wrong email he will notice immediately and doesn't need to refresh his email box to see if the mail is coming through. A simple "Hey, we've send off a confirmation mail to john@doe.com now. Please check your mailbox in a minute" is enough.
I'll add this tip to an upcoming article about UI tips & tricks for apps and web sites.
---
### Tweak AppCode font aliasing on your mac (Oct 27, 2013)
If you can't use your beloved Monaco font in AppCode because it has gained weight and simply looks too bold, you might want to trim your anti-aliasing settings.
Try running this in your terminal
$ defaults write com.jetbrains.AppCode.plist AppleFontSmoothing -int 1
You might tweak it even more by using different values for `-int 1` e.g. 0, 2 or 3. I'm not changing the system wide font smoothing setting, but only the one for AppCode.
---
### Immediately flush IIS log for real time tail to avoid 60 second buffer delay (Aug 15, 2013)
I wanted to tail my IIS log in realtime to avoid having to wait 60 seconds as is the default on IIS 7. I found out that I could run the command
> netsh http flush logbuffer
This is great but I wanted to do a tail so this short script does the trick for you (I assume you have cygwin installed if you're on Windows)
Run command every second in the background and flush output (the "Ok." message)
$ while true; do netsh http flush logbuffer > /dev/null; sleep 1; done &
Then you're able to do your regular tail
$ tail -100f u_ex130814.log
and have it update in real time.
---
### How to slice a PSD for use with iPhone & iPad (Dec 16, 2012)
If you are designer doing iOS interfaces and want to help your developer, these guidelines are for you.
0. Slice both a regular and Retina version.
* Retina files are postfixed with "@2x.png" (for "two times") e.g. "account.png" vs "account@2x.png"
* Retina files must be placed in same folder as its non-retina brother
* Retina dimensions must be dividable with 2 e.g. 25x13 is not a valid retina dimension but 26x14 is fine
* All files should be of type PNG (24bit if necessary)
* Background files might be in JPG too (saves on file size)
* Use transparency if needed - _no_ background color
* All files must be lower-cased
* All files must _not_ include any spaces
* Separate filenames with dashes if necessary e.g. "black-box.png"
* Group files in folders if needed e.g. "icons/account.png", "backgrounds/washed.png"
* Keep folder structure after delivery to developer and update files in that structure if needed
* Animations must be postfixed with a number e.g. "anim_0.png", "anim_1.png", "anim2.png", etc. (retina would be "anim_0@2x.png", "anim_1@2x.png", etc)
* Inform developer of any special masking necessary
* Slice each image with zero margin/padding i.e. keep to size of image
An additional tip for Mac users. Download [Slicy](http://macrabbit.com/slicy/) from macrabbit. It's an incredible cool tool which slices your PSDs automatically based on your layer naming.
Let me know in the comments if you have more suggestions I need to put on the list.
---
### Resolving DNS issues on my ThinkPad running Windows 8 (Sep 08, 2012)
I just installed Windows 8 but had a hard time figuring out why not all sites were available. I quickly found out the DNS lookup failed.
Since I had to uninstall my ThinkVantage WIFI manager before installing Windows 8 I assumed it could have something to do with an invalid configuration.
I had to reset my TCP/IP stack before I got it to work which is done using
C:\> netsh int ip reset reset.log
followed by
C:\> netsh winsock reset catalog
It should do the trick -- you might have to restart your computer.
---
### A quick Rails guide for designers (May 28, 2012)
I almost always work with great designers when building Ruby on Rails web applications. These designers are capable of doing amazing HTML and CSS and are already able to navigate a RoR directory structure or able to do so after a quick intro. I'm not focusing on this basic structure convention in this guide but instead I will be taking designers a step further and actually enable them to add a little bit of functionality to views i.e. enabling them to control some logic in `*.erb.html` files located in `/app/views` folder. Your designer need to be running your Rails app locally but that should be pretty common for agile teams.
To clarify, this guide is only useful for your designers working closely with you on a Ruby on Rails project. It's supposed to be a pragmatic quick read telling your WHAT but not necessarily WHY. Here you still have to bug your developer.
I will go through these
* differencies between `<% ` and `<%=` tags
* differencies between a `"double quoted string"` and a `'single quoted string'`
* using `cycle` tag
* using `dom_id` tag
* using `link_to` tag and understanding `rake routes`
Ok, let's go...
### differencies between `<% ` and `<%=` tags
Most developers tell designers to avoid touching anything between `<%` and `%>` tags. This is an obsolete mindset not fitting into a team with highly skilled members.
Code such as `<% if @rides.any? %>` does *not* output anything but code such as `<%= @ride.title %>` will.
### differencies between a `"double quoted string"` and a `'single quoted string'`
A code block like `<%= "Picture of #{@car.name}" %>` might output `Picture of Porsche` but a block like `<%= 'Picture of #{@car.name}' %>` will simply output `Picture of #{@car.name}`.
What's to notice is that dynamic code in `#{}` is expanded within a `"double quoted string"` but not within a `'single quoted string'`.
### using `cycle` tag
Occasionally you are probably creating tables looking like
Denmark
England
Sweden
The example above cycles through rows setting a class of either `dark` or `light`. It is possible to hook this up using something like this
<% ["Denmark", "England", "Sweden"].each do |name| %>
<% end %>
<%= name %>
You already know the `<%= %>` syntax which tells you to output _something_. Line 3 loops through all countries and on line 4 we are using the `cycle` method which will output `dark` on first row, `light` on second, `dark` on third, etc.
### using `dom_id` tag
When building AJAX interfaces it is very common to need a unique ID for each element such as when printing a list of comments
First comment
Second comment
If your developer needs to add comments dynamically it will probably be hooked up using `dom_id` with code such as
<% @comments.each do |comment| %>
<%= comment.content %>
<% end %>
The `dom_id` simply takes an iterated object and output a string useful as an element ID.
### using `link_to` tag and understanding `rake routes`
Instead of creating standard HTML such as `Log in` you are actually able to hook it up pretty easily by running `rake routes` in your Terminal. This will give you a list of available URLs such as
new_user_session GET /users/sign_in(.:format) {:controller=>"sessions", :action=>"new"}
user_session POST /users/sign_in(.:format) {:controller=>"sessions", :action=>"create"}
destroy_user_session GET /users/sign_out(.:format) {:controller=>"sessions", :action=>"destroy"}
Look at this and then take first part of a line matching your URL e.g. `new_user_session` and append it with `_path` then hook it up using `<%= link_to 'Log in', new_user_session_path %>`. It will generate the exact same output but if a developer afterwards thinks a URL for signing in should be `/users/login` he won't have to go into each view to change it.
I am hoping this short guide will help your designers to bind just a little bit more logic into your views.
---
### Restore full backup of Redmine from Google Storage (May 28, 2012)
Restore database from dump file
```
# required settings
DB_USERNAME=''
DB_PASSWORD=''
DB_NAME=''
REDMINE_ROOT='' # e.g. /home/peter/rails/redmine.commanigy.com'
BACKUP_ROOT='' # e.g. /home/peter/backups (will be created)
RESTORE_FROM='' # e.g. '20110201' for February 1, 2011
$ mysql -u $DB_USERNAME --password=$DB_PASSWORD $DB_NAME < $BACKUP_ROOT/redmine/db/$RESTORE_FROM
```
---
### A bash version of keep_releases known from Capistrano ruby scripts (Mar 31, 2012)
Today I needed a clean up feature in my bash script similar to what's known from Capistrano when using the "keep_releases" argument.
I wasn't able to find a simple version so I created it myself. Maybe others find it useful too so here goes
releases_path=/data/sites/yoursite.com/releases # change this
keep_releases=5
versions=`ls -xt $releases_path`
releases=(${versions// / })
# check available number of versions in releases directory
releases_count=${#releases[@]}
if [ $releases_count -le $keep_releases ]
then
echo 'no old releases to clean up'
else
echo keeping $keep_releases of $releases_count deployed releases
releases=(${releases[@]:0:0} ${releases[@]:($keep_releases)})
for release in "${releases[@]}"
do
path=$releases_path$release
`rm -rf $path`
done
fi
I've created a [github gist](https://gist.github.com/2266412) too. Feel free to modify it if you have a better solution.
---
### Finding Apache configuration file (httpd.conf) location (Jun 08, 2011)
Just a quick tip for programmers working with Apache. Sometimes I'm asked where to find the Apache configuration file on a given server. Since it's possible to configure this there is no "default location" so I usually do:
$ ps -ef | grep apache
which gives me a list like
deploy@cmd01:/$ ps -ef | grep apache
root 4053 1 0 06:26 ? 00:00:04 /usr/sbin/apache2 -k start
www 5189 4053 0 11:00 ? 00:00:00 /usr/sbin/apache2 -k start
www 5199 4053 0 11:00 ? 00:00:00 /usr/sbin/apache2 -k start
...
Then simply run
$ /usr/sbin/apache2 -V
and you will get the details you need, specifically this
Server compiled with....
-D SERVER_CONFIG_FILE="/etc/apache2/apache2.conf"
That's it. Are you using another/faster approach? Let me know.
---
### How to hide icon in your dock for any Mac application (Apr 30, 2011)
Just got a beta of a Mac notifier for Podio and didn't like it showed both an icon in my menubar and my dock (sometimes also referred to as the taskbar). If you want to avoid having any Mac application shown in your dock, it's possible to patch its package by doing these simple steps
* Open Finder and browse to your application
* Right-click the file and select "Show Package Content"
* Browse to "Contents" and open "Info.plist"
If you find an element called "Application is agent (UIElement)" you can mark its checkbox. If it does not exist you should add it by clicking "Add Item", enter "LSUIElement" and mark the checkbox.
Now save your Info.plist file and restart the application.
Done. The dock icon is now hidden.
Just a warning .. this might not work for all applications e.g. if the application contains a menu that will only show the application is focused. So if you can't access a window for that application through its menubar icon you are out of luck.
---
### Use sensible defaults when building a web, mobile or desktop application (Apr 25, 2011)
While working on migrating "gomore.dk", a Danish ridesharing service, to Rails 3, I figured it would make sense to look into the existing database to figure out if I could add some sensible defaults when creating e.g. new rides. The site already contains a decent database so I figured it would be rather easy to measure which defaults to use.
As an initial example, I would like to know how many seats were shared on each trip and therefore I did a simple query as shown below:
From this, it is pretty obvious that I should use "3" as a default number of seats available. In this case, some common sense would probably give you the same result (four seats in a standard car minus one for the driver).
Same type of query can be used to figure out the most popular seat price:
It is even possible to *remove* options if you look into providing sensible defaults for your users. As in this case where the existing gomore.dk contains a checkbox for specifying if car is "smoking" or "non smoking" area. A query showed me
i.e. we really don't need to have users decide on this .. more than 95% of all rides are non-smoking rides so the rest should either write it in a comment field or edit the ride afterwards to mark is specifically as "smoking". So in this case we just removed an option from our wizard to avoid clutter. Lovely.
The examples above should go for all defaults .. also stuff your marketing department would like to decide e.g. when a user creates an account and have to uncheck instead of check a "Subscribe to our daily, fancy, not-to-miss newsletter" box. Focus on pleasing your users by pre-selecting choices they probably *are* going to make themselves ... follow the "don't make me think" principle! It makes users happy and allow them to complete a task faster.
Using sensible defaults goes for any type of application you are creating being for web, mobile or desktop.
---
### An error occurred while validating. HRESULT = '8001010E' (Feb 11, 2011)
Just a quick tip. While upgrading one of my projects from VS.NET 2008 to VS.NET 2010 I ran into a problem I wasn't able to find a correct solution for it anywhere.
While building my setup projects I got:
An error occurred while validating. HRESULT = '8001010E'
Various posts suggested to remove all dependencies but in my case it was caused by an invalid reference to the framework. This is what I did to have it compile again:
* Right-click .vdproj
* Select "View" | "Launch Conditions"
* Right-click ".NET Framework"
* Select "Properties Window"
* Expand "Version" dropdown
* Select correct framework e.g. if it is currently set to "3.5.1234" you might select a similar in the dropdown list i.e. ".NET Framework 3.5".
Maybe it might help you as well.
---
### Universal builds for Mac App Store with Xcode (Feb 03, 2011)
While working on [Wallpapery](https://www.wallpaperyapp.com/ "Hand-picked designer desktops"), I had to do a universal build for both 32- and 64-bit. I expected I should simply set "Architectures" to "Standard (32/64-bit Universal)" but after approval in Mac App Store and user complaints I found out, I had missed a couple of steps.
To build your product for both 32- and 64-bit architectures (aka i386 and x86\_64) you have to explicitly unmark "Build Active Architecture Only" and filter list of "Valid Architectures" to *only* list "i386 x86_64"
I wasn't aware of that so maybe others find this useful.
---
### How to get display name from NSScreen (Jan 14, 2011)
While working on [Wallpapery](https://www.wallpaperyapp.com/) I needed to get a given screens display name. There is no "displayName" method on NSScreen so I added a category to provide this functionality. Seems like others are looking for this too so I'm posting my code below.
#### NSScreen+DisplayName.h
#import
@interface NSScreen (DisplayName)
- (NSString *)displayName;
@end
#### NSScreen+DisplayName.m
#import
#import "NSScreen+DisplayName.h"
@implementation NSScreen (DisplayName)
- (NSString *)displayName {
NSString *screenName = nil;
io_service_t framebuffer = CGDisplayIOServicePort([[[self deviceDescription] objectForKey:@"NSScreenNumber"] unsignedIntValue]);
NSDictionary *deviceInfo = (NSDictionary *)IODisplayCreateInfoDictionary(framebuffer, kIODisplayOnlyPreferredName);
NSDictionary *localizedNames = [deviceInfo objectForKey:[NSString stringWithUTF8String:kDisplayProductName]];
if ([localizedNames count] > 0) {
screenName = [[localizedNames objectForKey:[[localizedNames allKeys] objectAtIndex:0]] retain];
}
else {
screenName = @"Unknown";
}
[deviceInfo release];
return [screenName autorelease];
}
@end
You need to include the IOKit framework in your project.
Enjoy.
---
### How to send mass text messages from your own number (Jan 06, 2011)
A couple of months ago we needed to make a service which would be able to send out sms text messages to a large number of people. The text message itself should come from a specific number so recipients would be able to reply back for more information.
Another requirement was the ability to send a text message to a specific number and then trigger the mass sending to the configured recipients.
The part sending out bulk sms is easy. A lot of companies have great, simple APIs to do this but they do not allow for incoming sms without paying a considerable up-front amount (easily $2k). We would like to avoid paying this and thought of solutions and found one using Twitter. Basically it should be possible to send a tweet (via SMS, which is possible) and have this tweet delivered to all your configured recipients.
We built [ShoutSMS](https://www.commanigy.com/shoutsms) for this purpose but have currently disabled the Twitter integration since it was based on Basic Authentication which is going to be discontinued today. Instead we need to update our code to use OAuth and we plan to update this shortly.
The ShoutSMS service is very simple but very cheap as well. You sign up, confirm your number and import your list of phone numbers. Then you're ready to go. Since we temporarily disabled the Twitter integration it's possible to send messages directly from the site as well. Since we confirmed your number we are able to send out messages on your behalf so all messages will come from your confirmed phone number.

If this sounds interesting and maybe something your company could use for mass marketing, you should head over to the [ShoutSMS web site](https://www.commanigy.com/shoutsms) and create an account. You will get a couple of free sms to check out the features.
---
### Send your weight from an iPhone through SMS (Jan 06, 2011)
While working on lifestyleapps I have been asked a couple of times, if it would be possible to report your weight by sending an SMS from your phone. This is already possible and I have been using it from my iPhone 3G for a long time.
The trick is to associate your Twitter account to your lifestyleapps account and set up your Twitter to accept SMS. In order to report your weight you need to follow [@reporting](http://twitter.com/reporting) which is the lifestyleapps Twitter account and by following this (and it will follow you back) it's possible to send a direct message to avoid everyone having to see your weight.
This is the screen to associate your Twitter account in lifestyleapps
In order to send your weight you simply enter
d reporting weight 82.4
This will report your weight as "82.4" kg and insert it for todays date. You might shorten the message to
d reporting w 82.4
Lifestyleapps will check messages sent to @reporting each minute and see if an associated lifestyleapps account exists for that Twitter handle. If that's the case, the weight entry is inserted into your lifestyleapps account.
If you are on an iPhone you might be interested in [Twpie](https://www.commanigy.com/twpie) which is an upcoming application allowing you to send similar tweets fast. It does this by storing recently sent tweets and order these by usage count and last updated date.
---
### UIModalPresentationFormSheet width and height for an iPad in landscape mode (Nov 18, 2010)
In a recent application I was doing, I was designing an interface to be shown as a modal form sheet using setModalPresentationStyle:UIModalPresentationFormSheet. I searched the Apple documentation to find the exact dimensions of this sheet but it isn't documented.
It only states "The width and height of the presented view are smaller than those of the screen and the view is centered on the screen. If the device is in a landscape orientation and the keyboard is visible, the position of the view is adjusted upward so that the view remains visible. All uncovered areas are dimmed to prevent the user from interacting with them."
AuthenticationViewController *authentication = [[AuthenticationViewController alloc]
initWithNibName:@"AuthenticationViewController"
bundle:nil];
[authentication setDelegate:self];
[authentication setModalPresentationStyle:UIModalPresentationFormSheet];
[self presentModalViewController:authentication animated:NO];
[authentication release];
If others are looking for the same information, I can tell its dimension in landscape mode is 540x620. I got this by looking at `[view frame].size`.
---
### How to backup Redmine on Google Storage (Oct 27, 2010)
If you would like to backup your Redmine database and files, you might to consider Google Storage as your backup location. It comes with a 100 GB free monthly usage.
First, you need to [sign up](http://code.google.com/apis/storage/) for a Google Storage account if you don't have an account already.
Once done, download and install [GSUtil](http://code.google.com/apis/storage/docs/gsutil.html) which is a command line tool, allowing you to manage buckets.
Paste the following script into a file called "backup_redmine.sh"
# required settings
DB_USERNAME=''
DB_PASSWORD=''
DB_NAME=''
REDMINE_ROOT='' # e.g. /home/peter/rails/redmine.commanigy.com'
BACKUP_ROOT='' # e.g. /home/peter/backups (will be created)
# optional settings
GS_ROOT='gs://redmine-backup'
GS_FILENAME='backup_'`date +%Y%m%d`'.tar.gz'
echo 'Setting up directories'
mkdir $BACKUP_ROOT/redmine/db -p
mkdir $BACKUP_ROOT/redmine/files -p
echo 'Backing up database'
/usr/bin/mysqldump -u $DB_USERNAME --password=$DB_PASSWORD $DB_NAME | gzip > $BACKUP_ROOT/redmine/db/`date +%Y%m%d`.gz
echo 'Backing up attachments'
rsync -a $REDMINE_ROOT/files/ $BACKUP_ROOT/redmine/files/
echo 'Packing into single archive'
tar -czPf $GS_FILENAME $BACKUP_ROOT/redmine/
echo 'Creating bucket on Google Storage (if not already created)'
gsutil mb $GS_ROOT
echo 'Copying backup archive to Google Storage'
gsutil cp $GS_FILENAME $GS_ROOT
echo 'Cleanup by removing archive'
rm $GS_FILENAME
echo 'Backup complete'
***
You might want to apply execute rights to your script using
chmod +x backup_redmine.sh
And maybe even add it to your crontab to get daily backups
crontab -e
Then add this line
@daily FULL_PATH_TO_SCRIPT > /dev/null
That's it.
Let me know if you improve this script.
---
### Using vi for your simple, day-to-day editing needs (Sep 02, 2010)
My favorite editor isn't `vi`, but I'm still using it at least a couple of times each day. It's a short two character command, it's always available and it starts fast.
I have used it for decades and still, I only know these commands. I really don't need to learn any others, contrary what some of my friends tell me.
### Need to know
j = move down
k = move up
l = move right
h = move left
i = go into "insert" mode
: = go into "command-line" mode
ESC = go out of current mode
x = delete character
wq! = save file and quit (when in command mode)
q! = quit (when in command mode)
### Good to know
{number}G = goto line
yy = copy line
dd = delete line
p = paste line below
P = paste line above
r = replace character
A = go into "insert" mode and append to end-of-line
/ = go into "search" mode
That's it .. you might want to check out variants of these commands e.g. "5dd" to delete five lines, "4yy" to copy four lines.
If you need a list of all commands, look up the index help page in the vim (you are probably using `vim` and not `vi`) documentation using:
` : help index`
---
### Lesson learned: Put limits on anything you provide for free (Aug 25, 2010)
With our [ShoutSMS](/shoutsms) service, we provide three free sms credits just for signing up. We do this to allow new users to try our service, without having to buy initial credits, just after they sign up.
After initial launch, we almost immediately got people from India hitting our servers. They signed up, confirmed their number and tried to send overtaxed sms to various numbers. Because I had chosen an initial credit limit and a max cost limit on each sms, it was avoided. I know from my previous work at ZYB, that unlimited sms and unlimited cost/sms is not something you want to offer.
ShoutSMS does tracking of all sms messages sent to prevent fraud. Users are currently not able to see this statistic themselves, but we are working on adding this ability in a future update. This will allow users to track how many messages were delivered and to which country.
Think mass sms marketing is something your company could benefit from using? [Sign up](/shoutsms) for an account now and try it out for free.
---
### Marketing tip: Include link to your app in newsletters (Aug 18, 2010)
I have registered on a lot of sites and opt-in for their newsletter to be notified of updates.
One thing bugging me is, when a site sends a great mail in their newsletter but doesn't include a direct link to their web site. The mail is coming from their domain so it isn't hard to guess but _users are lazy_!
Since I'm registered on too many sites to visit regularly, I probably do want to visit a site, if it contains exiting updates but I have to admit, that without a direct link, I might not go for a visit but just archive that mail instead. It's a pity so I'm suggesting this template for all your newsletter posts.
Hi Peter [name of user, if known],
We have just updated our site with a cool new feature, allowing you
to Y while doing Z. It's amazing and magical. Boom. Read more about
this on our blog? [link to blog post, if available]
Visit us at thecoolapp.com [link to your site]
Kind regards,
[personal name or team code name]
--
This mail was sent to john@doe.com [email] because you signed up
for thecoolapp.com [link to site]. Unsubscribe immediately, if you do
not wish to receive more updates from us [link to unsubscribe link].
These basic elements should be in any marketing mail you send. If you are using any tracking tool, such as CampaignMonitor, you will notice a lot of people actually clicking your main web site link.
---
### Upgraded ShoutSMS from Rails 2.3.8 to Rails 3 in five minutes (Aug 16, 2010)
Today I wanted to try how easy it would be to upgrade our existing [ShoutSMS](https://www.commanigy.com/shoutsms) (pretty small) Rails application from 2.3.8 to latest Rails 3 release candidate (currently rc3). Without taking our test suite into consideration it took around five minutes with help from the official rails_upgrade[1] plugin. This is fast, yes, but considering the size of this app and possible pitfalls I am not looking forward to upgrade our larger projects.
These are the basic steps to perform
* Install [rails_upgrade](http://github.com/rails/rails\_upgrade) in my 2.3.8 project using "./script/plugin install http://github.com/rails/rails\_upgrade"
* Run rake tasks installed with plugin to check what steps are required with `rake rails:upgrade:check`
* Run `rake rails:upgrade:backup` to backup some files which will be override shortly
* Run `rake rails:upgrade:configuration >> upgrade_configuration`
* Run `rake rails:upgrade:gems >> upgrade_gems`
* Run `rake rails:upgrade:routes >> upgrade_routes`
* Create new Rails 3 app above your existing one with `rails n .`
* Check each of your files before overriding - not all are backed up with the backup task
* Copy back in your changes and refer to the three "upgrade\_*" files for updated configuration, gems and routes syntax
This did most of the work for me. I needed to patch a bit in my new "application.rb" file (e.g. replace RAILS\_ROOT with Rails.root, RAILS\_ENV with Rails.env, etc).
Notice, the rails\_upgrade plugin might suggest to change "`<% @object.each do |p| %>`" blocks to "`<%= @object.each do |p| %>`" but I don't see this should be done.
I needed to upgrade ActiveMerchant but it was a simple
$ gem update activemerchant
and then patch my Gemfile with correct version
gem 'activemerchant', '1.7.1', :require => 'active_merchant'
It was also needed to go through each ERb and update block helpers. Rake task "rake rails:upgrade:check" can be used multiple times to check if you're near the end.
I had a couple of "f.error\_messages" warnings as well. It's suggested to install "rails plugin install git://github.com/rails/dynamic\_form.git" but I made a partial instead to have complete control over my displayed error messages.
For more general upgrade tips & tricks you might consider viewing [part 1](http://railscasts.com/episodes/225-upgrading-to-rails-3-part-1), [part 2](http://railscasts.com/episodes/226-upgrading-to-rails-3-part-2) and [part 3](http://railscasts.com/episodes/227-upgrading-to-rails-3-part-3) of the "Upgrading to Rails 3" Railscasts series.
---
### Facebook CSS for will_paginate gem (Aug 16, 2010)
Today I needed to add pagination to our Danish beta application for handling your accounting called [Hurtigmoms](#) (defunct). Since we're developing in Rails it was a logically choice to use "will_paginate" to support pagination.
Our prototype layout is using a Facebook header and so I wanted my pagination control to mimick their style. If you need something similar you might want to take a look at my CSS styles which are using the default class names used by will_paginate.
.pagination {
font-size: 11px;
float: right;
margin: 0;
padding: 3px 0 4px;
}
.pagination a,
.pagination span {
padding: 3px 3px 2px;
}
.pagination .disabled {
background:none repeat scroll 0 0 transparent;
border:medium none;
color:#999999;
cursor:default;
}
.pagination a {
color:#3B5998;
cursor:pointer;
text-decoration:none;
}
.pagination a:hover {
background-color:#3B5998;
border-bottom:1px solid #3B5998;
border-color:#D8DFEA #D8DFEA #3B5998;
color:#FFFFFF;
text-decoration:none;
}
.pagination .current {}
.pagination .current {
border-bottom:2px solid #3B5998;
border-color:#3B5998;
color:#3B5998;
font-weight:bold;
padding-left:2px;
padding-right:2px;
}
.pagination .current a:hover {
background-color:#3B5998;
color:#FFFFFF;
}
.pagination .prev_page {
}
.pagination .next_page {
}
Just copy and paste it into your application css file and you're done.
This is how it looks:
---
### Tracking coffee intake with touchatag and Lifestyleapps (Apr 03, 2009)
I have bought a touchatag RFID reader and a couple of touchatag RFID tags and was wondering how I could use these to track my daily intake in lifestyleapps.
I noticed a Twitter application already has been developed which post a message from a configured account. Since lifestyleapps already integrate with Twitter it was a simple matter of associating a direct message and prefixing it with “h” or “having” to let lifestyleapps know you are reporting an intake.
Many cups of coffee are consumed on a daily basis by me and I thought I would make tracking this easier for myself by configuring a touchatag with a Twitter message of “d reporting having Coffee, instant, prepared with water”. This means “d” for direct message, “reporting” for the Twitter user receiving our message (used by lifestyleapps), “having” to tell lifestyleapps you are reporting an intake and “Coffee, instant, prepared with water” to make lifestyleapps look up this specific intake and figuring out its nutrition values.
Now whenever I drink a cup of coffee I just need to place my coffee mug on a touchatag reader and it will automatically trigger a Twitter message which will be read by lifestyleapps. And this can by done using no code at all.
This is a pretty sweet thing and I’m planning to put a couple of tags on my breakfast food items since I almost eat the same breakfast every morning. It would be nice to be able to just put a bottle of milk, a bag of bread and a jar of jam on my reader to track my breakfast within lifestyleapps.
If you don’t know about lifestyleapps you are welcome to sign up for a free account at [lifestyleapps](#) [update - this is now defunct].
---
### Today, we have taken over development of ConquerCam (Mar 19, 2009)
Today, we have taken over development of ConquerCam. ConquerCam is a low-priced (less than twenty bucks) webcam software package for Windows having quite a few cool features such as built-in web server, motion detection and scheduled uploads via FTP.
ConquerCam was initially developed by me back in 1998 and at that time it was surely one of the very best in its category. Lacking time I stopped active development in 2003 but didn’t really give up on it since I continued to get feedback. ConquerCam is still being downloaded by 100+ users a day so I know it is still popular though it is now behind some of its competitors.
That will change now! ConquerCam will be developed professionally starting April 1th and that will generate some faster release-cycles in the future. This is great news for ConquerCam and its user-base out there.
For more information please visit our [ConquerCam page](/conquercam)
---
### Upgrading Rails Engines Project to Rails 2.3.2 (Mar 16, 2009)
Our [lifestyleapps](#) project (still in very early beta) was running Rails 2.2.2 with the Rails Engines plugin ten minutes ago. Today, Rails 2.3.2 was released so I decided to try if I could easily upgrade it and avoid using the Rails Engines plugin anymore. It was beautiful simple and took me less than ten minutes.
First, I had to update our Apache Passenger module with a version supporting Rails 2.3 so I did a
$ gem update passenger
and then run the install to build our apache module
$ passenger-install-apache2-module
In my config/environment.rb I changed
RAILS_GEM_VERSION = '2.2.2' unless defined? RAILS_GEM_VERSION
to
RAILS_GEM_VERSION = '2.3.2' unless defined? RAILS_GEM_VERSION
and asked Rails to update my various script files by issuing
$ rake rails:update
Finally I remembered the application.rb should be named application_controller.rb now so I issued an explicit task for this as well
$ rake rails:update:application_controller
In the Rails Engines plugin you need to have the “routes.rb” file in the root of your plugin but with Rails 2.3.2 you should have it in the ‘config’ folder under your plugin and its content should be wrapped in “ActionController::Routing::Routes.draw do |map|” as the root routes.rb. So I changed this from
/vendor/plugins/life_intake/routes.rb
to
/vendor/plugins/life_intake/config/routes.rb
The contents of this routes.rb was changed from
map.resources :foods
to
ActionController::Routing::Routes.draw do |map|
map.resources :foods
end
Finally I had to update the root “routes.rb” to avoid using the “from_plugin” call e.g. I simply removed lines such as
map.from_plugin :life_intake
Now I don’t need the Rails Engines plugin anymore so I removed it with
$ ./script/plugin remove engines
That’s it .. I was now able to run my tests and start up my project and have it run on Rails 2.3.2.
Enjoy!
---
### Extend your shell toolbox with pbcopy (Mar 12, 2009)
We are developing Rails applications on Mac OSX and a command which isn’t used enough in my opinion is “pbcopy”. This command will allow you to grab the standard input from a terminal and put it on the clipboard.
I find myself using commands such as `pwd | pbcopy` all the time. This will grab my current working directory and make it available in my clipboard allowing me to easily paste it into another terminal or application. This avoids the need for you to grab your mouse to paste a simple line.
Just a quick tip for developers switching between terminal and desktop applications on a regular basis.
---
### Our blog is live (Mar 08, 2009)
You’ve found our blog “Command through simplicity”. This blog will post behind-the-scenes information about applications released by [Commanigy](https://www.commanigy.com).
We have moved our beta applications [Lifestyleapps](/lifestyleapps) and [Observer](/observer) to new and faster servers. These applications are almost updated daily so keep an eye on this blog or our [Twitter account](https://x.com/commanigy).
---
Gazing around you find more interesting places and you wonder how cool it would be, if you zoom into these places and see what they are seeing.
Povtown is a brand new community where people are offering to share their current view with others.
---
### Protect.APP
[Visit](https://github.com/theill/protectdotapp)
This service helps .NET developers of commercial software to protect their code from decompilation.
### Problem
Developers doing commercial software on .NET will need to obfuscate their code before sending to customers. This is needed because it’s very easy to decompile .NET applications.
Shareware developers face a challenge when they need to either use a obfuscator because they need to carefully consider what, where and how to obfuscate their code. It’s time a developer would rather use doing actual development.
Semi-automatic solutions exists but they are expensive typically around $2000.
### Solution
I propose a different solution to this problem. I protect a given .NET application for a small fee allowing developers to focus on building great applications. Each time a developer wants to release a new version of their product, they use our service.
---
## Blog posts
### When the interface stops mattering (Feb 19, 2026)
Beside my regular job, I've been building software solo for a long time. One person, own codebase, shipping features, fixing bugs, talking to users — the whole deal. And for most of that time, the interface was everything. The UI *was* the product. You'd spend hours agonizing over a button label, a modal flow, a color choice. If someone couldn't figure out how to use it within ten seconds, you lost them.
That mental model is quietly breaking down, and I think it's one of the most interesting shifts happening in software right now.
### The interface used to be the gatekeeper
Think about what an interface really does. It sits between your user and the actual capability of your product. The capability is the valuable thing — the data, the logic, the integration, the thing you spent months building. The interface is just the door.
For most of software history, the door had to be beautiful, obvious, and polished. If the door was confusing, users bounced. If it was ugly, they didn't trust you. The interface shaped the entire perception of quality.
So we designed. We iterated. We A/B tested shades of blue on a CTA button. We rewrote onboarding flows five times. We hired designers. We obsessed.
And it made sense — because that was the *only* way in.
### Now there are a thousand doors
With AI coding tools and agents becoming genuinely good, the interface layer is fragmenting fast. Users can now spin up a custom tool that taps your API and shows them exactly what *they* need in exactly the way *they* want it — in an afternoon. No designer required. No waiting for a feature request to climb your backlog. Just "vibe code" it.
I've done this myself, more times than I can count. Someone asks for a feature in [knipsmig.com](https://knipsmig.com) that's too niche for the core product — the kind of thing that matters deeply to three event photographers on the planet. Old me would have filed it as "won't do" and moved on. New me thinks: does the API support this? Can they, or I, just build a thin client on top? Often the answer is yes.
The broader point is this: as a SaaS builder, you no longer control how your product will be consumed. An AI agent might hit your API on behalf of a user who never opens your app. Someone might build a wrapper that serves a niche you never thought of. A power user might write their own dashboard because yours doesn't show the one metric they care about.
That's not a threat. That's your product becoming infrastructure.
### What actually holds its value
When I think about knipsmig, the thing that's genuinely hard to replicate isn't the UI. It's the upload pipeline, the photo processing, the smart sharing logic, the event structure, the data model behind a digital photobook. Those things took time to figure out and refine. The interface on top of it? Honestly, I could rebuild that in a week with a decent AI assistant.
This reframes how I think about where to invest. If your competitive moat is a clever UI, that moat is getting shallower by the month. If your moat is the underlying capability — the data, the integrations, the domain logic — that's much harder to replicate.
It also changes what a good API means. I've always put a lot of effort into the APIs because, first of all I'm a developer myself and love a nice API but also because it just makes it possible to make fewer *core* features .. and I love a slim core. I think of it as one of the primary surfaces of the product even more today. It's how AI agents will interact with your service. It's how power users will extend it. It's how the next wave of "interfaces" — whatever they look like — will connect to what you've built.
### Build the capability. Let the interfaces be disposable.
I'm 48 and have been shipping software since I was a teenager. I've watched a lot of "the next big thing" come and go. But this one feels different, because it's not replacing what we do — it's changing the layer at which we compete.
If you're building a SaaS product, make the service rock solid. Document the API obsessively. Think about what your product's unique capability really is, stripped of any interface. Then build *that* as durably as you can.
The UI? Ship it, improve it, keep it functional. But don't mistake it for the product. In 2026, it increasingly isn't.
Someone could fork your interface tomorrow. They can't fork ten years of domain expertise and the data that comes with it. Yet.
---
### Finally did a test ride with FSD in Denmark (Jan 08, 2026)
Yesterday, I drove to Odense for a test ride at Tesla. They showcased the Full Self-Driving (FSD) feature, and I had read extensively about it and watched nearly every video available. I needed to experience it for myself.
It was amazing. Although it was snowing lightly, Tesla was concerned that the system might disengage too often, but we got to try it anyway. The car performed exceptionally well with no issues at all.
The smoothness and confidence made it feel less like a tech demo and more like riding with someone who has driven that route a thousand times.
What truly impressed me was how natural it felt. The car handled lane changes, merges, and even snowy conditions effortlessly.
The fully self-driving car is a solved problem. End of story. You can argue when the steering wheel will be gone and when you can sleep in the car, sure .. but as someone who spends most of his time coding and building products, this feature sheet has moved from in development to done for sure. Done-done coming up.
---
### Add seasonal joy to your site with generative AI (Dec 07, 2025)
We all know that feeling - visiting a website during the holidays and seeing a little festive touch that makes you smile. Maybe it's snowflakes falling on the hero image, pumpkins appearing in October, or hearts floating around on Valentine's Day. These small details create emotional connections with users and show that there's a human touch behind the pixels.
But here's the problem: creating seasonal variations of your website's imagery is **tedious**. You either need to hire a designer every time a holiday rolls around, or you end up using the same tired stock photos everyone else is using.
Or do you?!
### Use Generative AI
What if you could take your existing brand imagery and automatically generate dozens of seasonal variations with a single command? That's exactly what modern image generation APIs make possible.
The idea is simple:
1. Take your existing hero image, product photos, or illustrations
2. Use AI to transform them into seasonal variations while keeping the core subject intact
3. Deploy them automatically based on the calendar
No Figma, Sketch or Photoshop skills required. No designer bottleneck. Just your original image and a bit of automation.
### Why bother?
You might be wondering if seasonal imagery is worth the effort. Consider this:
- **Emotional engagement**: Seasonal content creates a sense of timeliness and relevance
- **Return visitors notice**: Users who come back will see something fresh
- **Marketing alignment**: Your visuals can match your seasonal campaigns
- **Competitive edge**: Most sites don't bother—yours will stand out
- **It's fun**: Adding a bit of whimsy to your site makes the web a better place
A great example of this in action is [knipsmig.com](https://knipsmig.com), which uses seasonal imagery throughout the year to keep the experience fresh and delightful. Whether it's cozy autumn vibes or festive holiday decorations, the site feels alive and in tune with the moment.
Here's a glimpse of how the same base illustration transforms across different seasons and holidays:
Spring
Summer
Autumn


Christmas
Halloween
Easter


Diwali
Chinese New Year
Día de los Muertos


### A script that does the heavy lifting
I've created a TypeScript script that utilizes Google's Gemini API to generate seasonal variations of any image. It supports over 25 themes, including the four seasons and major holidays like Christmas, Diwali, Chinese New Year, as well as occasions like graduation and Black Friday.
However, be aware that it's not inexpensive! I'm defaulting to 4K output, which is currently the largest available from Nano Banana Pro. You may want to adjust this setting.
Anyway, here's the script for you ...
---
### Julen er på blokken 🎄 (Oct 24, 2025)
> _This post is written in Danish to capture the local spirit of my new Christmas rap song._
Julestemningen har fået et frisk pust på blokken i år! Jeg har netop skrevet og indspillet en ny dansk julesang, "Julen er på blokken", der blander klassiske julebilleder med moderne rap og ægte blok-stemning. Forestil dig sne der falder tungt, glimmer i luften, og klassiske juleretter på bordet – men i stedet for den traditionelle julemusik slår vi over på hiphop-beats og rim, der samler hele nabolaget.
Sangen handler om at fejre julen sammen på godt og ondt – med plads til både rap og remoulade, rim og juletraditioner. Om det så er nissen på taget som nikker i takt til beatet, Rudolf der lyser festen op med sin næse, eller vennerne på blokken der deler gaver og glæde mens rimene fyger gennem frosten.
"Julen er på blokken" er ikke bare en sang – det er et moderne juleeventyr, hvor fest, fællesskab og nutidens toner smelter sammen. Lyt med, del stemningen, og få smilet og juleglimtet frem – også til dem, der foretrækker omkvæd frem for klassiske kirkeklokker.
Hør den her før din nabo!

### Lyrics
**[Verse]**
Sne falder tungt, som tæpper på gaden
Glimmer i luften, julelys i faden
Anden på bordet, men jeg rapper i stedet
Pebernødder sprøjter, helt ude af kæden
**[Chorus]**
Julen er på blokken, vi danser i frost
Gaver bliver delt, intet bliver lost
Julen er på blokken, en fest uden stop
Rim i luften, mens vi fyrer den op
**[Verse 2]**
Nissen på taget, han lytter til min flow
Han nikker med huen, siger "det der er dope"
Juletræet glimter, som stjerner i nat
Men jeg holder det ægte, ingen glimmer på min hat
**[Chorus]**
Julen er på blokken, vi danser i frost
Gaver bliver delt, intet bliver lost
Julen er på blokken, en fest uden stop
Rim i luften, mens vi fyrer den op
**[Bridge]**
Rudolf i sneen, hans næse den skinner
Rytmen i sleden, hvor festen begynder
Klokkerne ringer, en lyd som en drøm
Jeg rapper om julen, i rim bliver jeg søm
**[Chorus]**
Julen er på blokken, vi danser i frost
Gaver bliver delt, intet bliver lost
Julen er på blokken, en fest uden stop
Rim i luften, mens vi fyrer den op
---
### You have 168 hours a week. Make them count (Aug 19, 2025)
We all know that one person who seems to get everything done. They're successful, energized, and always on top of their game. It’s easy to think they have some secret, but the reality is simpler: they’ve learned to use their time efficiently.
The good news? You have the exact same 24 hours in a day as they do. Every morning you wake up is a clean slate, a fresh start to take control of your day and direct your life where you want it to go.
This isn't just another to-do list. This is a three-part system to help you master your time. We'll look at how you're currently spending your time, how to find more of it, and how to use it efficiently.

## **Part 1: Find out where your time is really going**
We live in an age of constant distraction, which means we have to be ruthless about auditing our time. The first step is to get an honest look at your week.
For one week, track your daily activities and multiply each by seven to see the weekly total.
* **Internet & TV**: \_*\_ hours x 7 =* \_\_\_
* **Work or school**: \_*\_ hours x 7 =* \_\_\_
* **Socializing**: \_*\_ hours x 7 =* \_\_\_
* **Family- or partner time**: \_*\_ hours x 7 =* \_\_\_
* **Working out**: \_*\_ hours x 7 =* \_\_\_
* **Reading**: \_*\_ hours x 7 =* \_\_\_
* **Sleeping**: \_*\_ hours x 7 =* \_\_\_
* **Cooking and eating**: \_*\_ hours x 7 =* \_\_\_
* **Commuting**: \_*\_ hours x 7 =* \_\_\_
* **Other**: \_*\_ hours x 7 =* \_\_\_
Now, add up your totals and subtract that number from 168 (the total number of hours in a week).
**168 \- \[Your weekly total\] = \_\_\_**
That final number shows you the gap—the time you might not even realize you have. Next, look at your list and identify the biggest time-wasters, the activities that aren't contributing to your goals. This could be binge-watching a series or endlessly scrolling through social media.
You don’t have to eliminate these things entirely. Instead, set clear limits. Using a browser extension like [StayFocusd](https://chromewebstore.google.com/detail/stayfocusd-%E2%80%93-website-bloc/laankejkbhbdhmipfmgcngdelahlfoji) can help you cap your time on certain websites. Limiting X, Reddit or Facebook to just 10 minutes a day, for example, can make you more focused and intentional with your time there.
## **Part 2: How to create more time**
Once you know where your time goes, you can start to reclaim it.
### **Optimize your sleep**
Waking up early can have a massive impact, giving you focused time to work on yourself and your biggest goals. The key isn't justwaking up early, but waking up right. Our bodies sleep in 90-minute cycles. You'll feel more refreshed waking up after 6 or 7.5 hours than after 8, because you're waking up *between* cycles, not during one.
To make this a habit:
* **Go to bed at the same time every night.**
* **Wake up gradually earlier.** If your goal is 6 am, start with 7:50 am, then 7:40 am, and so on.
You might feel an energy drop for the first few weeks as your body adjusts, but a quick 20-30 minute power nap can help you push through.

### **Reclaim your "dead time"**
Dead time is time spent on activities you can't avoid, but that don't require your full attention, like commuting, grocery shopping, or even working out.
This is your opportunity to multitask productively. Use this time to listen to audiobooks or podcasts, or even learn a new language with an app like Duolingo. It's about adding value to time you're already committed to spending.
## **Part 3: How to use your time efficiently**
Now that you've found more time, here’s how to make the most of it.
### **Set clear goals**
Goals act like the lens of a camera: without focus, the picture is blurry. If you don't know what you're aiming for, it's easy to waste time by accident.
Keep it simple. Set 3-5 major goals for the next year in the most important areas of your life (work, health, personal growth, etc.). Phrase them as if you've already achieved them. For example: "I have completed my beginner Spanish course by December 1st."
### **Find your high-leverage activities**
The [Pareto Principle](https://en.wikipedia.org/wiki/Pareto_principle), or the 80/20 rule, states that 80% of your results come from just 20% of your efforts. To find your 20%, ask yourself:
* "If I could only do one thing all day, which task would add the most value toward my goal?"
* Then ask, "What would be the second most valuable task?" And the third?
These are your high-leverage activities.
### **Build powerful rituals**
Your morning ritual sets the tone for your entire day. It should be built from the high-leverage activities you just defined. If your goal is to start a blog, your ritual might be to write for 30-60 minutes every morning.
A few tips to make your morning ritual even better:
* **Drink water.** Your body is dehydrated after 6-8 hours of sleep.
* **Get a small win.** Do something simple but productive, like making your bed, to build momentum.
* **Exercise.** Any physical activity can kickstart your day and boost your energy.
Don't forget a night ritual, too. An hour before bed, turn off all your electronics for a "tech detox." Read a book, talk with your partner, and reflect on the day. Benjamin Franklin famously asked himself, "What good have I done today?"

### **Delegate, eliminate, and automate**
You don't have to do everything yourself. This approach is a key part of many productivity systems, including David Allen's popular [Getting Things Done (GTD)](https://en.wikipedia.org/wiki/Getting_Things_Done) methodology. Look at all your tasks that are *not* high-leverage activities and ask:
* Can I **delegate** this to someone else?
* Can I **eliminate** this entirely?
* Can this be **automated**?
### **Work in focused bursts**
The [Pomodoro Technique](https://en.wikipedia.org/wiki/Pomodoro_Technique) is a simple but effective way to stay focused. You work in a 25-minute sprint, then take a 5-minute break. This keeps your mind fresh and helps you stay highly effective.
For your most important tasks, block out time in your calendar and treat it like a meeting with yourself. This is your time for deep, focused work without interruptions.
### **Learn to say no**
Protecting your time often means saying "no." Say no to meetings without a clear purpose or outcome. Say no to checking your email first thing in the morning; finish your ritual first.
Most importantly, say no to things that don't support your goals. Remember, you aren't saying "no" to others—you're saying "yes" to yourself and what truly matters.
### **Be consistent, not perfect**
Things will not always go according to plan. You'll have inefficient days, and you'll get interrupted. The goal isn't perfection; it's consistency.
Once a week, take 30 minutes to review what was productive and what wasn't. Double down on what worked and try to eliminate what didn't.
Focus on the hour in front of you and make it count. Start with one or two of these techniques, and you'll be amazed at what you can achieve.
---
### Get the new macOS Tahoe wallpapers today (Aug 15, 2025)
The next major update for the Mac, macOS Tahoe, is just around the corner, and it's bringing some beautiful new visuals with it—especially the new screensavers.
I couldn't wait, so I've taken high-resolution screengrabs of all 15 new screensavers and added them to the Wallpapery app archive. Now you can enjoy the stunning aesthetic of macOS Tahoe on your desktop right now.
Check out the full collection at the Wallpapery website:
[https://www.wallpaperyapp.com/designers/macos-tahoe](https://www.wallpaperyapp.com/designers/macos-tahoe)
---
### Why comments aren't necessary (Aug 11, 2025)

Many years ago, I learned from a developer I deeply admired that *"comments are bad"*. At the time, this seemed counterintuitive - weren't comments supposed to make code more understandable? But because I respected his expertise, I pressed him to explain. His reasoning was straightforward:
> You don't need comments if your code is self-explanatory.
When you think about it, this makes a lot of sense.
If you're adding a comment to explain what the code does, you're essentially admitting that the code itself isn't clear enough. Comments become a band-aid for poor naming, confusing structure, or overly compact logic.
Instead of writing a comment, take a moment to ask yourself:
Can I rename this variable to clearly convey its meaning?
Can I extract this logic into a small, well-named function to make the intent obvious?
Example:
```
// only people above 18 are eligible to vote
if (age >= 18) this.vote()
```
This works, but the comment merely restates what the code is already doing. If the reader can't understand the code, it's because it isn't written clearly enough.
Refactor it like this:
```
const eligibleToVote = age >= 18
if (eligibleToVote) this.vote()
```
Now the code speaks for itself. No extra explanation is required.
---
### Why fewer comments = better code
Comments can become out of sync. You change the code but forget to update the comment, and suddenly it misrepresents the code. Worse, people tend to trust comments without questioning them. Self-documenting code avoids this issue - what you see is what's actually happening.
By forcing yourself to make the code readable on its own, you naturally:
* Choose better names
* Write smaller, more focused functions
* Avoid cramming too much logic into one place
The result is code that's easier to read, easier to change, and far less likely to confuse the next person who works on it (including you, three months from now).
---
So, the next time you're about to write a comment, pause for a moment and ask yourself, "Could I make this so clear that no comment is needed?" Most of the time, the answer will be yes, and your code will benefit from it.
---
### Building ten simple games with GPT-5 (Aug 09, 2025)

I wanted to test out the recently released GPT-5 model by building ten simple and popular games.
All games were built in a one-shot prompt. Only the Tetris one didn't fully work first-shot but a quick "redo your implementation" request fixed it.
Each section below includes the exact prompt used for that game. All follow the same constraints: single self-contained HTML file, inline CSS/JS, optional CDN font/SFX, no build tools, and responsive layout.
### [Pong](/pong-game.html)

Build a complete Pong game as one HTML file (no build tools); use inline JS/CSS and optionally CDNs; render with <canvas>; two paddles (W/S for left, ↑/↓ for right), one ball with simple physics and wall bounce; score when opponent misses; show scores, Restart button (R), Pause (P), and minimal on-screen instructions; keep a simple AI option toggle for right paddle; responsive canvas sizing; no external state, analytics, or extra pages; keep assets (fonts/sfx) via CDN only.
### [Snake](/snake-game.html)

Build a classic Snake as one HTML file with <canvas>; arrow keys to turn; fixed-step game loop; grid size ~20–30; snake grows on food; food spawns not on snake; die on self or wall (plus option toggle for wrap mode); show score/high score (localStorage), Restart (R), Pause (P); add simple difficulty (speed) select; all JS/CSS inline, CDNs allowed for fonts/sfx; responsive; no extra pages.
### [Tic-tac-toe](/tic-tac-toe-game.html)

Build Tic-Tac-Toe as one HTML file; 3×3 board with click/touch; two modes: Human vs Human and Human vs AI (unbeatable minimax); show current player, win/draw line highlight, Restart; simple move history (undo optional); clean responsive layout; all JS/CSS inline; may load a webfont from CDN; no frameworks unless via CDN and minimal.
### [Minesweeper](/minesweeper-game.html)

Build Minesweeper as one HTML file; adjustable board sizes (Beginner/Intermediate/Expert); left-click reveal, right-click flag (long-press for touch); numbers show adjacent mines; first click never a mine; timer and mine counter; Restart; win when all safe revealed; neat visual states; accessible keyboard controls; all JS/CSS inline; optional icon font via CDN; responsive grid; no extra pages.
### [Breakout](/breakout-game.html)

Build Breakout as one HTML file using <canvas>; paddle (mouse or ←/→), ball, rows of bricks; basic collision/physics; lives, score, and level progression (rebuild bricks, slightly faster ball); power-ups optional (wider paddle, multi-ball); Restart (R), Pause (P), instructions overlay; all JS/CSS inline, optional CDN font/sfx; responsive canvas.
### [Flappy bird](/flappy-bird-game.html)

Build a Flappy-style game as one HTML file; tap/click/space to flap; gravity, gap pipes scrolling; score increments per pipe passed; best score via localStorage; game over on pipe/ground; Restart; optional simple parallax background (CDN image allowed); all JS/CSS inline; responsive and 60fps loop; no extra pages.
### [Tetris](/tetris-game.html)

Build Tetris as one HTML file; standard 7 tetrominoes with bag randomizer; rotate (Z/X), move (←/→), soft drop (↓), hard drop (Space), hold piece (C), next queue; SRS-style rotation if simple to implement; line clears (single/double/triple/tetris) with scoring and level/speed; ghost piece; Pause/Restart; clean responsive UI; all JS/CSS inline; optional CDN font; no extra pages.
### [Simon](/simon-game.html)

Build Simon as one HTML file; four colored pads with tone per pad; game plays growing sequence; user repeats by click/touch/keyboard (1–4); strict mode toggle (error restarts round vs resets game); show round number; Start/Restart; simple SFX via tone generation or CDN audio; all JS/CSS inline; accessible focus styles; responsive layout.
### [Hangman](/hangman-game.html)

Build Hangman as one HTML file; include a small built-in word list (array) and random choice; on-screen keyboard + physical keyboard input; show revealed letters, wrong guesses, remaining attempts, simple stick-figure progression; win/lose message and Restart; optional category filter; all JS/CSS inline; optional CDN webfont; responsive; no external calls.
### [Number guessing](/number-guessing-game.html)

Build a Number Guessing Game as one HTML file; computer picks random number in a chosen range (default 1–100); user inputs guesses; show “Higher/Lower/Correct” feedback and attempt count; allow range selector and Restart; minimal, responsive UI; all JS/CSS inline; optional CDN font; no extra pages.
---
### AI reignited my coding passion (Mar 25, 2025)
I’ve been programming for nearly 40 years — started messing around with code at 8, built my first real shareware software at 15, and now, at 47, I thought I’d seen it all. But lately, AI tools like Claude Code, Cursor and Windsurf have taken my passion for coding to a whole new level . It’s the opposite of what I feel some senior developers are saying these days (if they have even tried it), and I get why — change can feel threatening. When I first dipped into AI, I’ll admit I felt a mix of awe and dread. It was _so good_ right out of the gate that it left me anxious, even demotivated. But I got over that hump, and now I’m completely hooked.
When you’ve coded as long as I have, you start seeing the same patterns repeat endlessly. There’s obviously “vibe” coding, which is its own fun beast—loose, creative, exploratory. But then there’s the grind: reviewing big PRs, diving into serious refactoring (not just renaming a class/variable, which barely needs AI), or sketching out a rough base for new features. Those tasks used to drain me when they got too repetitive. Now, with AI, personally using Windsurf paired with Sonnet 3.5 (sometimes 3.7), those tasks have become genuinely enjoyable ❤️. Take a simple prompt like “extract this into a new component, figure out a decent name” What used to involve multiple steps is now one line, and better yet, it often suggests a solid name like “PaymentStatusBadge” for a some code which will decide between showing five different states. It’s not always the perfect name, but it’s close enough to spark a chain of thought. That makes it so much faster than staring at a blob of code, trying to load the whole context into my head just to name something—especially when the refactoring gets chunky.
Then there’s the magic of shipping fast for early internal iterations. I’ve always been good at cranking out rough apps or features at lightning speed. Breadth-first development, tracer-bullet coding—whatever you call it, it’s been my thing. The dream is models that respond instantly—or at least feel real-time. Imagine building a system just by talking to it, watching the changes unfold as you speak. I’ve always said programmers are artists, crafting beautiful code like Monet slapping paint on a canvas—rapid strokes, iterate, refine (though my wife struggles to see the masterpiece when she catches me in a dark room, noise-canceling headset on, muttering “just one more tweak”). Simple stuff like “add a green submit button in the top-right navigation” is already easy, but picture a prompt like this:
> Build a page for entering contact details. I need name (required), email (required), and phone (optional). Add cool icons for each field, include standard email + phone validations, reject single-word names, and show clear error messages.
Right now, that gets you 90% there for a basic feature but takes a couple of minutes to figure out (I'm talking Windsurf Agent mode here, reading context, potentially doing a websearch, updating coding, fixing linting issues, etc). But what if it happened instantly? — you'd say “need name” and a field pops up; you say “required,” a red asterisk appears; you say “email,” and it slots in below—that’d be a whole new way to build, like sketching a lily pond in code. We’re not far off, either. It’s just a GPU power game with tech we already have. This isn’t about PhD-level niche systems (whatever that means); I’m talking everyday SaaS apps, internal tooling, business utilities, the broad stuff.
Even building rough user interfaces has become a joy. If your codebase has enough examples, a prompt like “add a table showing a list of customers, see ProductsTable.tsx as a reference” can churn out a solid UI a fraction of the time it usually did. It pulls from your existing patterns, hitting 95% of what you need. Sure, if your code’s a mess, it struggles—but with a decent foundation, the plumbing just vanishes.
For me, AI isn’t replacing my craft—it’s amplifying it tenfold! After 40 years, that’s got me more excited about the future than ever.

Oh, just remember, it's far from perfect but learning to control and embrace it is key. When I asked Grok3 to proof-read my article I got this 🤣
> Here’s your improved article with minor tweaks for clarity, flow, and polish. I’ve preserved your voice and intent while tightening up phrasing, fixing small grammatical hiccups, and enhancing readability. I also corrected a couple of spelling errors (e.g., "Windsurf" seemed inconsistent, so I assumed "WarpSpeed" might be intended—feel free to revert if that’s wrong). Let me know if you’d like further adjustments!
---
### Bridging AI and the real world with MCP (Mar 08, 2025)
*You’re likely here because you’re curious about MCP — what it is and how it works. In this guide, I’ll break down the Model Context Protocol (MCP) and show how it connects AI to real-world systems, making complex integrations simpler and more efficient.*
**Key takeaways**
- MCP is a standardized framework that connects AI models to real-world systems using JSON-RPC 2.0.
- It simplifies complex integrations by providing structured access to resources, tools, and prompts.
- Organizations can use MCP to streamline AI interactions with external data, enabling scalable and context-aware applications.
### What is MCP?
The Model Context Protocol (MCP) sets up a client-server handshake where an AI-powered client—like a travel app—communicates with a server providing resources, tools, or prompts. It addresses the challenge of language models that lack native access to external data or actions by providing a clean, standardized API. Built on JSON-RPC 2.0, MCP ensures lightweight and interoperable communication. Key methods include `mcp.discover`, `mcp.get_resource`, and `mcp.execute`. MCP is typically communicated over HTTP or WebSockets, and errors follow JSON-RPC conventions.
MCP is structured around three main components:
- **Prompts**: Templates or instructions, such as "find hotels matching user criteria."
- **Resources**: JSON-formatted external data, like travel dates or budget.
- **Tools**: Functions or APIs, such as a hotel search endpoint.
The open-source November 2024 specification enables organizations to adapt MCP for diverse use cases, streamlining how context flows into AI models for real-world applications.
### Why MCP matters
Without a protocol like MCP, integrating AI with external systems often involves fragile, custom code that is difficult to reuse. MCP provides a standardized approach, similar to REST for HTTP APIs, reducing complexity and enabling scalable, context-aware AI systems. For organizations prioritizing structured data, MCP offers a seamless way to connect systems to AI models.
### Use case: Booking a hotel
Imagine a travel website with a widget that allows users to book a hotel in Copenhagen for March 15-18, 2025, with a €200/night budget and preferences for a quiet room with a city view. The widget uses MCP to facilitate this interaction between the client (widget), a hotel service (server), and an AI model, potentially enhanced by structured data expertise.
#### Step 1: Client initiates the process
The widget sends a discovery request to the server to determine the available prompts, resources, and tools:
```json
{
"jsonrpc": "2.0",
"method": "mcp.discover",
"id": 1
}
```
The server responds with the available prompts, resources, and tools:
```json
{
"jsonrpc": "2.0",
"id": 1,
"result": {
"prompts": ["suggest_hotels"],
"resources": ["user_profile", "calendar"],
"tools": ["search_hotels"]
}
}
```
#### Step 2: Retrieve resources
The widget requests user profile data, which may be enhanced by structured data practices:
```json
{
"jsonrpc": "2.0",
"method": "mcp.get_resource",
"params": {
"resource": "user_profile"
},
"id": 2
}
```
The server responds with the user profile data:
```json
{
"jsonrpc": "2.0",
"id": 2,
"result": {
"budget": 200,
"currency": "EUR",
"preferences": {
"room_type": "quiet",
"view": "city"
}
}
}
```
Next, the widget requests calendar data:
```json
{
"jsonrpc": "2.0",
"method": "mcp.get_resource",
"params": {
"resource": "calendar"
},
"id": 3
}
```
The server responds with the calendar data:
```json
{
"jsonrpc": "2.0",
"id": 3,
"result": {
"dates": {
"start": "2025-03-15",
"end": "2025-03-18"
},
"location": "Copenhagen"
}
}
```
#### Step 3: Execute the prompt with tools
The widget bundles the user profile and calendar data and sends an execution request to the server:
```json
{
"jsonrpc": "2.0",
"method": "mcp.execute",
"params": {
"prompt": "suggest_hotels",
"resources": {
"user_profile": {
"budget": 200,
"currency": "EUR",
"preferences": {
"room_type": "quiet",
"view": "city"
}
},
"calendar": {
"dates": {
"start": "2025-03-15",
"end": "2025-03-18"
},
"location": "Copenhagen"
}
},
"tools": ["search_hotels"]
},
"id": 4
}
```
The server processes the request and returns a hotel suggestion:
```json
{
"jsonrpc": "2.0",
"id": 4,
"result": {
"suggestion": "The Hotel d'Angleterre: €175/night, quiet room, city view. Available March 15-18, 2025."
}
}
```
### Structured data integration
Organizations with expertise in structured data can enhance this process by ensuring resources like `user_profile` and `calendar` adhere to well-defined schemas. This aligns with MCP’s resource-driven approach and can improve server-side data flow.
Companies focusing on highly structured data, such as [Zublime](https://www.zublime.com), are doing extensive work around MCP to enhance the user experience. Their efforts demonstrate how structured data can be leveraged to create more intuitive and efficient systems.
### That's a wrap
MCP provides a robust framework for connecting AI models to real-world systems using JSON-RPC 2.0. By standardizing interactions between clients, servers, and AI, it reduces complexity and enables scalable, context-aware applications. Organizations leveraging structured data, like Zublime, can further enhance MCP’s capabilities, ensuring cleaner inputs and more precise AI outputs. As AI continues to evolve, MCP stands as a powerful tool for building systems that are not only practical and effective but also adaptable to the ever-changing demands of real-world integration.
---
### Tip: Use explicit log statements (Jan 16, 2025)
Logging is a critical practice in software development, providing insights into the application's behavior, helping diagnose issues, and facilitating debugging. However, the effectiveness of logging is significantly influenced by how log statements are written. It's essential to make log statements explicit and contextual, which not only enhances the readability and maintainability of the code but also aids in troubleshooting.
## Why Explicit Log Statements Matter
When you include context in your log statements, it becomes much easier to trace issues back to their source. This is because explicit log statements act as breadcrumbs, guiding developers through the execution flow of the application. By embedding meaningful context, such as function names, variable states, or specific operations being performed, developers can quickly identify where a problem might have occurred.
### Benefits of Contextual Logging:
1. **Enhanced Searchability**: With explicit log statements, you can search your codebase more effectively. For instance, if a log entry contains specific identifiers like function names or user IDs, you can quickly locate the relevant code sections by searching for these terms.
2. **Improved Debugging**: When an issue arises, clear and detailed log messages provide valuable insights into what the application was doing at any given time. This can significantly reduce the time spent diagnosing problems.
3. **Better Collaboration**: Explicit logs help team members understand the code quickly, making it easier for new developers to get up to speed or for external auditors to assess the code.
4. **Efficient Monitoring**: In production environments, explicit logs allow for better monitoring and alerting. They can be used to trigger alerts when specific conditions are met, thereby improving the system's reliability and responsiveness.
### How to Implement Explicit Log Statements
To achieve effective logging, consider configuring your logger to include context automatically or ensure each log statement is self-explanatory. Here’s how you can improve your logging practices:
### Avoid Generic Log Statements
Generic log statements lack context and clarity, making them difficult to interpret. For example:
```jsx
function saveUser(user) {
console.log(user); // Avoid at all cost
console.log('got', user); // Using 'got' is too generic
}
```
The above examples are problematic because they provide minimal information about what the log entry refers to or where it was generated.
### Use Explicit and Contextual Log Statements
Instead, aim for log statements that clearly describe the action being taken and the context in which it occurs:
```jsx
function saveUser(user) {
logger.debug(`UsersRepository.saveUser(user: ${user?.id})`); // Easy to search for
logger.debug(`Preparing to save user ${user?.id} in the database`); // Clear and descriptive
}
```
In these examples, the log messages are not only descriptive but also include specific details such as the function name and user ID. This makes them much more valuable for anyone trying to understand the code's behavior or diagnose an issue.
---
By adopting a practice of writing explicit and context-rich log statements, you significantly enhance the maintainability and operability of your software. This approach not only aids in debugging and monitoring but also fosters a more collaborative and efficient development environment. So, make it a habit to use explicit log statements and empower your team with the clarity and insights they provide.
---
### Tip: Avoid nested ternary operators (?:) (Jan 15, 2025)
Nested ternary operators in a single line are difficult to read and understand. Instead, refactor them into a separate function or split them across multiple lines with clear grouping.
**Avoid**
```jsx
```
**Do**
```jsx
function alignItemsByAdjustment (left, right) {
if (right) {
return 'flex-end'
} else if (left) {
return 'flex-start'
} else {
return 'center'
}
}
```
---
### Tip: Avoid let statements (Jan 14, 2025)
Do not use **let** when only used for delayed initialization. Using **let** is a hint to developers, that variable will change over time so should be avoided if possible by restructuring initialization.
**Avoid**
```jsx
let closeToLeft = false
let closeToRight = false
if (maxDepthPixelValue < 60) closeToLeft = true
if (maxDepthPixelValue > Utils.width - 60) closeToRight = true
```
**Do**
```jsx
const closeToLeft = (maxDepthPixelValue < 60)
const closeToRight = (maxDepthPixelValue > Utils.width - 60)
```
---
### The power of incremental progress (Jan 09, 2025)
Continuous improvement is about making small, consistent daily changes that compound over time, focusing on gradual 1% improvements rather than dramatic, unsustainable transformations.
- Small, consistent improvements can lead to **37x better results** over a year
- Focus on doing more of **what already works** and avoiding tiny losses
- **Measure progress** backward by analyzing past performance and making slight adjustments
---
### Focus on less to achieve more (Nov 19, 2024)
In the world of software development, it's easy to get caught up in the race to add more features. We often think that more features mean better software. However, this isn't always true - more often it is actually the opposite.
When building software, there’s a strong temptation to keep adding features. With AI this is now even stronger because it is so, so easy to add new stuff. It seems logical that more features mean more functionality, which should make users happier, right? Allow us to get just one more customer which needs this specific feature. Will make it so much easier to sell, etc. However, this approach will lead to bloated software that's hard to use, difficult to maintain, and full of bugs.
Instead of trying to do everything, successful software often focuses on doing a few things really well. By concentrating on core functionalities, developers can create a product that is not only easier to use but also more reliable and efficient.
Keeping software simple has many benefits:
1. Ease of use - Users can quickly understand and use the software without a steep learning curve. This leads to a better user experience and higher satisfaction.
2. Better performance - Simpler software often runs faster and more efficiently because it doesn’t have to load unnecessary features.
3. Easier maintenance - With fewer features, there are fewer things that can go wrong. This makes it easier to fix bugs and update the software over time.
4. Clear vision - A focused approach helps maintain a clear vision of what the software is meant to achieve, preventing feature creep and ensuring that every addition aligns with the core purpose.
Building software is about creating value for users. By focusing on fewer features and doing them exceptionally well, you can create software that truly stands out. Remember, less is more.
By simplifying your approach, you can achieve greater success and create software that users love.
---
### Why reviewing your own PRs is good (Jul 17, 2024)
We've all been there - you've written what you think is perfect code, only to have your co-workers point out a glaring mistake. It's not a great feeling, but it's part of the job. However, there's a way to minimize these instances and make the development process smoother for everyone involved: reviewing your own pull requests.
I've found that when I review my own PRs in the GitHub UI, I approach the code with a fresh perspective. Issues that I missed while writing the code suddenly become obvious. It's like a new set of eyes on my work, and it's saved me from many embarrassing mistakes.
My process is simple: I open a new PR as a draft with no reviewers selected. I then go over the diff and make any necessary changes. Once I'm satisfied, I mark the PR as ready and assign reviewers. This takes a little more time, but it's worth it for the improved signal-to-noise ratio and the more pleasant review experience for my team.
In the main body of the pull request, I provide a high-level overview of the changes I'm making. If I'm adding new dependencies, I explain why they're necessary and any alternatives I've considered. I generally aim to limit the number of dependencies, so a new one must be justified.
I also use this opportunity to add inline comments about my design choices and the alternatives I considered. This helps my reviewers understand my thought process and makes the review process more efficient.
The other advantage is that these comments create their own thread on the code review UI. If there's any discussion or controversy, it's all contained in one place. This makes it easier to follow the discussion and avoids fragmented threads scattered throughout the PR's activity log. It even works great if developers use the Github plugin for VS Code.
So, reviewing your own pull requests is a simple yet powerful way to catch mistakes before your co-workers do. It's not just about avoiding embarrassment - it's about making the development process smoother and more efficient for everyone involved. So next time you're about to hit that "Create PR" button, take a moment to review your own work. Your co-workers will thank you, and you'll thank yourself.
---
### Upgrading ShoutSMS from Rails 4 to Rails 7.1 (Jul 09, 2024)
Our [ShoutSMS](https://www.shoutsmshq.com/) project has been cruising smoothly for the past 20 years. It has been running on Rails 4 without a glitch, but today I decided to upgrade it to the latest Rails version.
The process went surprisingly smoothly. I have to admit, the ShoutSMS service isn't too complex in features, and the number of third-party gems is quite limited.
I started by creating a new Rails 7.1 application to use as a base. I then compared files and folders at a top level, especially remembering to copy the bin folder and files. Next, I upgraded the Gemfile by essentially copying over the new Gemfile from Rails 7.1 and patching it with the components I had.
Once I got it up and running, I used the rails app:update command, which patches files. For each file it wanted to override, I checked a diff. A good idea is to commit to your source repo before running this update, then override all files in one go and check the changes using `git diff`.
I used the ActiveMerchant gem, which has been heavily updated. However, since it wasn't really needed anymore, I decided to remove it (the best way of ensuring an upgrade works 😉) and instead installed the Stripe gem to handle payments. Previously, we used PayPal for this.
---
### A collection of small JS utility functions (Jul 09, 2024)
This is a compilation of nearly 300 compact JavaScript utility functions, designed to streamline common programming tasks and enhance code efficiency. If you don't want to use libraries such as `lodash` or `underscore` (but I urge you to do) then this list might come in handy. It contains very simple functions such as `isEmpty`, `isEven` and `isOdd` to more specialized array and object manipulations, this collection offers a wide range of practical tools for JavaScript developers.
These bite-sized functions serve multiple purposes:
1. Quick solutions for everyday coding challenges
2. Learning resources for JavaScript best practices and techniques
3. Building blocks for larger, more complex applications
4. Time-savers for repetitive programming tasks
Whether you're a beginner looking to expand your JavaScript toolkit or an experienced developer seeking to optimize your code, this collection provides valuable, ready-to-use functions that can be easily integrated into various projects.
Well, here's the list
```
/* 1. Check if an array is empty */
const isEmpty = (arr) => !arr.length
/* 2. Remove duplicates from an array */
const unique = (arr) => [...new Set(arr)]
/* 3. Get the last item in an array */
const lastItem = (arr) => arr[arr.length - 1]
/* 4. Reverse a string */
const reverseString = (str) => str.split('').reverse().join('')
/* 5. Check if a number is even */
const isEven = (num) => num % 2 === 0
/* 6. Check if a number is odd */
const isOdd = (num) => num % 2 !== 0
/* 7. Generate a random number between two values */
const randomBetween = (min, max) => Math.floor(Math.random() * (max - min + 1)) + min
/* 8. Check if a year is a leap year */
const isLeapYear = (year) => (year % 4 === 0 && year % 100 !== 0) || (year % 400 === 0)
/* 9. Shuffle an array */
const shuffleArray = (arr) => arr.sort(() => Math.random() - 0.5)
/* 10. Get a random item from an array */
const randomItem = (arr) => arr[Math.floor(Math.random() * arr.length)]
/* 11. Convert a string to an array of words */
const words = (str) => str.match(/\w+/g)
/* 12. Clone an array */
const cloneArray = (arr) => arr.slice()
/* 13. Flatten an array */
const flattenArray = (arr) => arr.flat()
/* 14. Remove falsy values from an array */
const compact = (arr) => arr.filter(Boolean)
/* 15. Get the intersection of two arrays */
const intersection = (arr1, arr2) => arr1.filter(x => arr2.includes(x))
/* 16. Get the union of two arrays */
const union = (arr1, arr2) => [...new Set([...arr1, ...arr2])]
/* 17. Convert array of pairs to an object */
const arrayToObject = (arr) => Object.fromEntries(arr)
/* 18. Convert object to array of pairs */
const objectToArray = (obj) => Object.entries(obj)
/* 19. Merge two objects */
const mergeObjects = (obj1, obj2) => ({ ...obj1, ...obj2 })
/* 20. Convert RGB to hex */
const rgbToHex = (r, g, b) => '#' + [r, g, b].map(x => x.toString(16).padStart(2, '0')).join('')
/* 21. Convert hex to RGB */
const hexToRgb = (hex) => hex.slice(1).match(/.{2}/g).map(x => parseInt(x, 16))
/* 22. Get the day of the year */
const dayOfYear = (date) => Math.floor((date - new Date(date.getFullYear(), 0, 0)) / 1000 / 60 / 60 / 24)
/* 23. Get the number of days in a month */
const daysInMonth = (year, month) => new Date(year, month, 0).getDate()
/* 24. Format date as YYYY-MM-DD */
const formatDate = (date) => date.toISOString().split('T')[0]
/* 25. Capitalize the first letter of each word */
const capitalizeWords = (str) => str.replace(/\b\w/g, c => c.toUpperCase())
/* 26. Generate a random string */
const randomString = (length) => Math.random().toString(36).substr(2, length)
/* 27. Check if a string contains a substring */
const contains = (str, substr) => str.indexOf(substr) !== -1
/* 28. Convert a string to kebab case */
const toKebabCase = (str) => str.trim().replace(/[\s_]+/g, '-').toLowerCase()
/* 29. Convert a string to snake case */
const toSnakeCase = (str) => str.trim().replace(/[\s-]+/g, '_').toLowerCase()
/* 30. Convert a string to camel case */
const toCamelCase = (str) => str.trim().replace(/[-_](.)/g, (_, c) => c.toUpperCase())
/* 31. Repeat a string n times */
const repeat = (str, n) => str.repeat(n)
/* 32. Trim whitespace from both sides */
const trim = (str) => str.trim()
/* 33. Convert a string to an array */
const toArray = (str) => [...str]
/* 34. Count the occurrences of a substring */
const countOccurrences = (str, subStr) => str.split(subStr).length - 1
/* 35. Find the index of a substring */
const indexOfSub = (str, subStr) => str.indexOf(subStr)
/* 36. Replace all occurrences of a substring */
const replaceAll = (str, subStr, newStr) => str.split(subStr).join(newStr)
/* 37. Check if a string starts with a substring */
const startsWith = (str, subStr) => str.startsWith(subStr)
/* 38. Check if a string ends with a substring */
const endsWith = (str, subStr) => str.endsWith(subStr)
/* 39. Uppercase the first letter */
const capitalizeFirst = (str) => str.charAt(0).toUpperCase() + str.slice(1)
/* 40. Lowercase the first letter */
const decapitalizeFirst = (str) => str.charAt(0).toLowerCase() + str.slice(1)
/* 41. Check if a value is a number */
const isNumber = (val) => !isNaN(val)
/* 42. Convert a number to a string */
const numberToString = (num) => num.toString()
/* 43. Convert a string to a number */
const stringToNumber = (str) => +str
/* 44. Get the absolute value of a number */
const abs = (num) => Math.abs(num)
/* 45. Round a number to the nearest integer */
const round = (num) => Math.round(num)
/* 46. Round a number down */
const floor = (num) => Math.floor(num)
/* 47. Round a number up */
const ceil = (num) => Math.ceil(num)
/* 48. Get the maximum number in an array */
const max = (arr) => Math.max(...arr)
/* 49. Get the minimum number in an array */
const min = (arr) => Math.min(...arr)
/* 50. Get the sum of an array */
const sum = (arr) => arr.reduce((acc, num) => acc + num, 0)
/* 51. Get the average of an array */
const average = (arr) => sum(arr) / arr.length
/* 52. Convert degrees to radians */
const degreesToRadians = (deg) => deg * (Math.PI / 180)
/* 53. Convert radians to degrees */
const radiansToDegrees = (rad) => rad * (180 / Math.PI)
/* 54. Generate a UUID */
const uuid = () => 'xxxxxxxx-xxxx-4xxx-yxxx-xxxxxxxxxxxx'.replace(/[xy]/g, c => (c === 'x' ? Math.random() * 16 : (Math.random() * 4 + 8) % 16).toString(16))
/* 55. Debounce a function */
const debounce = (fn, delay) => { let timer; return (...args) => { clearTimeout(timer); timer = setTimeout(() => fn(...args), delay); }; }
/* 56. Throttle a function */
const throttle = (fn, limit) => { let lastFunc, lastRan; return function() { const context = this, args = arguments; if (!lastRan) { fn.apply(context, args); lastRan = Date.now(); } else { clearTimeout(lastFunc); lastFunc = setTimeout(function() { if (Date.now() - lastRan >= limit) { fn.apply(context, args); lastRan = Date.now(); } }, limit - (Date.now() - lastRan)); } }; }
/* 57. Convert a string to title case */
const toTitleCase = (str) => str.replace(/\w\S*/g, (txt) => txt.charAt(0).toUpperCase() + txt.substr(1).toLowerCase())
/* 58. Case insensitive string comparison */
const caseInsensitiveCompare = (str1, str2) => str1.toLowerCase() === str2.toLowerCase()
/* 59. Validate an email */
const isValidEmail = (email) => /\S+@\S+\.\S+/.test(email)
/* 60. Validate a URL */
const isValidUrl = (str) => /^(https?|ftp):\/\/[^\s/$.?#].[^\s]*$/.test(str)
/* 61. Sleep for a specified time */
const sleep = (ms) => new Promise(resolve => setTimeout(resolve, ms))
/* 62. Convert a date to timestamp */
const toTimestamp = (date) => Date.parse(date)
/* 63. Get current timestamp */
const currentTimestamp = () => Date.now()
/* 64. Clear all cookies */
const clearCookies = () => document.cookie.split(';').forEach(c => document.cookie = c.trim().split('=')[0] + '=;expires=Thu, 01 Jan 1970 00:00:00 UTC')
/* 65. Get a random color */
const randomColor = () => '#' + Math.floor(Math.random() * 16777215).toString(16)
/* 66. Format number with commas */
const formatNumber = (num) => num.toString().replace(/\B(?=(\d{3})+(?!\d))/g, ",")
/* 67. Compute Fibonacci sequence */
const fibonacci = (n) => n <= 1 ? n : fibonacci(n - 1) + fibonacci(n - 2)
/* 68. Check if a value is an array */
const isArray = (val) => Array.isArray(val)
/* 69. Generate a range of numbers */
const range = (start, end) => [...Array(end - start + 1).keys()].map(i => i + start)
/* 70. Find the factorial of a number */
const factorial = (n) => n <= 1 ? 1 : n * factorial(n - 1)
/* 71. Create a shallow copy of an object */
const shallowCopy = (obj) => ({ ...obj })
/* 72. Create a deep copy of an object */
const deepCopy = (obj) => JSON.parse(JSON.stringify(obj))
/* 73. Check if an object is empty */
const isEmptyObject = (obj) => Object.keys(obj).length === 0
/* 74. Get the length of an object */
const objectLength = (obj) => Object.keys(obj).length
/* 75. Get a random boolean value */
const randomBoolean = () => Math.random() >= 0.5
/* 76. Generate a random hex color */
const randomHexColor = () => '#' + Math.random().toString(16).slice(2, 8).padEnd(6, '0')
/* 77. Calculate the HCF of two numbers */
const hcf = (x, y) => !y ? x : hcf(y, x % y)
/* 78. Calculate the LCM of two numbers */
const lcm = (x, y) => !x || !y ? 0 : Math.abs((x * y) / hcf(x, y))
/* 79. Convert Celsius to Fahrenheit */
const celsiusToFahrenheit = (c) => (c * 9/5) + 32
/* 80. Convert Fahrenheit to Celsius */
const fahrenheitToCelsius = (f) => (f - 32) * 5/9
/* 81. Compute the power of a number */
const power = (base, exp) => Math.pow(base, exp)
/* 82. Check if an object has a property */
const hasProperty = (obj, prop) => obj.hasOwnProperty(prop)
/* 83. Encode a URL */
const encodeURL = (url) => encodeURIComponent(url)
/* 84. Decode a URL */
const decodeURL = (url) => decodeURIComponent(url)
/* 85. Strip HTML tags from a string */
const stripHTML = (str) => str.replace(/<[^>]*>?/gm, '')
/* 86. Check if a string is palindrome */
const isPalindrome = (str) => str === str.split('').reverse().join('')
/* 87. Get query params from URL */
const getQueryParams = (url) => Object.fromEntries(new URL(url).searchParams)
/* 88. Merge two arrays */
const mergeArrays = (arr1, arr2) => [...arr1, ...arr2]
/* 89. Find the nth Fibonacci number */
const nthFibonacci = (n, a = 1, b = 1) => n <= 2 ? b : nthFibonacci(n - 1, b, a + b)
/* 90. Find the square root */
const sqrt = (num) => Math.sqrt(num)
/* 91. Calculate the distance between two points */
const distance = (x1, y1, x2, y2) => Math.sqrt((x2 - x1) ** 2 + (y2 - y1) ** 2)
/* 92. Get current date and time */
const currentDateTime = () => new Date().toLocaleString()
/* 93. Get the type of a variable */
const getType = (val) => typeof val
/* 94. Check if a value is an object */
const isObject = (val) => val && typeof val === 'object' && val.constructor === Object
/* 95. Check if a value is a function */
const isFunction = (val) => val && typeof val === 'function'
/* 96. Convert a value to boolean */
const toBoolean = (val) => !!val
/* 97. Parse a JSON string */
const parseJSON = (str) => JSON.parse(str)
/* 98. Join array elements into a string */
const joinArray = (arr, sep = ',') => arr.join(sep)
/* 99. Capitalize the first word */
const capitalizeFirstWord = (str) => str.replace(/^\w/, c => c.toUpperCase())
/* 100. Calculate body mass index (BMI) */
const bmi = (weight, height) => (weight / (height ** 2)).toFixed(1)
/* 101. Find the longest word in a string */
const longestWord = (str) => str.split(' ').sort((a, b) => b.length - a.length)[0]
/* 102. Find the shortest word in a string */
const shortestWord = (str) => str.split(' ').sort((a, b) => a.length - b.length)[0]
/* 103. Check if two arrays are equal */
const arraysEqual = (arr1, arr2) => JSON.stringify(arr1) === JSON.stringify(arr2)
/* 104. Get the difference between two arrays */
const arrayDifference = (arr1, arr2) => arr1.filter(x => !arr2.includes(x))
/* 105. Get the symmetric difference of two arrays */
const symmetricDifference = (arr1, arr2) => arr1.filter(x => !arr2.includes(x)).concat(arr2.filter(x => !arr1.includes(x)))
/* 106. Get the common elements in two arrays */
const commonElements = (arr1, arr2) => arr1.filter(x => arr2.includes(x))
/* 107. Remove specific element from an array */
const without = (arr, ...args) => arr.filter(x => !args.includes(x))
/* 108. Check if a string is empty */
const isEmptyString = (str) => str.trim().length === 0
/* 109. Convert a string to an array of characters */
const stringToCharArray = (str) => str.split('')
/* 110. Split a string by a delimiter */
const splitByDelimiter = (str, delim) => str.split(delim)
/* 111. Remove whitespace from a string */
const removeWhitespace = (str) => str.replace(/\s/g, '')
/* 112. Repeat a string n times */
const repeatString = (str, num) => str.repeat(num)
/* 113. Get the index of an element in an array */
const indexOfElement = (arr, el) => arr.indexOf(el)
/* 114. Remove the first element of an array */
const removeFirst = (arr) => arr.slice(1)
/* 115. Remove the last element of an array */
const removeLast = (arr) => arr.slice(0, -1)
/* 116. Find the number of digits in a number */
const numDigits = (num) => num.toString().length
/* 117. Calculate compound interest */
const compoundInterest = (p, r, t, n) => p * (1 + r / n) ** (n * t)
/* 118. Check if a string is a valid date */
const isValidDate = (date) => !isNaN(Date.parse(date))
/* 119. Convert a Unix timestamp to a date */
const timestampToDate = (timestamp) => new Date(timestamp)
/* 120. Convert a date to a Unix timestamp */
const dateToTimestamp = (date) => date.getTime()
/* 121. Get the current year */
const currentYear = () => new Date().getFullYear()
/* 122. Get the current month */
const currentMonth = () => new Date().getMonth() + 1
/* 123. Get the current day */
const currentDay = () => new Date().getDate()
/* 124. Convert seconds to hours, minutes, and seconds */
const secondsToHMS = (sec) => { const h = Math.floor(sec / 3600); const m = Math.floor((sec % 3600) / 60); const s = sec % 60; return `${h}h ${m}m ${s}s`; }
/* 125. Count the number of vowels in a string */
const countVowels = (str) => str.match(/[aeiou]/gi)?.length || 0
/* 126. Check if a string is numeric */
const isNumeric = (str) => !isNaN(str)
/* 127. Convert a number to binary */
const toBinary = (num) => num.toString(2)
/* 128. Convert a binary number to decimal */
const binaryToDecimal = (bin) => parseInt(bin, 2)
/* 129. Convert a number to hexadecimal */
const toHex = (num) => num.toString(16)
/* 130. Convert a hexadecimal number to decimal */
const hexToDecimal = (hex) => parseInt(hex, 16)
/* 131. Round a number to n decimal places */
const roundTo = (num, places) => +num.toFixed(places)
/* 132. Calculate the hypotenuse of a right triangle */
const hypotenuse = (a, b) => Math.sqrt(a ** 2 + b ** 2)
/* 133. Calculate the area of a circle */
const areaOfCircle = (radius) => Math.PI * radius ** 2
/* 134. Calculate the circumference of a circle */
const circumference = (radius) => 2 * Math.PI * radius
/* 135. Calculate the area of a rectangle */
const areaOfRectangle = (length, width) => length * width
/* 136. Calculate the perimeter of a rectangle */
const perimeter = (length, width) => 2 * (length + width)
/* 137. Calculate the area of a triangle */
const areaOfTriangle = (base, height) => (base * height) / 2
/* 138. Check if a string is a URL */
const isUrl = (str) => /^(http|https):\/\/[^\s$.?#].[^\s]*$/.test(str)
/* 139. Truncate a string to a specified length */
const truncate = (str, len) => str.length > len ? str.slice(0, len) + '...' : str
/* 140. Get the first n elements of an array */
const firstElements = (arr, n) => arr.slice(0, n)
/* 141. Get the last n elements of an array */
const lastElements = (arr, n) => arr.slice(-n)
/* 142. Check if an object is a date */
const isDate = (val) => val instanceof Date
/* 143. Find the nth root of a number */
const nthRoot = (num, root) => Math.pow(num, 1 / root)
/* 144. Calculate the sum of even numbers in an array */
const sumOfEvens = (arr) => arr.filter(n => n % 2 === 0).reduce((a, b) => a + b, 0)
/* 145. Calculate the sum of odd numbers in an array */
const sumOfOdds = (arr) => arr.filter(n => n % 2 !== 0).reduce((a, b) => a + b, 0)
/* 146. Get the median of an array */
const median = (arr) => { const sorted = arr.slice().sort((a, b) => a - b); const mid = Math.floor(sorted.length / 2); return sorted.length % 2 !== 0 ? sorted[mid] : (sorted[mid - 1] + sorted[mid]) / 2; }
/* 147. Get the mode of an array */
const mode = (arr) => arr.reduce((a, b, i, ar) => ar.filter(v => v === a).length >= ar.filter(v => v === b).length ? a : b, null)
/* 148. Calculate the variance of an array */
const variance = (arr) => { const mean = arr.reduce((a, b) => a + b, 0) / arr.length; return arr.map(x => (x - mean) ** 2).reduce((a, b) => a + b, 0) / arr.length; }
/* 149. Calculate the standard deviation of an array */
const standardDeviation = (arr) => Math.sqrt(variance(arr))
/* 150. Check if a number is prime */
const isPrime = (num) => { for (let i = 2, s = Math.sqrt(num); i <= s; i++) if (num % i === 0) return false; return num > 1; }
/* 151. Find the greatest common divisor (GCD) */
const gcd = (a, b) => !b ? a : gcd(b, a % b)
/* 152. Get a random float between two values */
const randomFloat = (min, max) => Math.random() * (max - min) + min
/* 153. Interpolate between two values */
const interpolate = (start, end, factor) => start + (end - start) * factor
/* 154. Get the current timestamp in seconds */
const timestampInSeconds = () => Math.floor(Date.now() / 1000)
/* 155. Convert a string to lowercase */
const toLowerCase = (str) => str.toLowerCase()
/* 156. Convert a string to uppercase */
const toUpperCase = (str) => str.toUpperCase()
/* 157. Find the square of a number */
const square = (num) => num ** 2
/* 158. Find the cube of a number */
const cube = (num) => num ** 3
/* 159. Convert an array to a string with a delimiter */
const arrayToString = (arr, delim = ',') => arr.join(delim)
/* 160. Get unique values from an array */
const uniqueValues = (arr) => Array.from(new Set(arr))
/* 161. Check if all array elements satisfy a condition */
const allElements = (arr, fn) => arr.every(fn)
/* 162. Repeat an array n times */
const repeatArray = (arr, num) => Array(num).fill(arr).flat()
/* 163. Flatten a nested array */
const flatten = (arr) => arr.reduce((a, b) => a.concat(Array.isArray(b) ? flatten(b) : b), [])
/* 164. Get the keys of an object */
const getObjectKeys = (obj) => Object.keys(obj)
/* 165. Get the values of an object */
const getObjectValues = (obj) => Object.values(obj)
/* 166. Get the entries of an object */
const getObjectsEntries = (obj) => Object.entries(obj)
/* 167. Get the average of an array of numbers */
const avg = (arr) => arr.reduce((sum, val) => sum + val, 0) / arr.length
/* 168. Check if a year is a leap year */
const isLeap = (year) => (year % 4 === 0 && year % 100 !== 0) || year % 400 === 0
/* 169. Get the current day of the week */
const currentDayOfWeek = () => new Date().toLocaleString('en-us', { weekday: 'long' })
/* 170. Get the current month name */
const currentMonthName = () => new Date().toLocaleString('en-us', { month: 'long' })
/* 171. Check if some array elements satisfy a condition */
const someElements = (arr, fn) => arr.some(fn)
/* 172. Sort an array of objects */
const sortByKey = (arr, key) => arr.sort((a, b) => (a[key] > b[key] ? 1 : -1))
/* 173. Format a date as MM/DD/YYYY */
const formatDateMMDDYYYY = (date) => { const d = new Date(date); return `${d.getMonth() + 1}/${d.getDate()}/${d.getFullYear()}`; }
/* 174. Add days to a date */
const addDays = (date, days) => { let result = new Date(date); result.setDate(result.getDate() + days); return result; }
/* 175. Get the number of days between two dates */
const daysBetween = (date1, date2) => Math.abs(Math.floor((date2 - date1) / (1000 * 60 * 60 * 24)))
/* 176. Get the sign of a number */
const sign = (num) => Math.sign(num)
/* 177. Filter an array based on condition */
const filterArray = (arr, fn) => arr.filter(fn)
/* 178. Reduce an array to a single value */
const reduceArray = (arr, fn, init) => arr.reduce(fn, init)
/* 179. Calculate the distance between two points */
const distanceBetweenPoints = (x1, y1, x2, y2) => Math.hypot(x2 - x1, y2 - y1)
/* 180. Get the hour from a date object */
const getHour = (date) => date.getHours()
/* 181. Get the minute from a date object */
const getMinute = (date) => date.getMinutes()
/* 182. Get the second from a date object */
const getSecond = (date) => date.getSeconds()
/* 183. Get the UTC timestamp */
const getUTCTimestamp = () => Date.now()
/* 184. Shuffle the characters in a string */
const shuffleString = (str) => str.split('').sort(() => 0.5 - Math.random()).join('')
/* 185. Check if an array contains all elements of another array */
const arrayContainsArray = (superset, subset) => subset.every(value => superset.includes(value))
/* 186. Get the file extension from a file name */
const getFileExtension = (filename) => filename.split('.').pop()
/* 187. Pad a string with zeros */
const padWithZeros = (num, places) => String(num).padStart(places, '0')
/* 188. Replace all instances of a substring */
const replaceAllStrings = (str, find, replace) => str.split(find).join(replace)
/* 189. Capitalize the first character of each word */
const capitalizeFirstChar = (str) => str.replace(/\b\w/g, char => char.toUpperCase())
/* 190. Merge two sorted arrays */
const mergeSortedArrays = (arr1, arr2) => [...arr1, ...arr2].sort((a, b) => a - b)
/* 191. Interleave two arrays */
const interleaveArrays = (arr1, arr2) => arr1.flatMap((val, index) => [val, arr2[index]])
/* 192. Get the sum of the digits of a number */
const sumDigits = (num) => num.toString().split('').reduce((acc, digit) => acc + parseInt(digit), 0)
/* 193. Remove specific properties from an object */
const removeProperties = (obj, props) => Object.fromEntries(Object.entries(obj).filter(([key]) => !props.includes(key)))
/* 194. Compare two objects */
const compareObjects = (obj1, obj2) => JSON.stringify(obj1) === JSON.stringify(obj2)
/* 195. Calculate the elapsed time between two dates */
const elapsedTimeBetweenDates = (start, end) => { const diff = end - start; return { hours: Math.floor(diff / 36e5), minutes: Math.floor((diff % 36e5) / 60000), seconds: Math.floor((diff % 60000) / 1000) }; }
/* 196. Create an array of n elements */
const createArray = (length, val) => Array.from({ length }, () => val)
/* 197. Resize an array */
const resizeArray = (arr, newSize, defaultValue = null) => [...arr, ...Array(Math.max(newSize - arr.length, 0)).fill(defaultValue)].slice(0, newSize)
/* 198. Get every nth element of an array */
const everyNth = (arr, nth) => arr.filter((_, i) => i % nth === nth - 1)
/* 199. Check if a string is a palindrome */
const palindromeCheck = (str) => str === str.split('').reverse().join('')
/* 200. Get all combinations of an array */
const combinations = (arr) => arr.reduce((a, v) => a.concat(a.map(r => [v].concat(r))), [[]])
/* 201. Check if a value is a boolean */
const isBoolean = (val) => typeof val === 'boolean'
/* 202. Check if a value is null */
const isNull = (val) => val === null
/* 203. Check if a value is undefined */
const isUndefined = (val) => typeof val === 'undefined'
/* 204. Check if a value is NaN */
const isNaNValue = (val) => Number.isNaN(val)
/* 205. Check if a value is an integer */
const isInteger = (val) => Number.isInteger(val)
/* 206. Map values of an array */
const mapArray = (arr, fn) => arr.map(fn)
/* 207. Check if an object has nested properties */
const hasNestedProperty = (obj, path) => path.split('.').reduce((o, p) => o ? o[p] : null, obj) !== null
/* 208. Check if a number is positive */
const isPositive = (num) => num > 0
/* 209. Check if a number is negative */
const isNegative = (num) => num < 0
/* 210. Toggle a boolean value */
const toggleBoolean = (bool) => !bool
/* 211. Check if a value is a string */
const isString = (val) => typeof val === 'string'
/* 212. Remove punctuation from a string */
const removePunctuation = (str) => str.replace(/[.,\/#!$%\^&\*;:{}=\-_~()]/g, "")
/* 213. Replace spaces with underscores */
const spacesToUnderscores = (str) => str.replace(/\s/g, '_')
/* 214. Replace underscores with spaces */
const underscoresToSpaces = (str) => str.replace(/_/g, ' ')
/* 215. Replace spaces with hyphens */
const spacesToHyphens = (str) => str.replace(/\s/g, '-')
/* 216. Replace hyphens with spaces */
const hyphensToSpaces = (str) => str.replace(/-/g, ' ')
/* 217. Unique elements in an array */
const uniqueElements = (arr) => [...new Set(arr)]
/* 218. Convert a string to pascal case */
const toPascalCase = (str) => str.replace(/(\w)(\w*)/g, function(g0,g1,g2){ return g1.toUpperCase() + g2.toLowerCase(); })
/* 219. Swap values in an array */
const swapValues = (arr, idx1, idx2) => ([arr[idx1], arr[idx2]] = [arr[idx2], arr[idx1]], arr)
/* 220. Move an element within an array */
const moveElement = (arr, from, to) => (arr.splice(to, 0, arr.splice(from, 1)[0]), arr)
/* 221. Split a string into an array of words */
const splitIntoWords = (str) => str.split(/\s+/)
/* 222. Merge an array of words into a string */
const mergeWords = (arr) => arr.join(' ')
/* 223. Get a timestamp for a date */
const getTimestamp = (date) => new Date(date).getTime()
/* 224. Format a date as DD/MM/YYYY */
const formatDateDDMMYYYY = (date) => { const d = new Date(date); return `${d.getDate()}/${d.getMonth() + 1}/${d.getFullYear()}`; }
/* 225. Compare two dates */
const compareDates = (date1, date2) => new Date(date1) - new Date(date2)
/* 226. Check if a value is a symbol */
const isSymbol = (val) => typeof val === 'symbol'
/* 227. Create a set from an array */
const arrayToSet = (arr) => new Set(arr)
/* 228. Create an array from a set */
const setToArray = (set) => Array.from(set)
/* 229. Get the first element of a set */
const firstSetElement = (set) => set.values().next().value
/* 230. Get the last element of a set */
const lastSetElement = (set) => [...set].pop()
/* 231. Check if a set contains an element */
const setContains = (set, el) => set.has(el)
/* 232. Get the union of two sets */
const unionSets = (set1, set2) => new Set([...set1, ...set2])
/* 233. Get the intersection of two sets */
const intersectSets = (set1, set2) => new Set([...set1].filter(x => set2.has(x)))
/* 234. Get the difference of two sets */
const differenceSets = (set1, set2) => new Set([...set1].filter(x => !set2.has(x)))
/* 235. Get the symmetric difference of two sets */
const symmetricDifferenceSets = (set1, set2) => new Set([...set1].filter(x => !set2.has(x)).concat([...set2].filter(x => !set1.has(x))))
/* 236. Clear all elements of a set */
const clearSet = (set) => set.clear()
/* 237. Get the length of a set */
const setLength = (set) => set.size
/* 238. Check if a value is an instance of a class */
const isInstance = (val, cls) => val instanceof cls
/* 239. Get the maximum value in a set */
const maxSetValue = (set) => Math.max(...set)
/* 240. Get the minimum value in a set */
const minSetValue = (set) => Math.min(...set)
/* 241. Convert a set to a string */
const setToString = (set) => [...set].join(', ')
/* 242. Check if an array contains duplicate values */
const hasDuplicates = (arr) => new Set(arr).size !== arr.length
/* 243. Find duplicates in an array */
const findDuplicates = (arr) => arr.filter((item, index) => arr.indexOf(item) !== index)
/* 244. Remove duplicates from an array */
const removeDuplicates = (arr) => [...new Set(arr)]
/* 245. Check if an array is a subset of another array */
const isSubset = (arr1, arr2) => arr2.every(val => arr1.includes(val))
/* 246. Get the union of two arrays */
const unionArrays = (arr1, arr2) => [...new Set([...arr1, ...arr2])]
/* 247. Get the intersection of two arrays */
const intersectArrays = (arr1, arr2) => arr1.filter(x => arr2.includes(x))
/* 248. Get the difference of two arrays */
const differenceArrays = (arr1, arr2) => arr1.filter(x => !arr2.includes(x))
/* 249. Get the symmetric difference of two arrays */
const symmetricDifferenceArrays = (arr1, arr2) => arr1.filter(x => !arr2.includes(x)).concat(arr2.filter(x => !arr1.includes(x)))
/* 250. Create a Map from an array of pairs */
const arrayToMap = (arr) => new Map(arr)
/* 251. Create an array of pairs from a Map */
const mapToArray = (map) => Array.from(map.entries())
/* 252. Get the keys of a Map */
const getMapKeys = (map) => Array.from(map.keys())
/* 253. Get the values of a Map */
const getMapValues = (map) => Array.from(map.values())
/* 254. Get the entries of a Map */
const getMapEntries = (map) => Array.from(map.entries())
/* 255. Check if a Map contains a key */
const mapContainsKey = (map, key) => map.has(key)
/* 256. Get the value of a key in a Map */
const getMapValue = (map, key) => map.get(key)
/* 257. Set a key-value pair in a Map */
const setMapValue = (map, key, value) => map.set(key, value)
/* 258. Delete a key-value pair in a Map */
const deleteMapValue = (map, key) => map.delete(key)
/* 259. Clear all key-value pairs in a Map */
const clearMap = (map) => map.clear()
/* 260. Get the size of a Map */
const mapSize = (map) => map.size
/* 261. Merge two Maps */
const mergeMaps = (map1, map2) => new Map([...map1, ...map2])
/* 262. Clone a Map */
const cloneMap = (map) => new Map(map)
/* 263. Filter a Map */
const filterMap = (map, fn) => new Map([...map].filter(fn))
/* 264. Transform a Map into an object */
const mapToObject = (map) => Object.fromEntries(map)
/* 265. Transform an object into a Map */
const objectToMap = (obj) => new Map(Object.entries(obj))
/* 266. Check if two Maps are equal */
const mapsEqual = (map1, map2) => map1.size === map2.size && [...map1.entries()].every(([key, val]) => val === map2.get(key))
/* 267. Reverse the key-value pairs in a Map */
const reverseMap = (map) => new Map([...map].map(([key, val]) => [val, key]))
/* 268. Sort a Map by keys */
const sortMapByKey = (map) => new Map([...map.entries()].sort())
/* 269. Sort a Map by values */
const sortMapByValue = (map) => new Map([...map.entries()].sort((a, b) => a[1] - b[1]))
/* 270. Get a random value from a Map */
const randomMapValue = (map) => { const values = [...map.values()]; return values[Math.floor(Math.random() * values.length)]; }
/* 271. Invert the key-value pairs of an object */
const invertObject = (obj) => Object.fromEntries(Object.entries(obj).map(([key, val]) => [val, key]))
/* 272. Remove null or undefined properties from an object */
const cleanObject = (obj) => Object.fromEntries(Object.entries(obj).filter(([_, v]) => v != null))
/* 273. Get the first key of an object */
const firstObjectKey = (obj) => Object.keys(obj)[0]
/* 274. Get the last key of an object */
const lastObjectKey = (obj) => Object.keys(obj).pop()
/* 275. Deep clone an object */
const deepClone = (obj) => JSON.parse(JSON.stringify(obj))
/* 276. Merge two objects deeply */
const deepMerge = (obj1, obj2) => { const isObject = obj => obj && typeof obj === "object"; return Object.keys(obj2).reduce((acc, key) => { if (Array.isArray(obj1[key]) && Array.isArray(obj2[key])) { acc[key] = obj1[key].concat(...obj2[key]); } else if (isObject(obj1[key]) && isObject(obj2[key])) { acc[key] = deepMerge(obj1[key], obj2[key]); } else { acc[key] = obj2[key]; } return acc; }, { ...obj1 }); }
/* 277. Fill an array with values */
const fillArray = (count, value) => Array(count).fill(value)
/* 278. Check if two objects are deeply equal */
const deepEqual = (a, b) => JSON.stringify(a) === JSON.stringify(b)
/* 279. Find the maximum value in an array of objects */
const maxBy = (arr, key) => arr.reduce((a, b) => (a[key] > b[key] ? a : b))
/* 280. Find the minimum value in an array of objects */
const minBy = (arr, key) => arr.reduce((a, b) => (a[key] < b[key] ? a : b))
/* 281. Randomize the order of elements in an array */
const shuffle = (arr) => arr.sort(() => 0.5 - Math.random())
/* 282. Get a random element from an array */
const randomElement = (arr) => arr[Math.floor(Math.random() * arr.length)]
/* 283. Chunk an array into smaller arrays */
const chunkArray = (arr, size) => { const result = []; while (arr.length) result.push(arr.splice(0, size)); return result; }
/* 284. Flatten a nested array of any depth */
const flattenDeep = (arr) => arr.reduce((a, b) => a.concat(Array.isArray(b) ? flattenDeep(b) : b), [])
/* 285. Compare two strings ignoring case */
const equalsIgnoreCase = (str1, str2) => str1.toLowerCase() === str2.toLowerCase()
/* 286. Zip arrays */
const zip = (...arrays) => Array.from({ length: Math.max(...arrays.map(a => a.length)) }, (_, i) => arrays.map(a => a[i]))
/* 287. Remove falsy values from an array */
const compactArray = (arr) => arr.filter(Boolean)
```
Enjoy
---
### Released "Molly: Memory Game" as a very simple Simon clone (May 27, 2024)
With the help from AI it's now easier than every to build small, useful games. I just talked with my daughter the other day about the game "Simon" which she didn't know. I told her it was a pretty simple game showing four colors which would light up in a sequence. You then have to remember the sequence and each time you will get one more color added to that sequence.
I downloaded four clones from the App Store .. but all of them were either showing an ad after each play or was just too complicated.
So I sad down the same evening and made the basic of a Simon clone .. and called it "[Molly](/molly-memory-game)" instead.
I decided to push it to the App Store on both iPhone and iPad but don't want to push it for free because free on the App Store automatically means lots of 💩 commercials and/or tracking. I don't want that and have nothing of that sort in this game.
[Grab it on the App Store](https://apps.apple.com/app/molly-memory-game/id6503224315) for the cost of a Costco hot dog and soda combo now.
---
### Revived Baby Art on the App Store (May 13, 2024)
After not having updated Baby Art for years, it was removed from the Apple App Store. I initially created this app as a very simple drawing tool for the iPad, designed for my daughter when she was still a baby.
The idea was simple: open the app and the baby can draw with their fingers in various colors and shapes. It automatically changes colors and shapes with each stroke and also randomly plays some baby sounds.
Recently, I decided to revive it. Ten years ago, all the drawing handling had to be done manually. It was a lot of work back then, but with the introduction of PencilKit on iPadOS, it's now incredibly simple. I decided to remove much of my custom code and use PencilKit.
I'm even considering open-sourcing this project too.
Anyway, if you have a baby or toddler, you should definitely check out [Baby Art](/baby-art).
---
### Projects page updated with screenshots (May 08, 2024)
I tried to find some old screenshots of the projects and updated the [projects](/projects) page so it looks a bit better.
I'm considering reviving some of the projects so they can get back running instead of just being the source code you're able to see.
---
### Building a simple Tic-Tac-Toe game (May 02, 2024)
Yesterday, I found myself needing to pass some quality time with my daughter and we decided to play tic-tac-toe. To my surprise, there weren't many options for a *simple* tic-tac-toe game that allowed two people to play remotely by just sharing a link. Sure you have lots of options if you download a game or want to go to a website and tap through 438 ads before playing, but I was looking for a straightforward page where you could click "new game," and then easily invite someone to join by sharing a link.
Seeing this gap, and also wanting to dive back into programming with Ruby on Rails—a framework I hadn't touched in over a decade—I decided to take it upon myself to create just what I needed. I called this new project [Tic-Tac-🦶🏼](/tictactoe), where players can choose fun emojis instead of the traditional X and O symbols.
This project was not just about creating a game; it was also an exploration into the latest real-time communication in Rails. I used this opportunity to experiment with Action Cable, Rails’ integrated feature for WebSockets. It was interesting to see how seamlessly it facilitated real-time updates, a crucial component for a responsive and engaging two-player game.
Through building [Tic-Tac-🦶🏼](/tictactoe), I reacquainted myself with Rails after 10+ years of not really touching it.
---
### Released ConquerRSVP (Apr 29, 2024)
We are thrilled to announce the launch of our latest application, [ConquerRSVP](/conquerrsvp), now available for MacOS users. This innovative application harnesses the power of Rapid Serial Visual Presentation (RSVP) technology to revolutionize the way you read.
### What is RSVP?
RSVP is a cutting-edge reading technique designed to enhance speed and efficiency by presenting one word at a time at a user-controlled pace. This method minimizes eye movement and reduces the time spent on conventional reading, thus allowing for a significantly faster reading experience without sacrificing comprehension.
### Features of ConquerRSVP
ConquerRSVP brings a host of exciting features designed to cater to the avid reader’s needs:
* Single Word Presentation: Experience content one word at a time, allowing for faster absorption and understanding.
* Customizable Speed Settings: Adjust the speed of word presentation to match your personal comfort level and gradually increase it as you become more adept.
* Focused Reading: By reducing peripheral distractions, ConquerRSVP helps you stay more focused on the content.
* Progress Tracking: Keep track of your reading speed and monitor your improvement over time.
### Why choose ConquerRSVP?
Whether you are gearing up for academic challenges, aiming to breeze through numerous business reports, or simply looking to enjoy more books in your leisure time, ConquerRSVP offers the perfect solution. It's not just a reading app; it's a productivity tool that optimizes your reading while keeping it engaging and efficient.
### Get started now
Ready to transform your reading and increase your processing speed? [Download ConquerRSVP today](https://apps.apple.com/app/conquerrsvp/id6499281369?mt=12) from the MacOS App Store and step into a world where reading fast is fun and effortless. Embrace the challenge and become the fast reader you’ve always aspired to be!
Happy fast reading! 😜
---
### Getting back into Rails 7 from Rails 2.3 😱 (Apr 27, 2024)
I've decided to revisit Rails after more than a decade of not using it. I have always loved it and created many applications when I was a Ruby on Rails consultant around 15 years ago.
I have over 25 RoR applications I could try to migrate from an old Rails version to the new one. However, after a couple of quick attempts, I decided it's not worth it because so much has changed, and it's hard to determine the best migration path. Instead, I just set up a clean new Rails 7 app and transferred the content I needed.
I started out with a simple app for my website. It’s a decent, straightforward app with multi-domain routing, a couple of different layouts based on domains, a simple blog system, and not much more than that.
As expected, the setup was rather fast. I had to read up on "Turbo Links" to get the links working and tweak the routing a bit with some alias-naming.
It's also worth noting the introduction of new features like ActionCable, ActiveStorage, and Stimulus in recent Rails versions. These features offer modern web capabilities such as real-time communication and direct upload to cloud storage solutions, which were not conceivable when Rails 2 was current. Incorporating these into a decade-old application can feel like retrofitting a vintage car with modern technology - exciting but complex.
Rails still feels like it “just works,” and that’s so nice. I love that you can get from idea to production in minutes. I experimented with a couple of hosting providers but returned to my trusted RoR provider, Heroku. It still seems to work well, even though they were acquired by Salesforce back in 2010. Who would have thought that?
---
### Don't be shy, make sitelinks fly (Apr 25, 2024)
Ever searched for your favorite brand on Google and noticed those neat little links hanging out beneath the main result? Those are **sitelinks**, and they're basically the VIP section of search results!
### What are sitelinks anyway?
Sitelinks are like your website's greatest hits album. They're those extra links Google (and Bing!) shows under your main search result that point to other pages on your site. Think of them as the search engine saying, "Hey, this site is so awesome, let me show you some shortcuts!"
Here's the kicker: they only appear for results search engines think are trustworthy and useful. No pressure!
### Types of sitelinks (they come in flavors!)
| Type | What it does | Where you'll see it |
|------|-------------|---------------------|
| **Organic sitelinks** | Up to 6 links with descriptions | Top result for branded searches |
| **One-line sitelinks** | Horizontal links (usually 4) | Various search results |
| **Paid sitelinks** | Ad extensions you control | Google Ads campaigns |
### Why should you care?
**Real estate, baby!** Sitelinks make your search result HUGE. It's like upgrading from economy to first class. Plus:
- **More clicks**: people get exactly where they want to go
- **Trust boost**: Google's basically giving you a thumbs up
- **Brand visibility**: show off your best pages upfront
- **Better UX**: users jump straight to the good stuff
Fun fact: Some sites see over 12% of their branded traffic clicking sitelinks instead of the main result!
### How to make sitelinks happen
Bad news: You can't directly control them. Search engine algorithms call the shots.
Good news: You can totally influence them! Here's how:
#### 1. **Structure your site like a library**
Keep things organized and logical. If your navigation is a mess, Google won't know what to promote.
#### 2. **Internal linking is your BFF**
Link to important pages and use descriptive anchor text. Make it clear what each page is about! Bonus points for adding breadcrumb navigation—it helps both users and search engines understand your site hierarchy.
#### 3. **Write killer title tags**
Make them descriptive and concise (50-60 characters). These help search engines understand your pages. And hey, avoid duplicate titles—each page should have its own unique title!
#### 4. **Own your brand name**
Rank #1 for your brand? Sitelinks are way more likely to show up. Simple as that.
#### 5. **Create an XML sitemap**
This is a `sitemap.xml` file that lists all your important pages. Most platforms (WordPress, Shopify) generate this automatically at `yoursite.com/sitemap.xml`. Submit it to Google Search Console and Bing Webmaster Tools so search engines know where to find it!
#### 6. **Add structured data**
Schema markup helps search engines understand your content better. Add Organization schema to your homepage with your business name, logo, and contact info. It's like giving search engines a cheat sheet about your site!
### Don't want a page as a sitelink?
If a page keeps showing up as a sitelink and you don't want it there, you can add a `noindex` tag to remove it from search results entirely. Just be careful—this removes the page from all search results, not just sitelinks!
### The reality check
Here's the honest truth: search engine algorithms decide everything. You can't force sitelinks to appear, and you can't edit them manually (well, not anymore). But following best practices definitely tips the scales in your favor.
Think of it like being a good host at a party. Set everything up nicely, make it easy for guests to find what they need, and let the magic happen naturally.
### Quick win checklist
- [ ] Clean, logical site structure
- [ ] Strategic internal linking
- [ ] Descriptive page titles
- [ ] XML sitemap submitted
- [ ] Schema markup on homepage
- [ ] Ranking well for your brand
- [ ] Important pages are accessible
### Bottom line
Sitelinks are like getting a gold star from search engines. They make your search result stand out, help users find what they need faster, and signal that you've got a solid, trustworthy site.
Can't force them? True. But build a well-structured, user-friendly site with great content, and you'll be well on your way to sitelink stardom!
---
### Just bought a new macbook, what should I install? (Mar 26, 2024)

Congratulations on your new MacBook! And congrats on writing one of the most popular engagement bait tweets in the world. If you're a regular X-, Peerlist- or Reddit user you will see this question a couple of times per day. So many nice people are getting new macs and have a hard time figuring out what to install on this mighty-fine machine .. so here are essential recommendations for what to install, whether you’re setting it up for work, school, or personal use:
#### Must-have applications
- **[Raycast](https://www.raycast.com/)** because you deserve it
- **[Google Chrome](https://www.google.com/chrome/)** because Safari is already installed and you might want an alternative
- **[Bitwarden](https://bitwarden.com/)** because you want to use passwords you cannot remember and 1Password is too expensive
- **iCloud Drive** so you can avoid Dropbox for anything in the world
- **[Obsidian](https://obsidian.md/)** so you can tell your PM that you found something way better than Notion
- **[Spotify](https://open.spotify.com/)** because you like music but Apple Music is crap
These are just starter suggestions. As you use your Mac, you can personalize further based on your daily needs and workflow.
---
### RSVP? It's not just a polite request but it's a reading revolution (Feb 06, 2024)
When most of us see the letters RSVP, our minds instinctively translate it to "Répondez s'il vous plaît," a fancy way of asking us to confirm our attendance at a soirée. But in the world of cognitive neuroscience and advanced reading technologies, RSVP stands for something far more intriguing: Rapid Serial Visual Presentation. It's about turbo-charging our reading speed.
### What is Rapid Serial Visual Presentation (RSVP)?
Rapid Serial Visual Presentation is a digital reading format where words are presented one at a time or in small groups at the same location on a device screen. This technology aims to increase reading speed and efficiency by reducing the need for eye movements called saccades, which are typical when reading text lines traditionally. Thus, RSVP allows for faster text processing because your eyes don't need to move; the words do.
### How does it work?
RSVP's core idea is simplicity itself: keep the eyes fixed and let the text move. In practice, this might look like a stream of words flashing in a single spot at speeds you can adjust according to your comfort and comprehension levels. Various applications and tools employing the RSVP method can significantly vary the words per minute (WPM), often pushing the boundaries of what one might manage with normal reading.
### Benefits of RSVP
The principal advantage of RSVP is the potential increase in reading speed. Studies have shown that with this method, readers can often process information much faster than through traditional reading. This makes it an appealing option for reading large volumes of text in a short amount of time — perfect for students cramming for exams or professionals trying to stay abreast of new information in their fields.
Moreover, RSVP can be a blessing for visually impaired individuals, reducing the physical strain involved in navigating lines of text. You are able to try it out using our [ConquerRSVP](/conquerrsvp) app available for MacOS.
### Not without challenges
RSVP is not without its critics who point out potential drawbacks. The biggest challenge is the lack of contextual understanding and retention when words are flashed rapidly. The eye-brain coordination at high speeds might boost word recognition but at the cost of deep comprehension and memory retention.
### The future of RSVP
As digital reading evolves and more studies delve into cognitive processing, RSVP could see innovative adaptations to balance speed with comprehension. Hybrid models that incorporate aspect of traditional reading, like allowing backtracking or highlighting key information, might make RSVP more versatile and effective.
---
### Simon Says game app: Classic memory fun for iPhone and iPad (Jul 08, 2022)
Simon Says has been a beloved game for generations, captivating players with its simple yet challenging gameplay. In today's digital world, this classic game has found new life in the form of mobile apps, bringing the excitement of Simon Says to our smartphones and tablets.
## The origins of Simon Says
Simon Says originated as a children's game, where one player takes on the role of "Simon" and issues commands to other players. The catch? Players should only follow commands that begin with "Simon says." This game has been a staple of parties, classrooms, and playgrounds for decades, helping children develop listening skills, concentration, and quick reflexes.

## From physical to digital: The evolution of Simon Says
As technology advanced, Simon Says made the leap from a verbal game to an electronic one. In 1978, Milton Bradley released the first electronic version of the game, simply called "Simon." This device featured four colored buttons that would light up in a sequence, challenging players to repeat the pattern correctly.
Fast forward to the smartphone era, and we've seen a surge in simon game apps that bring this classic experience to our fingertips. These simon says game apps offer the same addictive gameplay with added features, convenience, and portability.
## Why Simon Says remains popular in the app world
1. **Cognitive benefits**: Simon Says, whether played traditionally or as a simon memory game app, helps improve memory, concentration, and pattern recognition skills.
2. **All ages appeal**: From children to adults, everyone can enjoy and benefit from playing Simon Says.
3. **Quick play sessions**: Perfect for short breaks or waiting times, simon the game app versions allow for quick, engaging gameplay sessions.
4. **Competitive element**: Many simon says app games include leaderboards and multiplayer modes, adding a competitive edge to the classic game.
5. **Adaptability**: Digital versions can offer various difficulty levels, themes, and game modes to keep players engaged.
## The benefits of playing Simon Says on your mobile device
1. **Portability**: Take the game anywhere, anytime.
2. **No lost pieces**: Unlike physical games, you'll never misplace a crucial component.
3. **Updates and new content**: Enjoy regular updates with new features and challenges.
4. **Progress tracking**: Monitor your improvement over time with built-in statistics.
5. **Multiplayer options**: Play with friends remotely or challenge players worldwide.
## How to get started with Molly: Memory Game
Ready to dive into the world of digital Simon Says? Here's how to get started with Molly: Memory Game:
1. Visit the App Store on your iPhone or iPad.
2. Search for "[Molly: Memory Game](https://apps.apple.com/app/molly-memory-game/id6503224315)" or "simon says app game".
3. Download and install the app.
4. Open the app and choose your preferred game mode.
5. Start playing and challenge yourself to beat your high score!
Remember, regular play can help improve your memory and cognitive skills, so make Molly: Memory Game part of your daily routine for both fun and brain training.

By bringing the classic Simon Says game to the digital age, apps like Molly: Memory Game are ensuring that this beloved pastime continues to entertain and challenge players for generations to come.
---
### The importance of creativity in babies and toddlers through drawing (May 24, 2022)
In the early stages of human development, creativity plays a crucial role in shaping how children perceive and interact with the world. Among various creative activities, drawing stands out as a fundamental practice that greatly benefits babies and toddlers. Here’s why encouraging your little ones to draw is essential for their growth
### Enhancement of motor skills
Drawing helps hone both fine and gross motor skills. As toddlers grasp crayons and scribble on paper, they refine their hand-eye coordination and dexterity. This foundational skill is crucial not only for artistic endeavors but also for daily activities such as writing, buttoning clothing, and more.
### Emotional expression and development
For many young children, drawing is a form of self-expression. It provides a safe outlet for conveying emotions, thoughts, and experiences that they might not yet have the words to articulate. This emotional release can help in developing empathy and understanding as they grow older.
### Cognitive growth
Engaging in drawing stimulates both the right and left hemispheres of the brain. It nurtures critical cognitive skills such as problem-solving, planning, and decision-making. When children decide what to draw and choose colors, shapes, and sizes, they are essentially exercising their brains, promoting cognitive development.
### Creativity and imagination
Drawing sparks creativity and imagination, key components of child development. By encouraging toddlers to draw, you foster a sense of curiosity and exploration. This imaginative play is not only crucial for artistic growth but also for innovative thinking in all areas of life.
### Language skills development
Discussing their drawings with parents or caregivers enhances toddlers' language skills. It encourages them to describe their artwork, tell stories, and ask questions, thereby expanding their vocabulary and improving their communication abilities.
### Building confidence and self-esteem
Each completed drawing is a product of a toddler’s effort and creativity. This sense of accomplishment can significantly boost their confidence and self-esteem. Praising their artwork reinforces positive feedback and encourages them to continue exploring their creative abilities.
### Social skills
Drawing often becomes a shared activity when done in group settings such as playdates or preschool. It encourages toddlers to collaborate, share materials, and discuss their ideas, thereby fostering essential social skills.
Providing a variety of materials, creating a designated drawing space, being supportive and non-critical, and engaging in drawing together can make the activity more enriching and enjoyable. Drawing is more than just a pastime; it is a crucial element in the developmental journey of babies and toddlers. It nurtures their physical, cognitive, and emotional growth, paving the way for a well-rounded individual. Encouraging children to draw helps them develop the skills necessary for a vibrant and dynamic life. Their creativity and imagination will flourish, extending the benefits far beyond the art they create.
If you want to get your child started being creative, we have made an iPhone/iPad app called [Baby Art](/baby-art) you could check out.
---
### Understanding rapid serial visual presentation (RSVP) (Apr 24, 2022)
In our fast-paced digital world, where information overload is common and attention spans are dwindling, innovative methods to manage and process information are essential. One such method is rapid serial visual presentation, or RSVP. This technique has revolutionized how we consume text and offers numerous applications in various fields.
### What is rapid serial visual presentation (RSVP)?
Rapid serial visual presentation (RSVP) is a method of displaying information (typically text) quickly and concisely by presenting words or images in rapid succession at a single location of the visual field, usually at the center of a screen. Instead of reading text from left to right, the words flash one at a time in the same place, allowing for faster reading speeds without the need to move one's eyes.
### The mechanics of RSVP
#### Presentation rate
The speed at which words are presented is measured in words per minute (WPM). Depending on the desired reading speed, the rate can be adjusted, with common speeds ranging from 200 WPM to over 1000 WPM.
#### Focus and comprehension
RSVP leverages the brain's ability to recognize and process information quickly. By focusing on a single point, it minimizes the eye movements that typically slow down reading, known as saccades, thus enabling a more efficient reading process.
#### Segmentation
Text is broken down into small chunks (usually single words or short phrases) to reduce cognitive load and aid in comprehension.
### Applications of RSVP
#### Speed reading tools
RSVP is popular in speed reading applications, helping individuals to read faster while maintaining comprehension. Apps like [ConquerRSVP](/conquerrsvp) and others use this technique to display text in a manner that enhances reading efficiency.
#### Assistive technology
For individuals with visual impairments or reading difficulties like dyslexia, RSVP can provide a more accessible way to consume written content. By controlling the pace and reducing the need for scanning, it can make reading more manageable and less stressful.
#### Media consumption
In the era of information overload, RSVP can be used to quickly review large amounts of text content, such as news articles, emails, and reports. This allows people to stay informed without spending excessive time on each piece of content.
#### Education
RSVP can be an effective tool in educational settings, helping students quickly absorb and retain information from textbooks and study materials.
### Benefits of RSVP
#### Increased reading speed
RSVP can significantly boost reading speeds by eliminating the time spent on eye movements between words.
#### Improved focus
Centralizing the text at a single point reduces distractions, allowing for better concentration.
#### Enhanced comprehension
By controlling the flow of information, RSVP helps maintain a consistent rate of reading, which can improve understanding and retention of the material.
### Challenges and considerations
#### Cognitive load
Despite its benefits, rapid presentation without breaks can increase cognitive load, potentially leading to fatigue and reduced comprehension for longer texts.
#### Loss of context
Skipping through words too quickly can sometimes result in missing context or nuance, especially in complex or detailed information.
RSVP represents a powerful tool that transforms reading and information processing. By understanding its mechanics and benefits, individuals and organizations can leverage RSVP in various domains to enhance efficiency and accessibility. Whether you're a speed reader, someone using assistive technology, or just looking to better manage your information intake, RSVP offers a promising solution to the challenges of modern reading.
Make sure to try out my [ConquerRSVP](/conquerrsvp) reader if you want to try out rapid serial visual presentation reading for yourself.
---
### Prefer ObsoletedUser over NewUser for breaking changes (Nov 13, 2021)
> *When updating a variable or type, it is a better practice to rename the old one to `ObsoletedX` and keep the active one as `X`. This approach enhances clarity, simplifies transitions and refactoring, minimizes errors, and improves overall code readability and maintainability. Adopting this naming convention is a small but powerful step towards writing cleaner, more maintainable code.*
In the ever-evolving landscape of software development, updates and refactoring are routine. However, the manner in which these updates are implemented can significantly impact code maintainability and readability. A common scenario developers face is updating a variable or type, such as transitioning from an old user model to a new one. The intuitive approach might be to introduce a `NewUser` type while keeping the old one as `User`. However, a more effective strategy is to rename the old type to `ObsoletedUser` and retain the active one as `User`.
### 1. Clarity and intention
Renaming the old type to `ObsoletedUser` and keeping the new one as `User` immediately communicates the state and purpose of each type. It clarifies that `ObsoletedUser` is deprecated and should not be used in new code, while `User` is the current, active type. This naming convention reduces ambiguity and helps developers understand the codebase more quickly.
### 2. Ease of transition
When a new developer joins the team or when someone revisits the code after a long period, having a clear distinction between deprecated and active types simplifies the onboarding process. They can easily identify which type to use without second-guessing or digging through documentation. This practice minimizes the cognitive overhead associated with understanding the codebase.
### 3. Refactoring simplicity
Refactoring code to replace an old type with a new one can be a daunting task, especially in large codebases. By keeping the active type as `User` and marking the old one as `ObsoletedUser`, you streamline the refactoring process. Developers can methodically replace instances of `ObsoletedUser` without worrying about inadvertently affecting the new type.
### 4. Minimizing errors
Introducing a `NewUser` type while keeping the old one as `User` can lead to confusion and potential errors. Developers might mistakenly use `User` when they intend to use `NewUser` or vice versa. This naming convention can lead to bugs and inconsistencies in the code. By clearly delineating the deprecated type, you reduce the risk of such errors.
### 5. Code readability and maintenance
Good code is not just about functionality; it’s also about readability and maintainability. Clear and intentional naming conventions contribute significantly to these aspects. When the active type remains as `User`, and the deprecated type is renamed to `ObsoletedUser`, the codebase remains clean and intuitive. Future maintenance becomes more manageable, and the overall quality of the code improves.
Let's consider a simple TypeScript example.
```typescript
interface User {
id: number;
name: string;
email: string;
}
function getUserInfo(user: User): string {
return User: ${user.name}, Email: ${user.email};
}
const user: User = { id: 1, name: "Alice", email: "alice@example.com" };
console.log(getUserInfo(user));
```
Instead of introducing a NewUser type, we rename the old type to ObsoletedUser and keep the active one as User.
```typescript
interface ObsoletedUser {
id: number;
name: string;
email: string;
}
interface User {
id: number;
fullName: string;
emailAddress: string;
}
function getUserInfo(user: User): string {
return User: ${user.fullName}, Email: ${user.emailAddress};
}
const newUser: User = { id: 1, fullName: "Alice Johnson", emailAddress: "alice.johnson@example.com" };
console.log(getUserInfo(newUser));
function getObsoletedUserInfo(user: ObsoletedUser): string {
return User: ${user.name}, Email: ${user.email};
}
const oldUser: ObsoletedUser = { id: 2, name: "Bob", email: "bob@example.com" };
console.log(getObsoletedUserInfo(oldUser));
```
---
### Kids playing Simon: Fun and brain-boosting benefits (Jun 21, 2021)
In the age of smartphones and digital distractions, finding activities that engage children in a fun yet educational way can be challenging. Enter Simon, an electronic game that has stood the test of time since its introduction in 1978. With its simple yet captivating design, Simon continues to be a beloved game among children. But beyond the fun and excitement, playing Simon offers several cognitive benefits for young minds.
### How Simon works
Simon is deceptively simple. The game features four colored buttons, each producing a distinct sound. The device lights up the buttons in a particular sequence, beginning with one light and gradually increasing in complexity as the game progresses. Players must accurately repeat the sequence by pressing the buttons in the same order. Any mistake ends the game.
### Why Simon is more than just a game
While Simon might seem like a basic memory game, it delivers substantial brain-boosting benefits that contribute to a child’s overall cognitive development.
#### 1. Enhances memory skills
At its core, Simon is a game of memory. By requiring players to recall and replicate increasingly complex sequences, it effectively exercises short-term memory. Over time, children become adept at remembering longer sequences, which translates to enhanced recall abilities in other areas of learning.
#### 2. Improves concentration and attention
To excel at Simon, children must maintain a high level of concentration. The game's increasing pace and complexity demand sustained focus, helping kids practice and improve their attention spans. This enhancement in concentration can positively influence their performance in school and other activities that require prolonged attention.
#### 3. Develops sequential thinking
Simon helps children learn how to think in sequences, a cognitive skill essential for problem-solving and logical reasoning. This skill is fundamental in subjects like mathematics and computer programming, where understanding the order of operations is crucial.
#### 4. Promotes hand-eye coordination
Pressing the correct buttons in response to visual and auditory cues enhances hand-eye coordination. This motor skill development is vital for everyday tasks and can also improve performance in sports and other physical activities.
### The joy of learning through play
One of the most significant advantages of games like Simon is that they provide educational benefits disguised as entertainment. Children are often more willing to engage in activities that are fun and rewarding. Playing Simon can be a delightful break from traditional learning methods, offering a playful approach to brain training.
### Encouraging healthy competition
Simon can also introduce children to the concept of healthy competition. Kids can challenge themselves to beat their previous scores or compete with friends and family members. This friendly competition can teach valuable lessons in perseverance, goal-setting, and resilience—all essential traits for personal growth.
### Bringing families together
Another fantastic aspect of Simon is its ability to bring families together. Parents and children can enjoy the game together, sparking moments of joy and bonding. It’s a wonderful way to spend quality time while engaging in a shared activity that nurtures cognitive development.
In a world where screen time often translates to passive consumption, Simon stands out as a classic game that actively engages children’s minds. It is more than just a memory game; it is a tool for cognitive enhancement, teaching valuable skills such as memory, concentration, sequential thinking, and hand-eye coordination. By incorporating Simon into playtime, parents can offer their children a fun, educational experience that benefits their brains while keeping them entertained. So, let the games begin—it's time for some brain-boosting fun with Simon!
Try our iPhone/iPad version called [Molly: Memory Game](/molly-memory-game) if you want to try it out.
---
### The story of Simon, the original memory game (Jun 18, 2021)
## The original Simon
Inventor Ralph Baer is best known for creating the first video game system, but his contributions extend much further. In 1975, Baer started an independent consulting business and began working with Marvin Glass & Associates in Chicago, a toy design firm responsible for some of the most successful American toys of the 20th century. Baer's role was to develop electronic toys and games, and the most famous outcome of this collaboration was Simon.
### Inspiration strikes
Named after the children's game "Simon Says," Simon was inspired by an Atari arcade game called Follow-Me. Baer and Howard Morrison, a partner at Marvin Glass, first encountered Follow-Me at a trade show in 1976. They agreed that while the execution of the arcade game was flawed, its core idea—challenging players to repeat a musical sequence created by the machine—had great potential. They set out to create a hand-held game based on this concept.
### Crafting the game
Like Follow-Me, Simon featured four colored buttons, each playing a unique note. Players had to replicate an increasingly complex sequence of tones generated by Simon. A single mistake would end the game. Baer recognized that selecting the right tones was crucial. He and Morrison believed that one of Follow-Me's key shortcomings was its unpleasant sounds.
Baer found the solution in his children's Compton Encyclopedia. He discovered that a bugle could only play four notes, making them ideal for Simon. These bugle notes ensured that any sequence produced by the game was not only challenging but also pleasing to the ear.
### Simon's launch and legacy
Simon was released by Milton-Bradley in 1978 with significant fanfare, including a midnight release party at Studio 54, the elite New York City disco. The game was an instant success, peaking during the 1980s and continuing to sell for decades.
Simon remains a beloved memory game that has stood the test of time, remarkable for its simplicity and engaging challenge. Whether you played it decades ago or are discovering it anew, Simon continues to captivate players with its timeless fun. If you want to try a simple online version of this classic game, check out [Molly: Memory Game](/molly-memory-game).
---
### 8 benefits of playing tic tac toe with preschoolers (May 19, 2021)
Tic tac toe is a simple yet fun game that can be a great way to teach preschoolers many valuable skills. Here are 8 benefits of playing tic tac toe with preschoolers:
1. Enhances Problem-Solving Skills
Playing tic tac toe requires children to think critically and use problem-solving skills to strategize and win the game.
2. Encourages Teamwork and Cooperation
Tic tac toe can be played with a partner, which can encourage teamwork and cooperation among children.
3. Enhances Fine Motor Skills
Tic tac toe requires children to use fine motor skills to place their pieces on the board.
4. Enhances Language Development
Tic tac toe can be used to teach children new words and concepts, such as numbers, counting, and basic math.
5. Enhances Memory and Recall
Playing tic tac toe can help children to improve their memory and recall skills, as they need to remember the positions of the pieces on the board.
6. Enhances Attention and Focus
Playing tic tac toe requires children to pay attention to the game, which can help to improve their attention and focus skills.
7. Promotes Self-Esteem
Tic tac toe can be used as a reward or positive reinforcement to help children build self-esteem and feel good about their accomplishments.
8. Encourages Creativity and Self-Expression
Children can play with different variations of tic tac toe and make their own board, allowing them to express their creativity and try new strategies.
Playing tic tac toe with preschoolers can be a fun and engaging way to help them develop many valuable skills, such as problem-solving, teamwork and cooperation, fine motor skills, language development, memory, attention, focus, self-esteem, and creativity. If you are looking for a simple Tic Tac Toe game using emojis, try our version at [Tic-Tac-🦶🏼](/tictactoe) - enjoy!
---
### Why "Click Here" Links Suck (Jan 21, 2021)
Using “Click here,” “More,” or “Read More” as link text is a common but misguided practice. These phrases don’t provide meaningful context for screen readers, speech recognition users, or anyone scanning links out of context. Instead, opt for descriptive text that stands on its own. Below are a few guidelines:
1. Make Link Text Descriptive
The link’s purpose should be clear even without surrounding content. For example:
```
Click here to learn about our company.
Learn about our company.
Learn about our company.
```
2. Avoid Generic Phrases
Duplicated link text like “Read More” can be confusing. Use unique, concise phrases for each link.
3. Keep It Short, But Clear
It’s okay to use a sentence as link text if needed, but avoid overly long phrases or entire paragraphs.
4. Use Full URLs Sparingly
When linking to a URL directly (e.g., http://example.com), consider how it impacts voice-control and screen reader users.
5. Fallback Options
If you can’t convey meaning in the link alone, add context in surrounding text or use a title attribute, but recognize that’s a last resort.
Following these guidelines boosts both accessibility and user experience, making your content clearer and more inclusive.
---
### A modern take on journaling (Nov 24, 2020)
A diary is a sanctuary for your daily routines, thoughts, feelings, or experiences. Traditionally, it's organized chronologically, capturing life's moments as they happen. While some cherish the privacy of their secret diaries, others find joy in sharing their personal stories with the world. The most famous diary, "The Diary of Anne Frank," transcended its private nature to become an iconic literary work.
### The evolution from diary to blog
The internet revolutionized journaling, transforming private thoughts into public blogs. Today, many people prefer recording their lives on vlogs—video diaries that blend visual storytelling with personal narratives.
### Why keep a diary?
Here are a few reasons why maintaining a diary can be beneficial:
- **Preserve private thoughts:** A diary is a personal space where you can express yourself freely.
- **Chronicle events:** Track significant events and milestones in your life.
- **Unfold narratives:** Use your diary to weave intriguing tales that document your experiences.
Regular diary-keeping sharpens your creativity and enhances your thought processes, providing a therapeutic outlet and helping you stay organized.
### The rise of online diaries
Writing online diaries brings a new dimension to journaling:
- **Creative freedom:** Online platforms offer tools to enhance your entries with multimedia.
- **Publishing opportunities:** Many platforms help you share your work with a broader audience, potentially turning you into a published author.
### Why choose an online personal diary?
An online diary is a versatile tool. Accessible from any device, it allows you to:
- **Log experiences anywhere:** With mobile apps, you can write whenever inspiration strikes, without needing paper or pen.
- **Set and track goals:** Online diaries often include features for habit and goal tracking.
- **Enhance privacy:** With robust security measures, online journals keep your entries safe.
- **Earn rewards:** Many platforms incentivize consistency and creativity with badges and rewards.
- **Leverage multimedia:** Enrich your entries with photos, videos, and audio clips.
### Detailed benefits of online diaries
1. **Enhanced privacy** - Paper journals are vulnerable to prying eyes. Online diaries, however, offer double password security and military-grade encryption, ensuring your entries are protected in the "Diary Vault."
2. **Write anywhere** - Mobile integration allows you to document your thoughts on the go, using apps available for iPhone, iPad, Android phones, and tablets.
3. **Goal and habit tracking** - Top online diaries let you monitor and achieve your personal goals. You can visualize your progress, make adjustments, and stay motivated.
4. **Path to authorship** - Many online platforms provide pathways to publish your diary. Share your stories on social media and reach a wider audience.
5. **Earn rewards** - To keep journaling fun and engaging, some platforms offer rewards for regular writing. These incentives help maintain consistency and improve your writing skills.
6. **Multimedia integration** - Take advantage of your devices' capabilities by adding photos, videos, and links to your entries. This enriches your diary, making it not just a written record but a multimedia scrapbook of your life's journey.
### The power of journaling
Regular diary-keeping is a powerful tool for personal growth. It helps you:
- **Reflect** Look back on past experiences and learn from them.
- **Organize** Keep track of your experiences, thoughts, and goals.
- **Heal** Writing about your feelings can be therapeutic, helping you process both joyous and challenging moments.
Maintaining an online diary can be a rewarding practice, blending traditional journaling with modern technology. Whether you're logging daily reflections, dieting progress, or dreams, an online diary offers a versatile and engaging way to document your life’s journey.
If you would like to dive into the world of journaling, I suggest you to try our [OhDiary](https://www.ohdiary.com) app. It is a secure, free online diary app which has been running since since 2005.
---
### What is an Online Diary? (Nov 11, 2020)
### History
Online diaries have been around since at least 1994, starting a new way for people to share their thoughts and experiences. At first, these diaries were called online journals and created communities of people sharing their daily lives. Over time, the term 'blog' became the common name for these journals. 'Weblog' was the original term, later shortened to 'blog.'
### Evolution
As technology advanced, private and secure online diaries emerged. These digital diaries replaced traditional notebooks hidden under pillows, allowing users to safely and securely store their personal thoughts online.
### Why keep an online diary?
Keeping an online diary can be a great experience for people in general .. and a great benefit for people already keeping an offline (i.e. in a physical book) diary. Here are some reasons and actions to get started:
1. *Track Personal Growth*: Write about your daily experiences and feelings to see how you change over time. Spend 10 minutes each evening writing about your day.
2. *Be Creative*: Use your diary to write creatively. Try different writing styles, poetry, or short stories. Share your creative journey with others.
3. *Set and Achieve Goals*: Use your diary to set personal goals and track your progress. Whether it’s fitness, learning a new skill, or career goals, writing about it can help you stay motivated.
4. *Boost Mental Health*: Writing can be therapeutic. Expressing emotions in a diary can help manage stress and anxiety. Start each entry with things you’re grateful for to stay positive.
5. *Build a Community*: Share parts of your diary publicly to connect with others. This can lead to supportive friendships. Join online writing challenges or groups to find like-minded people.
6. *Save Memories*: Your online diary can be a digital time capsule. Add photos, videos, and other media to make your entries richer.
7. *Learn and Improve*: Track what you’re learning and areas you want to improve. Reviewing your entries can help you understand yourself better.
### How to Get Started
1. *Choose a Platform*: Pick a platform that fits your privacy needs and writing style. Options include private apps like [OhDiary](https://www.ohdiary.com/), Day One and Penzu or public sites like WordPress and Medium.
2. *Create a Routine*: Write consistently. Find a time that works best for you, whether it’s in the morning, during lunch, or before bed.
3. *Start Simple*: Don’t overthink it. Begin with short entries, even just a few sentences or bullet points about your day. Your writing will naturally grow as you get more comfortable.
4. *Personalize Your Diary*: Customize your diary with themes and layouts that you like. Enjoying the look of your diary can motivate you to write regularly.
5. *Join a Community*: Engage with other online diarists. Comment on their entries and participate in discussions. The support from a community can keep you motivated.
Keeping an online diary is more than a hobby; it’s a way to discover yourself and grow. Start today and see where your thoughts take you!
---
### Understanding RSS: What it is and why it's useful (Jun 19, 2020)
In the vast digital world where information flows at an overwhelming pace, staying updated with your favorite websites, blogs, and news sources can be a daunting task. This is where RSS comes into the picture. In this blog post, we will explore what RSS is, how it works, and why it remains a valuable tool for managing online content consumption.
## What is RSS?
RSS stands for **Really Simple Syndication** or **Rich Site Summary**. It is a web feed format used to distribute frequently updated information, such as blog entries, news headlines, audio, and video content. An RSS feed enables publishers to syndicate data automatically, allowing users to keep track of multiple sources in one place.
### How does RSS work?
1. **RSS Feeds**:
- Websites create a special XML file that contains a summary of content (such as a news article or a blog post) along with metadata like publication date and author.
2. **RSS Readers**:
- Users subscribe to these feeds using an RSS reader or aggregator. These are tools or applications designed to collect and organize RSS feeds from various sources.
3. **Fetching Updates**:
- The RSS reader periodically checks the subscribed feeds for new content and retrieves updates automatically.
4. **Display**:
- The retrieved content is then displayed in the reader's interface, where users can easily browse through and engage with the updates.
## Why is RSS useful?
### 1. Centralized content management
RSS allows you to aggregate content from multiple websites into a single, easy-to-read format. Instead of visiting each site individually, you can view all updates in one place, saving time and effort.
### 2. Stay updated effortlessly
With RSS, you won't miss any updates from your favorite websites. The feed delivers newly published content directly to your reader, so you’re always in the loop without having to manually check sites.
### 3. No algorithm interference
Unlike social media platforms where algorithms dictate what you see, RSS feeds show you everything from the sources you've chosen to follow. There's no risk of missing out on important posts due to manipulated visibility.
### 4. Reduced clutter
By using an RSS reader, you can avoid the distractions and ads that often clutter websites. This streamlined consumption allows for a focused and efficient reading experience.
### 5. Offline access
Many RSS readers allow you to download articles for offline reading. This is particularly useful for individuals who need to access content in areas with limited internet connectivity.
### 6. Customization and control
RSS feeds offer a high level of customization. You can choose exactly which sites to follow, how often to check for updates, and how much of each article you want to see in your feed.
## How to get started with RSS
### Step 1: Choose an RSS reader
There are numerous RSS readers available, both web-based and standalone applications. Some popular options include:
- **Feedly**: A robust web-based reader with advanced features and a clean interface.
- **Inoreader**: Offers powerful filtering and organization tools.
- **The Old Reader**: Focuses on simplicity and ease of use, reminiscent of the original Google Reader.
- **RSS Owl**: A desktop application that is ideal for those who prefer software over web apps.
### Step 2: Subscribe to feeds
Visit your favorite websites and look for RSS icons or feed links, typically represented by a small orange square. Copy the feed URL and add it to your RSS reader.
### Step 3: Organize and customize
Group similar feeds into folders, set update intervals, and customize the display settings to suit your reading habits.
In an era dominated by social media and information overload, RSS remains a powerful tool for managing and consuming online content efficiently. By aggregating updates from your favorite websites into a single interface, RSS ensures that you stay informed without the noise and distractions of other platforms. Whether you are a news junkie, a blog enthusiast, or just someone looking to streamline your information intake, RSS is an invaluable resource worth exploring.
If you haven't yet tried using RSS feeds, now is the perfect time to start. Happy reading!
---
### Basecamp theme for Redmine (Sep 16, 2019)
In case you would like a theme similar to 37signals' **Basecamp**, you can use this patched stylesheet.
1. Download [`application.css`](http://github.com/theill/redmine-basecamp-theme/raw/master/stylesheets/application.css).
2. Create the required directories:
```
mkdir -p redmine/public/themes/basecamp/stylesheets
```
3. Copy the downloaded file into the directory:
```
cp application.css redmine/public/themes/basecamp/stylesheets
```
Now restart your Redmine instance and select the new `basecamp` theme from Redmine's Settings page (located at `/settings`).
You are welcome to send patches on GitHub:
Enjoy!
---
### Tip: Include email in notification message when sending confirmation mails (May 30, 2014)
If you are a web developer and needs to handle user registration the you probably are sending out confirmation emails to users to ensure they've entered a valid email.
Lots of web sites (and apps) are showing a message saying "We've send you a confirmation mail. Please check your mailbox".
Tip of the day is this - make sure to include the actual email in that notification message. In case a user actually entered a wrong email he will notice immediately and doesn't need to refresh his email box to see if the mail is coming through. A simple "Hey, we've send off a confirmation mail to john@doe.com now. Please check your mailbox in a minute" is enough.
I'll add this tip to an upcoming article about UI tips & tricks for apps and web sites.
---
### Tweak AppCode font aliasing on your mac (Oct 27, 2013)
If you can't use your beloved Monaco font in AppCode because it has gained weight and simply looks too bold, you might want to trim your anti-aliasing settings.
Try running this in your terminal
$ defaults write com.jetbrains.AppCode.plist AppleFontSmoothing -int 1
You might tweak it even more by using different values for `-int 1` e.g. 0, 2 or 3. I'm not changing the system wide font smoothing setting, but only the one for AppCode.
---
### Immediately flush IIS log for real time tail to avoid 60 second buffer delay (Aug 15, 2013)
I wanted to tail my IIS log in realtime to avoid having to wait 60 seconds as is the default on IIS 7. I found out that I could run the command
> netsh http flush logbuffer
This is great but I wanted to do a tail so this short script does the trick for you (I assume you have cygwin installed if you're on Windows)
Run command every second in the background and flush output (the "Ok." message)
$ while true; do netsh http flush logbuffer > /dev/null; sleep 1; done &
Then you're able to do your regular tail
$ tail -100f u_ex130814.log
and have it update in real time.
---
### How to slice a PSD for use with iPhone & iPad (Dec 16, 2012)
If you are designer doing iOS interfaces and want to help your developer, these guidelines are for you.
0. Slice both a regular and Retina version.
* Retina files are postfixed with "@2x.png" (for "two times") e.g. "account.png" vs "account@2x.png"
* Retina files must be placed in same folder as its non-retina brother
* Retina dimensions must be dividable with 2 e.g. 25x13 is not a valid retina dimension but 26x14 is fine
* All files should be of type PNG (24bit if necessary)
* Background files might be in JPG too (saves on file size)
* Use transparency if needed - _no_ background color
* All files must be lower-cased
* All files must _not_ include any spaces
* Separate filenames with dashes if necessary e.g. "black-box.png"
* Group files in folders if needed e.g. "icons/account.png", "backgrounds/washed.png"
* Keep folder structure after delivery to developer and update files in that structure if needed
* Animations must be postfixed with a number e.g. "anim_0.png", "anim_1.png", "anim2.png", etc. (retina would be "anim_0@2x.png", "anim_1@2x.png", etc)
* Inform developer of any special masking necessary
* Slice each image with zero margin/padding i.e. keep to size of image
An additional tip for Mac users. Download [Slicy](http://macrabbit.com/slicy/) from macrabbit. It's an incredible cool tool which slices your PSDs automatically based on your layer naming.
Let me know in the comments if you have more suggestions I need to put on the list.
---
### Resolving DNS issues on my ThinkPad running Windows 8 (Sep 08, 2012)
I just installed Windows 8 but had a hard time figuring out why not all sites were available. I quickly found out the DNS lookup failed.
Since I had to uninstall my ThinkVantage WIFI manager before installing Windows 8 I assumed it could have something to do with an invalid configuration.
I had to reset my TCP/IP stack before I got it to work which is done using
C:\> netsh int ip reset reset.log
followed by
C:\> netsh winsock reset catalog
It should do the trick -- you might have to restart your computer.
---
### A quick Rails guide for designers (May 28, 2012)
I almost always work with great designers when building Ruby on Rails web applications. These designers are capable of doing amazing HTML and CSS and are already able to navigate a RoR directory structure or able to do so after a quick intro. I'm not focusing on this basic structure convention in this guide but instead I will be taking designers a step further and actually enable them to add a little bit of functionality to views i.e. enabling them to control some logic in `*.erb.html` files located in `/app/views` folder. Your designer need to be running your Rails app locally but that should be pretty common for agile teams.
To clarify, this guide is only useful for your designers working closely with you on a Ruby on Rails project. It's supposed to be a pragmatic quick read telling your WHAT but not necessarily WHY. Here you still have to bug your developer.
I will go through these
* differencies between `<% ` and `<%=` tags
* differencies between a `"double quoted string"` and a `'single quoted string'`
* using `cycle` tag
* using `dom_id` tag
* using `link_to` tag and understanding `rake routes`
Ok, let's go...
### differencies between `<% ` and `<%=` tags
Most developers tell designers to avoid touching anything between `<%` and `%>` tags. This is an obsolete mindset not fitting into a team with highly skilled members.
Code such as `<% if @rides.any? %>` does *not* output anything but code such as `<%= @ride.title %>` will.
### differencies between a `"double quoted string"` and a `'single quoted string'`
A code block like `<%= "Picture of #{@car.name}" %>` might output `Picture of Porsche` but a block like `<%= 'Picture of #{@car.name}' %>` will simply output `Picture of #{@car.name}`.
What's to notice is that dynamic code in `#{}` is expanded within a `"double quoted string"` but not within a `'single quoted string'`.
### using `cycle` tag
Occasionally you are probably creating tables looking like
Denmark
England
Sweden
The example above cycles through rows setting a class of either `dark` or `light`. It is possible to hook this up using something like this
<% ["Denmark", "England", "Sweden"].each do |name| %>
<% end %>
<%= name %>
You already know the `<%= %>` syntax which tells you to output _something_. Line 3 loops through all countries and on line 4 we are using the `cycle` method which will output `dark` on first row, `light` on second, `dark` on third, etc.
### using `dom_id` tag
When building AJAX interfaces it is very common to need a unique ID for each element such as when printing a list of comments
First comment
Second comment
If your developer needs to add comments dynamically it will probably be hooked up using `dom_id` with code such as
<% @comments.each do |comment| %>
<%= comment.content %>
<% end %>
The `dom_id` simply takes an iterated object and output a string useful as an element ID.
### using `link_to` tag and understanding `rake routes`
Instead of creating standard HTML such as `Log in` you are actually able to hook it up pretty easily by running `rake routes` in your Terminal. This will give you a list of available URLs such as
new_user_session GET /users/sign_in(.:format) {:controller=>"sessions", :action=>"new"}
user_session POST /users/sign_in(.:format) {:controller=>"sessions", :action=>"create"}
destroy_user_session GET /users/sign_out(.:format) {:controller=>"sessions", :action=>"destroy"}
Look at this and then take first part of a line matching your URL e.g. `new_user_session` and append it with `_path` then hook it up using `<%= link_to 'Log in', new_user_session_path %>`. It will generate the exact same output but if a developer afterwards thinks a URL for signing in should be `/users/login` he won't have to go into each view to change it.
I am hoping this short guide will help your designers to bind just a little bit more logic into your views.
---
### Restore full backup of Redmine from Google Storage (May 28, 2012)
Restore database from dump file
```
# required settings
DB_USERNAME=''
DB_PASSWORD=''
DB_NAME=''
REDMINE_ROOT='' # e.g. /home/peter/rails/redmine.commanigy.com'
BACKUP_ROOT='' # e.g. /home/peter/backups (will be created)
RESTORE_FROM='' # e.g. '20110201' for February 1, 2011
$ mysql -u $DB_USERNAME --password=$DB_PASSWORD $DB_NAME < $BACKUP_ROOT/redmine/db/$RESTORE_FROM
```
---
### A bash version of keep_releases known from Capistrano ruby scripts (Mar 31, 2012)
Today I needed a clean up feature in my bash script similar to what's known from Capistrano when using the "keep_releases" argument.
I wasn't able to find a simple version so I created it myself. Maybe others find it useful too so here goes
releases_path=/data/sites/yoursite.com/releases # change this
keep_releases=5
versions=`ls -xt $releases_path`
releases=(${versions// / })
# check available number of versions in releases directory
releases_count=${#releases[@]}
if [ $releases_count -le $keep_releases ]
then
echo 'no old releases to clean up'
else
echo keeping $keep_releases of $releases_count deployed releases
releases=(${releases[@]:0:0} ${releases[@]:($keep_releases)})
for release in "${releases[@]}"
do
path=$releases_path$release
`rm -rf $path`
done
fi
I've created a [github gist](https://gist.github.com/2266412) too. Feel free to modify it if you have a better solution.
---
### Finding Apache configuration file (httpd.conf) location (Jun 08, 2011)
Just a quick tip for programmers working with Apache. Sometimes I'm asked where to find the Apache configuration file on a given server. Since it's possible to configure this there is no "default location" so I usually do:
$ ps -ef | grep apache
which gives me a list like
deploy@cmd01:/$ ps -ef | grep apache
root 4053 1 0 06:26 ? 00:00:04 /usr/sbin/apache2 -k start
www 5189 4053 0 11:00 ? 00:00:00 /usr/sbin/apache2 -k start
www 5199 4053 0 11:00 ? 00:00:00 /usr/sbin/apache2 -k start
...
Then simply run
$ /usr/sbin/apache2 -V
and you will get the details you need, specifically this
Server compiled with....
-D SERVER_CONFIG_FILE="/etc/apache2/apache2.conf"
That's it. Are you using another/faster approach? Let me know.
---
### How to hide icon in your dock for any Mac application (Apr 30, 2011)
Just got a beta of a Mac notifier for Podio and didn't like it showed both an icon in my menubar and my dock (sometimes also referred to as the taskbar). If you want to avoid having any Mac application shown in your dock, it's possible to patch its package by doing these simple steps
* Open Finder and browse to your application
* Right-click the file and select "Show Package Content"
* Browse to "Contents" and open "Info.plist"
If you find an element called "Application is agent (UIElement)" you can mark its checkbox. If it does not exist you should add it by clicking "Add Item", enter "LSUIElement" and mark the checkbox.
Now save your Info.plist file and restart the application.
Done. The dock icon is now hidden.
Just a warning .. this might not work for all applications e.g. if the application contains a menu that will only show the application is focused. So if you can't access a window for that application through its menubar icon you are out of luck.
---
### Use sensible defaults when building a web, mobile or desktop application (Apr 25, 2011)
While working on migrating "gomore.dk", a Danish ridesharing service, to Rails 3, I figured it would make sense to look into the existing database to figure out if I could add some sensible defaults when creating e.g. new rides. The site already contains a decent database so I figured it would be rather easy to measure which defaults to use.
As an initial example, I would like to know how many seats were shared on each trip and therefore I did a simple query as shown below:
From this, it is pretty obvious that I should use "3" as a default number of seats available. In this case, some common sense would probably give you the same result (four seats in a standard car minus one for the driver).
Same type of query can be used to figure out the most popular seat price:
It is even possible to *remove* options if you look into providing sensible defaults for your users. As in this case where the existing gomore.dk contains a checkbox for specifying if car is "smoking" or "non smoking" area. A query showed me
i.e. we really don't need to have users decide on this .. more than 95% of all rides are non-smoking rides so the rest should either write it in a comment field or edit the ride afterwards to mark is specifically as "smoking". So in this case we just removed an option from our wizard to avoid clutter. Lovely.
The examples above should go for all defaults .. also stuff your marketing department would like to decide e.g. when a user creates an account and have to uncheck instead of check a "Subscribe to our daily, fancy, not-to-miss newsletter" box. Focus on pleasing your users by pre-selecting choices they probably *are* going to make themselves ... follow the "don't make me think" principle! It makes users happy and allow them to complete a task faster.
Using sensible defaults goes for any type of application you are creating being for web, mobile or desktop.
---
### An error occurred while validating. HRESULT = '8001010E' (Feb 11, 2011)
Just a quick tip. While upgrading one of my projects from VS.NET 2008 to VS.NET 2010 I ran into a problem I wasn't able to find a correct solution for it anywhere.
While building my setup projects I got:
An error occurred while validating. HRESULT = '8001010E'
Various posts suggested to remove all dependencies but in my case it was caused by an invalid reference to the framework. This is what I did to have it compile again:
* Right-click .vdproj
* Select "View" | "Launch Conditions"
* Right-click ".NET Framework"
* Select "Properties Window"
* Expand "Version" dropdown
* Select correct framework e.g. if it is currently set to "3.5.1234" you might select a similar in the dropdown list i.e. ".NET Framework 3.5".
Maybe it might help you as well.
---
### Universal builds for Mac App Store with Xcode (Feb 03, 2011)
While working on [Wallpapery](https://www.wallpaperyapp.com/ "Hand-picked designer desktops"), I had to do a universal build for both 32- and 64-bit. I expected I should simply set "Architectures" to "Standard (32/64-bit Universal)" but after approval in Mac App Store and user complaints I found out, I had missed a couple of steps.
To build your product for both 32- and 64-bit architectures (aka i386 and x86\_64) you have to explicitly unmark "Build Active Architecture Only" and filter list of "Valid Architectures" to *only* list "i386 x86_64"

I wasn't aware of that so maybe others find this useful.
---
### How to get display name from NSScreen (Jan 14, 2011)
While working on [Wallpapery](https://www.wallpaperyapp.com/) I needed to get a given screens display name. There is no "displayName" method on NSScreen so I added a category to provide this functionality. Seems like others are looking for this too so I'm posting my code below.
#### NSScreen+DisplayName.h
#import
@interface NSScreen (DisplayName)
- (NSString *)displayName;
@end
#### NSScreen+DisplayName.m
#import
#import "NSScreen+DisplayName.h"
@implementation NSScreen (DisplayName)
- (NSString *)displayName {
NSString *screenName = nil;
io_service_t framebuffer = CGDisplayIOServicePort([[[self deviceDescription] objectForKey:@"NSScreenNumber"] unsignedIntValue]);
NSDictionary *deviceInfo = (NSDictionary *)IODisplayCreateInfoDictionary(framebuffer, kIODisplayOnlyPreferredName);
NSDictionary *localizedNames = [deviceInfo objectForKey:[NSString stringWithUTF8String:kDisplayProductName]];
if ([localizedNames count] > 0) {
screenName = [[localizedNames objectForKey:[[localizedNames allKeys] objectAtIndex:0]] retain];
}
else {
screenName = @"Unknown";
}
[deviceInfo release];
return [screenName autorelease];
}
@end
You need to include the IOKit framework in your project.
Enjoy.
---
### How to send mass text messages from your own number (Jan 06, 2011)
A couple of months ago we needed to make a service which would be able to send out sms text messages to a large number of people. The text message itself should come from a specific number so recipients would be able to reply back for more information.
Another requirement was the ability to send a text message to a specific number and then trigger the mass sending to the configured recipients.
The part sending out bulk sms is easy. A lot of companies have great, simple APIs to do this but they do not allow for incoming sms without paying a considerable up-front amount (easily $2k). We would like to avoid paying this and thought of solutions and found one using Twitter. Basically it should be possible to send a tweet (via SMS, which is possible) and have this tweet delivered to all your configured recipients.
We built [ShoutSMS](https://www.commanigy.com/shoutsms) for this purpose but have currently disabled the Twitter integration since it was based on Basic Authentication which is going to be discontinued today. Instead we need to update our code to use OAuth and we plan to update this shortly.
The ShoutSMS service is very simple but very cheap as well. You sign up, confirm your number and import your list of phone numbers. Then you're ready to go. Since we temporarily disabled the Twitter integration it's possible to send messages directly from the site as well. Since we confirmed your number we are able to send out messages on your behalf so all messages will come from your confirmed phone number.

If this sounds interesting and maybe something your company could use for mass marketing, you should head over to the [ShoutSMS web site](https://www.commanigy.com/shoutsms) and create an account. You will get a couple of free sms to check out the features.
---
### Send your weight from an iPhone through SMS (Jan 06, 2011)
While working on lifestyleapps I have been asked a couple of times, if it would be possible to report your weight by sending an SMS from your phone. This is already possible and I have been using it from my iPhone 3G for a long time.
The trick is to associate your Twitter account to your lifestyleapps account and set up your Twitter to accept SMS. In order to report your weight you need to follow [@reporting](http://twitter.com/reporting) which is the lifestyleapps Twitter account and by following this (and it will follow you back) it's possible to send a direct message to avoid everyone having to see your weight.
This is the screen to associate your Twitter account in lifestyleapps

In order to send your weight you simply enter
d reporting weight 82.4
This will report your weight as "82.4" kg and insert it for todays date. You might shorten the message to
d reporting w 82.4
Lifestyleapps will check messages sent to @reporting each minute and see if an associated lifestyleapps account exists for that Twitter handle. If that's the case, the weight entry is inserted into your lifestyleapps account.
If you are on an iPhone you might be interested in [Twpie](https://www.commanigy.com/twpie) which is an upcoming application allowing you to send similar tweets fast. It does this by storing recently sent tweets and order these by usage count and last updated date.
---
### UIModalPresentationFormSheet width and height for an iPad in landscape mode (Nov 18, 2010)
In a recent application I was doing, I was designing an interface to be shown as a modal form sheet using setModalPresentationStyle:UIModalPresentationFormSheet. I searched the Apple documentation to find the exact dimensions of this sheet but it isn't documented.
It only states "The width and height of the presented view are smaller than those of the screen and the view is centered on the screen. If the device is in a landscape orientation and the keyboard is visible, the position of the view is adjusted upward so that the view remains visible. All uncovered areas are dimmed to prevent the user from interacting with them."
AuthenticationViewController *authentication = [[AuthenticationViewController alloc]
initWithNibName:@"AuthenticationViewController"
bundle:nil];
[authentication setDelegate:self];
[authentication setModalPresentationStyle:UIModalPresentationFormSheet];
[self presentModalViewController:authentication animated:NO];
[authentication release];
If others are looking for the same information, I can tell its dimension in landscape mode is 540x620. I got this by looking at `[view frame].size`.
---
### How to backup Redmine on Google Storage (Oct 27, 2010)
If you would like to backup your Redmine database and files, you might to consider Google Storage as your backup location. It comes with a 100 GB free monthly usage.
First, you need to [sign up](http://code.google.com/apis/storage/) for a Google Storage account if you don't have an account already.
Once done, download and install [GSUtil](http://code.google.com/apis/storage/docs/gsutil.html) which is a command line tool, allowing you to manage buckets.
Paste the following script into a file called "backup_redmine.sh"
# required settings
DB_USERNAME=''
DB_PASSWORD=''
DB_NAME=''
REDMINE_ROOT='' # e.g. /home/peter/rails/redmine.commanigy.com'
BACKUP_ROOT='' # e.g. /home/peter/backups (will be created)
# optional settings
GS_ROOT='gs://redmine-backup'
GS_FILENAME='backup_'`date +%Y%m%d`'.tar.gz'
echo 'Setting up directories'
mkdir $BACKUP_ROOT/redmine/db -p
mkdir $BACKUP_ROOT/redmine/files -p
echo 'Backing up database'
/usr/bin/mysqldump -u $DB_USERNAME --password=$DB_PASSWORD $DB_NAME | gzip > $BACKUP_ROOT/redmine/db/`date +%Y%m%d`.gz
echo 'Backing up attachments'
rsync -a $REDMINE_ROOT/files/ $BACKUP_ROOT/redmine/files/
echo 'Packing into single archive'
tar -czPf $GS_FILENAME $BACKUP_ROOT/redmine/
echo 'Creating bucket on Google Storage (if not already created)'
gsutil mb $GS_ROOT
echo 'Copying backup archive to Google Storage'
gsutil cp $GS_FILENAME $GS_ROOT
echo 'Cleanup by removing archive'
rm $GS_FILENAME
echo 'Backup complete'
***
You might want to apply execute rights to your script using
chmod +x backup_redmine.sh
And maybe even add it to your crontab to get daily backups
crontab -e
Then add this line
@daily FULL_PATH_TO_SCRIPT > /dev/null
That's it.
Let me know if you improve this script.
---
### Using vi for your simple, day-to-day editing needs (Sep 02, 2010)
My favorite editor isn't `vi`, but I'm still using it at least a couple of times each day. It's a short two character command, it's always available and it starts fast.
I have used it for decades and still, I only know these commands. I really don't need to learn any others, contrary what some of my friends tell me.
### Need to know
j = move down
k = move up
l = move right
h = move left
i = go into "insert" mode
: = go into "command-line" mode
ESC = go out of current mode
x = delete character
wq! = save file and quit (when in command mode)
q! = quit (when in command mode)
### Good to know
{number}G = goto line
yy = copy line
dd = delete line
p = paste line below
P = paste line above
r = replace character
A = go into "insert" mode and append to end-of-line
/ = go into "search" mode
That's it .. you might want to check out variants of these commands e.g. "5dd" to delete five lines, "4yy" to copy four lines.
If you need a list of all commands, look up the index help page in the vim (you are probably using `vim` and not `vi`) documentation using:
` : help index`
---
### Lesson learned: Put limits on anything you provide for free (Aug 25, 2010)
With our [ShoutSMS](/shoutsms) service, we provide three free sms credits just for signing up. We do this to allow new users to try our service, without having to buy initial credits, just after they sign up.
After initial launch, we almost immediately got people from India hitting our servers. They signed up, confirmed their number and tried to send overtaxed sms to various numbers. Because I had chosen an initial credit limit and a max cost limit on each sms, it was avoided. I know from my previous work at ZYB, that unlimited sms and unlimited cost/sms is not something you want to offer.
ShoutSMS does tracking of all sms messages sent to prevent fraud. Users are currently not able to see this statistic themselves, but we are working on adding this ability in a future update. This will allow users to track how many messages were delivered and to which country.
Think mass sms marketing is something your company could benefit from using? [Sign up](/shoutsms) for an account now and try it out for free.
---
### Marketing tip: Include link to your app in newsletters (Aug 18, 2010)
I have registered on a lot of sites and opt-in for their newsletter to be notified of updates.
One thing bugging me is, when a site sends a great mail in their newsletter but doesn't include a direct link to their web site. The mail is coming from their domain so it isn't hard to guess but _users are lazy_!
Since I'm registered on too many sites to visit regularly, I probably do want to visit a site, if it contains exiting updates but I have to admit, that without a direct link, I might not go for a visit but just archive that mail instead. It's a pity so I'm suggesting this template for all your newsletter posts.
Hi Peter [name of user, if known],
We have just updated our site with a cool new feature, allowing you
to Y while doing Z. It's amazing and magical. Boom. Read more about
this on our blog? [link to blog post, if available]
Visit us at thecoolapp.com [link to your site]
Kind regards,
[personal name or team code name]
--
This mail was sent to john@doe.com [email] because you signed up
for thecoolapp.com [link to site]. Unsubscribe immediately, if you do
not wish to receive more updates from us [link to unsubscribe link].
These basic elements should be in any marketing mail you send. If you are using any tracking tool, such as CampaignMonitor, you will notice a lot of people actually clicking your main web site link.
---
### Upgraded ShoutSMS from Rails 2.3.8 to Rails 3 in five minutes (Aug 16, 2010)
Today I wanted to try how easy it would be to upgrade our existing [ShoutSMS](https://www.commanigy.com/shoutsms) (pretty small) Rails application from 2.3.8 to latest Rails 3 release candidate (currently rc3). Without taking our test suite into consideration it took around five minutes with help from the official rails_upgrade[1] plugin. This is fast, yes, but considering the size of this app and possible pitfalls I am not looking forward to upgrade our larger projects.
These are the basic steps to perform
* Install [rails_upgrade](http://github.com/rails/rails\_upgrade) in my 2.3.8 project using "./script/plugin install http://github.com/rails/rails\_upgrade"
* Run rake tasks installed with plugin to check what steps are required with `rake rails:upgrade:check`
* Run `rake rails:upgrade:backup` to backup some files which will be override shortly
* Run `rake rails:upgrade:configuration >> upgrade_configuration`
* Run `rake rails:upgrade:gems >> upgrade_gems`
* Run `rake rails:upgrade:routes >> upgrade_routes`
* Create new Rails 3 app above your existing one with `rails n .`
* Check each of your files before overriding - not all are backed up with the backup task
* Copy back in your changes and refer to the three "upgrade\_*" files for updated configuration, gems and routes syntax
This did most of the work for me. I needed to patch a bit in my new "application.rb" file (e.g. replace RAILS\_ROOT with Rails.root, RAILS\_ENV with Rails.env, etc).
Notice, the rails\_upgrade plugin might suggest to change "`<% @object.each do |p| %>`" blocks to "`<%= @object.each do |p| %>`" but I don't see this should be done.
I needed to upgrade ActiveMerchant but it was a simple
$ gem update activemerchant
and then patch my Gemfile with correct version
gem 'activemerchant', '1.7.1', :require => 'active_merchant'
It was also needed to go through each ERb and update block helpers. Rake task "rake rails:upgrade:check" can be used multiple times to check if you're near the end.
I had a couple of "f.error\_messages" warnings as well. It's suggested to install "rails plugin install git://github.com/rails/dynamic\_form.git" but I made a partial instead to have complete control over my displayed error messages.
For more general upgrade tips & tricks you might consider viewing [part 1](http://railscasts.com/episodes/225-upgrading-to-rails-3-part-1), [part 2](http://railscasts.com/episodes/226-upgrading-to-rails-3-part-2) and [part 3](http://railscasts.com/episodes/227-upgrading-to-rails-3-part-3) of the "Upgrading to Rails 3" Railscasts series.
---
### Facebook CSS for will_paginate gem (Aug 16, 2010)
Today I needed to add pagination to our Danish beta application for handling your accounting called [Hurtigmoms](#) (defunct). Since we're developing in Rails it was a logically choice to use "will_paginate" to support pagination.
Our prototype layout is using a Facebook header and so I wanted my pagination control to mimick their style. If you need something similar you might want to take a look at my CSS styles which are using the default class names used by will_paginate.
.pagination {
font-size: 11px;
float: right;
margin: 0;
padding: 3px 0 4px;
}
.pagination a,
.pagination span {
padding: 3px 3px 2px;
}
.pagination .disabled {
background:none repeat scroll 0 0 transparent;
border:medium none;
color:#999999;
cursor:default;
}
.pagination a {
color:#3B5998;
cursor:pointer;
text-decoration:none;
}
.pagination a:hover {
background-color:#3B5998;
border-bottom:1px solid #3B5998;
border-color:#D8DFEA #D8DFEA #3B5998;
color:#FFFFFF;
text-decoration:none;
}
.pagination .current {}
.pagination .current {
border-bottom:2px solid #3B5998;
border-color:#3B5998;
color:#3B5998;
font-weight:bold;
padding-left:2px;
padding-right:2px;
}
.pagination .current a:hover {
background-color:#3B5998;
color:#FFFFFF;
}
.pagination .prev_page {
}
.pagination .next_page {
}
Just copy and paste it into your application css file and you're done.
This is how it looks:
---
### Tracking coffee intake with touchatag and Lifestyleapps (Apr 03, 2009)
I have bought a touchatag RFID reader and a couple of touchatag RFID tags and was wondering how I could use these to track my daily intake in lifestyleapps.
I noticed a Twitter application already has been developed which post a message from a configured account. Since lifestyleapps already integrate with Twitter it was a simple matter of associating a direct message and prefixing it with “h” or “having” to let lifestyleapps know you are reporting an intake.
Many cups of coffee are consumed on a daily basis by me and I thought I would make tracking this easier for myself by configuring a touchatag with a Twitter message of “d reporting having Coffee, instant, prepared with water”. This means “d” for direct message, “reporting” for the Twitter user receiving our message (used by lifestyleapps), “having” to tell lifestyleapps you are reporting an intake and “Coffee, instant, prepared with water” to make lifestyleapps look up this specific intake and figuring out its nutrition values.
Now whenever I drink a cup of coffee I just need to place my coffee mug on a touchatag reader and it will automatically trigger a Twitter message which will be read by lifestyleapps. And this can by done using no code at all.
This is a pretty sweet thing and I’m planning to put a couple of tags on my breakfast food items since I almost eat the same breakfast every morning. It would be nice to be able to just put a bottle of milk, a bag of bread and a jar of jam on my reader to track my breakfast within lifestyleapps.
If you don’t know about lifestyleapps you are welcome to sign up for a free account at [lifestyleapps](#) [update - this is now defunct].
---
### Today, we have taken over development of ConquerCam (Mar 19, 2009)
Today, we have taken over development of ConquerCam. ConquerCam is a low-priced (less than twenty bucks) webcam software package for Windows having quite a few cool features such as built-in web server, motion detection and scheduled uploads via FTP.

ConquerCam was initially developed by me back in 1998 and at that time it was surely one of the very best in its category. Lacking time I stopped active development in 2003 but didn’t really give up on it since I continued to get feedback. ConquerCam is still being downloaded by 100+ users a day so I know it is still popular though it is now behind some of its competitors.
That will change now! ConquerCam will be developed professionally starting April 1th and that will generate some faster release-cycles in the future. This is great news for ConquerCam and its user-base out there.
For more information please visit our [ConquerCam page](/conquercam)
---
### Upgrading Rails Engines Project to Rails 2.3.2 (Mar 16, 2009)
Our [lifestyleapps](#) project (still in very early beta) was running Rails 2.2.2 with the Rails Engines plugin ten minutes ago. Today, Rails 2.3.2 was released so I decided to try if I could easily upgrade it and avoid using the Rails Engines plugin anymore. It was beautiful simple and took me less than ten minutes.
First, I had to update our Apache Passenger module with a version supporting Rails 2.3 so I did a
$ gem update passenger
and then run the install to build our apache module
$ passenger-install-apache2-module
In my config/environment.rb I changed
RAILS_GEM_VERSION = '2.2.2' unless defined? RAILS_GEM_VERSION
to
RAILS_GEM_VERSION = '2.3.2' unless defined? RAILS_GEM_VERSION
and asked Rails to update my various script files by issuing
$ rake rails:update
Finally I remembered the application.rb should be named application_controller.rb now so I issued an explicit task for this as well
$ rake rails:update:application_controller
In the Rails Engines plugin you need to have the “routes.rb” file in the root of your plugin but with Rails 2.3.2 you should have it in the ‘config’ folder under your plugin and its content should be wrapped in “ActionController::Routing::Routes.draw do |map|” as the root routes.rb. So I changed this from
/vendor/plugins/life_intake/routes.rb
to
/vendor/plugins/life_intake/config/routes.rb
The contents of this routes.rb was changed from
map.resources :foods
to
ActionController::Routing::Routes.draw do |map|
map.resources :foods
end
Finally I had to update the root “routes.rb” to avoid using the “from_plugin” call e.g. I simply removed lines such as
map.from_plugin :life_intake
Now I don’t need the Rails Engines plugin anymore so I removed it with
$ ./script/plugin remove engines
That’s it .. I was now able to run my tests and start up my project and have it run on Rails 2.3.2.
Enjoy!
---
### Extend your shell toolbox with pbcopy (Mar 12, 2009)
We are developing Rails applications on Mac OSX and a command which isn’t used enough in my opinion is “pbcopy”. This command will allow you to grab the standard input from a terminal and put it on the clipboard.
I find myself using commands such as `pwd | pbcopy` all the time. This will grab my current working directory and make it available in my clipboard allowing me to easily paste it into another terminal or application. This avoids the need for you to grab your mouse to paste a simple line.
Just a quick tip for developers switching between terminal and desktop applications on a regular basis.
---
### Our blog is live (Mar 08, 2009)
You’ve found our blog “Command through simplicity”. This blog will post behind-the-scenes information about applications released by [Commanigy](https://www.commanigy.com).
We have moved our beta applications [Lifestyleapps](/lifestyleapps) and [Observer](/observer) to new and faster servers. These applications are almost updated daily so keep an eye on this blog or our [Twitter account](https://x.com/commanigy).
---